


Published on:2021-03-11
Configure an NFS Storage Class on an Existing KubeSphere Cluster and Create a PersistentVolumeClaim


In my last article, I talked about how to use KubeKey to create a Kubernetes and KubeSphere cluster together with NFS storage. In fact, KubeSphere provides you with great flexibility as you can use KubeKey to install NFS storage when you create a cluster while it can also be deployed separately on an existing cluster.
KubeSphere features a highly interactive dashboard where virtually all the operations can be performed on it. In this article, I am going to demonstrate show to configure an NFS storage class on your existing KubeSphere cluster and create a PVC using the storage class.
Before You Begin
-
You have set up a Kubernetes cluster with KubeSphere installed. Here is my cluster information for your reference:
# kubectl get node -o wide NAME STATUS ROLES AGE VERSION INTERNAL-IP EXTERNAL-IP OS-IMAGE KERNEL-VERSION CONTAINER-RUNTIME client Ready master,worker 17m v1.17.9 192.168.0.3 <none> Ubuntu 16.04.4 LTS 4.4.0-116-generic docker://20.10.5 -
You have an available NFS server which provides an exported directory for external storage services. For more information, see my previous article.
Configure the Client Machine
This is basically the same as what I did last time as we need to make sure all of our client machines can use essential NFS client libraries and utilities.
-
Run the following command to make sure you are using the latest package.
sudo apt-get update -
Install
nfs-commonon all the clients.sudo apt-get install nfs-commonNote
For CentOS-based Linux distributions,nfs-utilsneeds to be installed. -
To make sure you can use NFS storage, you need to install its corresponding volume plugin. As Helm is installed together with KubeSphere by default, I will install NFS-client Provisioner by Helm charts including its storage class. Run the following command to add a repository first:
helm repo add stable https://charts.kubesphere.io/mainNote
-
As NFS itself does not have an internal provisioner, I will be using NFS-client Provisioner for dynamic provisioning of volumes.
-
kubectlis integrated into the console of KubeSphere. You can run commands with it from Toolbox in the bottom right corner of the KubeSphere dashboard.
-
-
Intall NFS-client Provisioner.
helm install stable/nfs-client-provisioner --set nfs.server=192.168.0.2 --set nfs.path=/mnt/demoNote
- Replace the server IP address and the exported directory with your own in the above command.
- For Helm 3, you must specify the flag
--generate-name. - For more information about configurable parameters, see this table.
-
Log in to the KubeSphere console with the default account and password (
admin/P@88w0rd) and go to Storage Classes on the Cluster Management page. You can see that the NFS storage class has been added.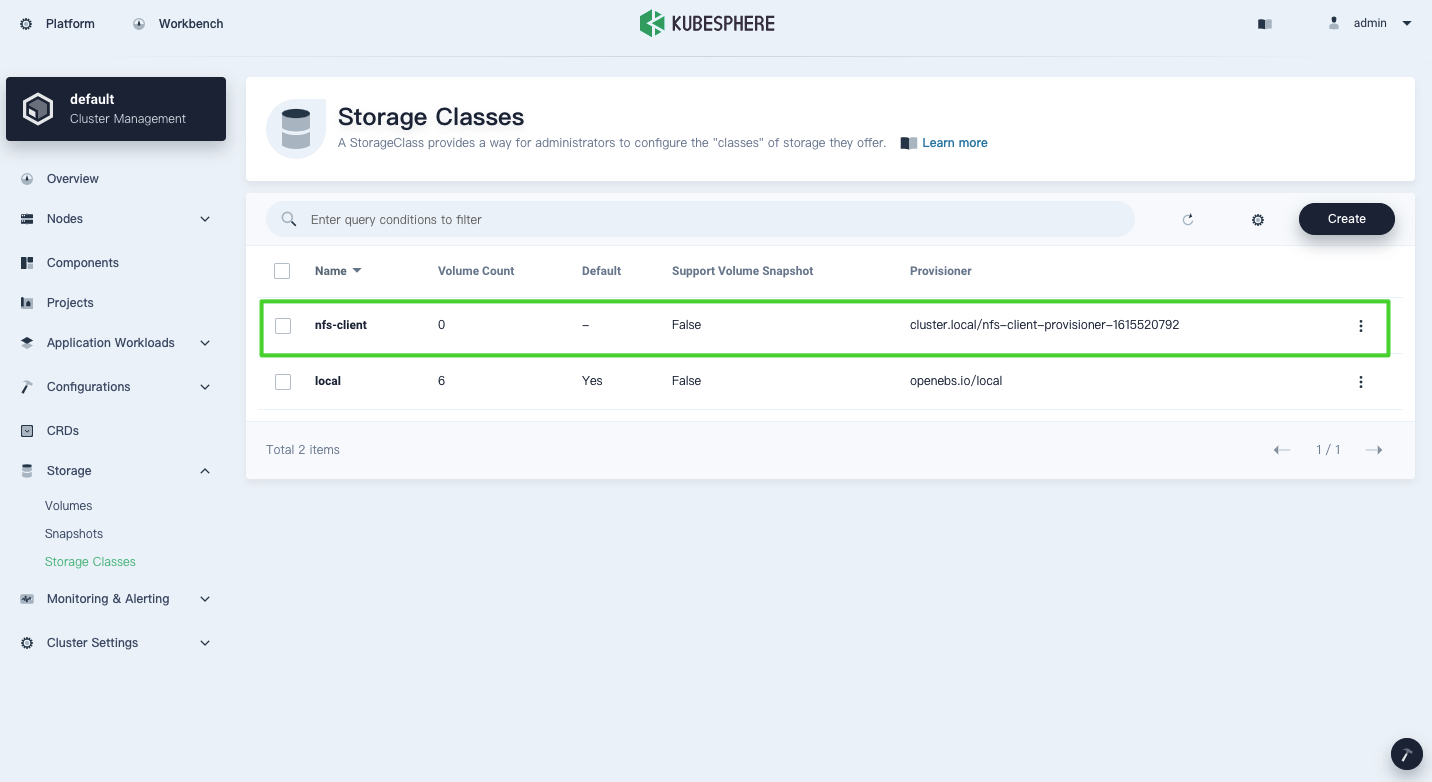
Create a PVC and Mount a Volume to a Workload
To mount a volume to your workload, you need to create a PersistentVolumeClaim (PVC) first. If your storage class supports dynamic provisioning, KubeSphere will automatically bind the PVC created to a PersistentVolume (PV) that satisfies the request you set for the PVC, such as access mode and capacity. You can then mount it to your workload to provide storage services.
-
In KubeSphere, you have different projects (i.e. namespaces) where workloads are running. Go to a project, navigate to the Volumes page, and click Create.
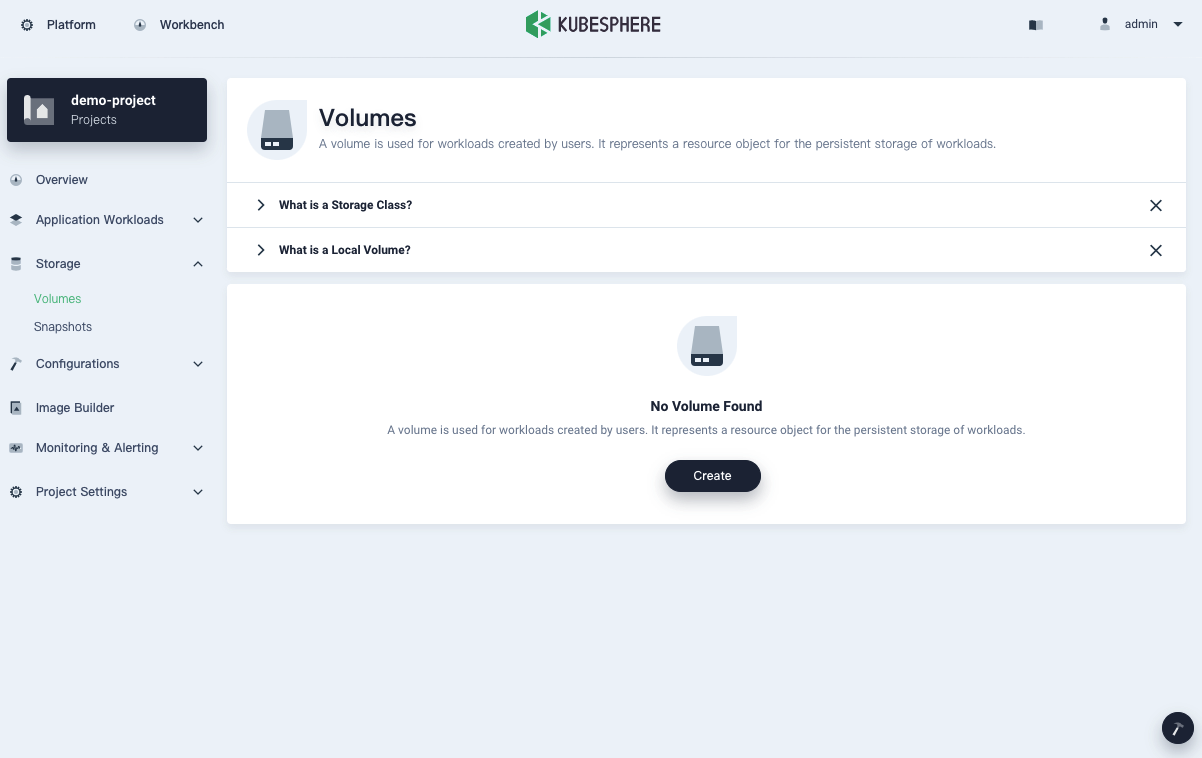
Note
- All objects created on this page are essentially PVCs.
- This article is not focused on the multi-tenant system of KubeSphere which features different levels for tenant isolation. For more information about KubeSphere workspaces and projects, see this article.
-
Click Create and set a name and necessary parameters for the PVC. You can select
nfs-clientas the storage class as shown below: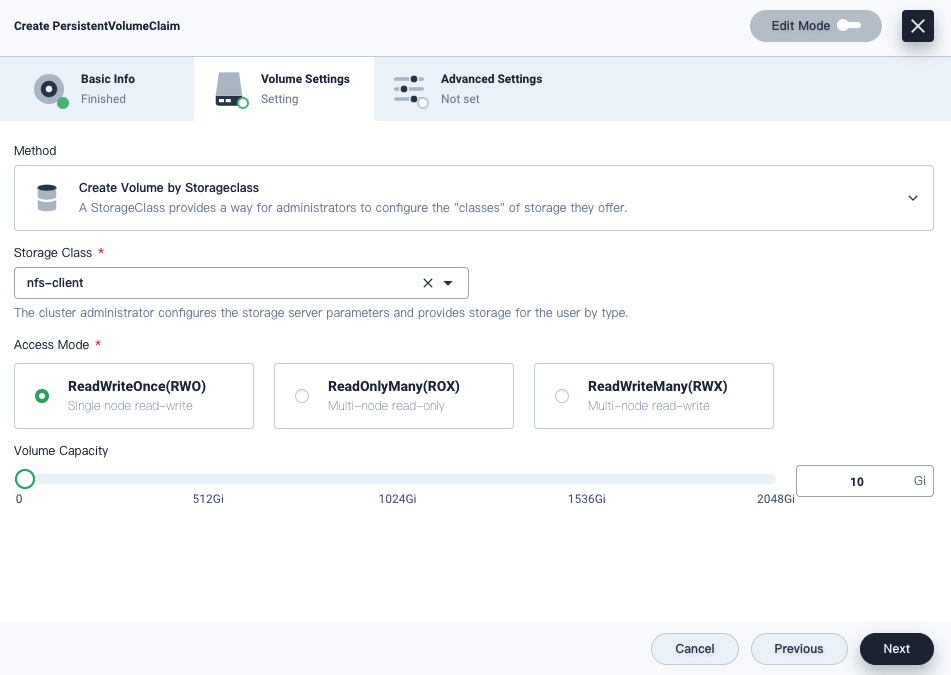
Note
In fact, you can also create a volume by using a volume snapshot while your storage class must support this feature. For more information, see Volume Snapshots. -
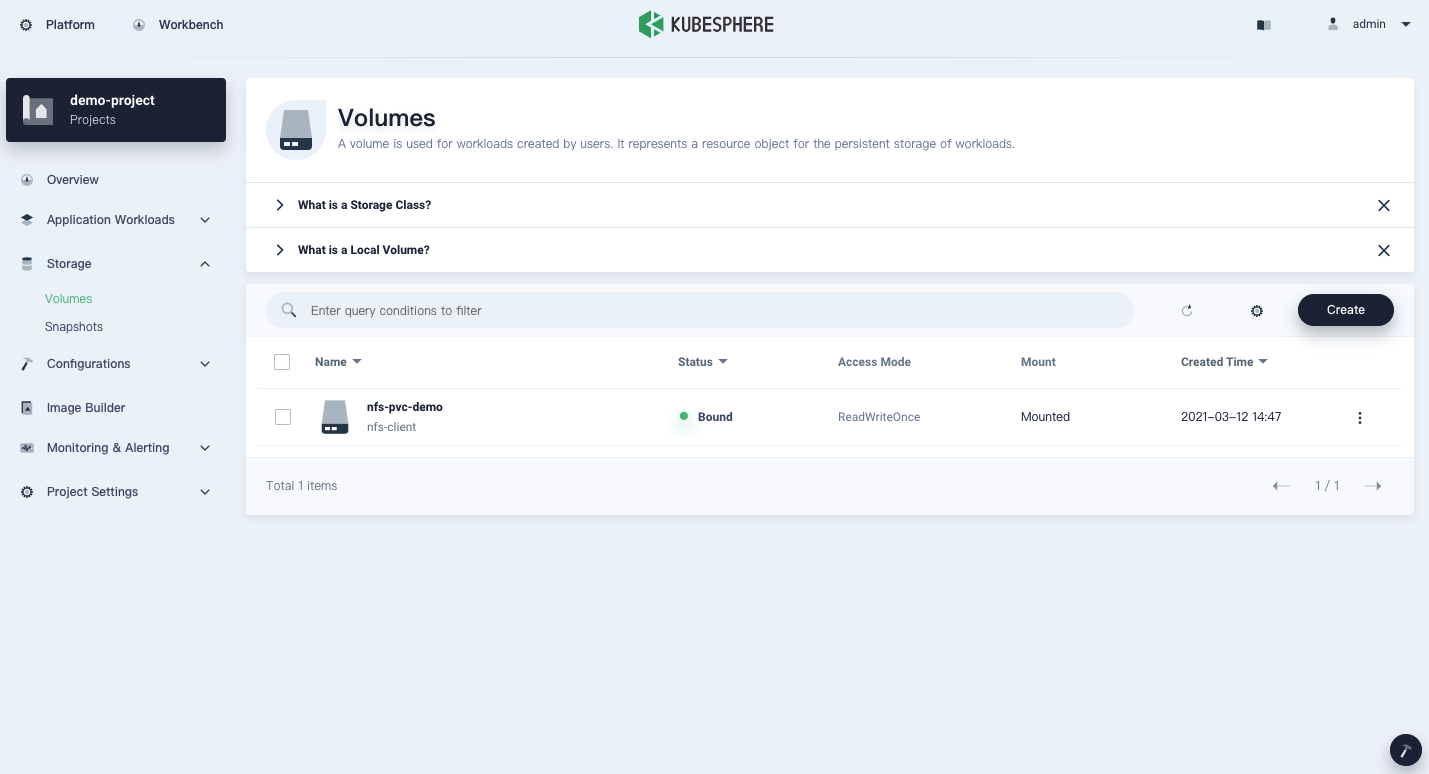
The PVC is bound now.

-
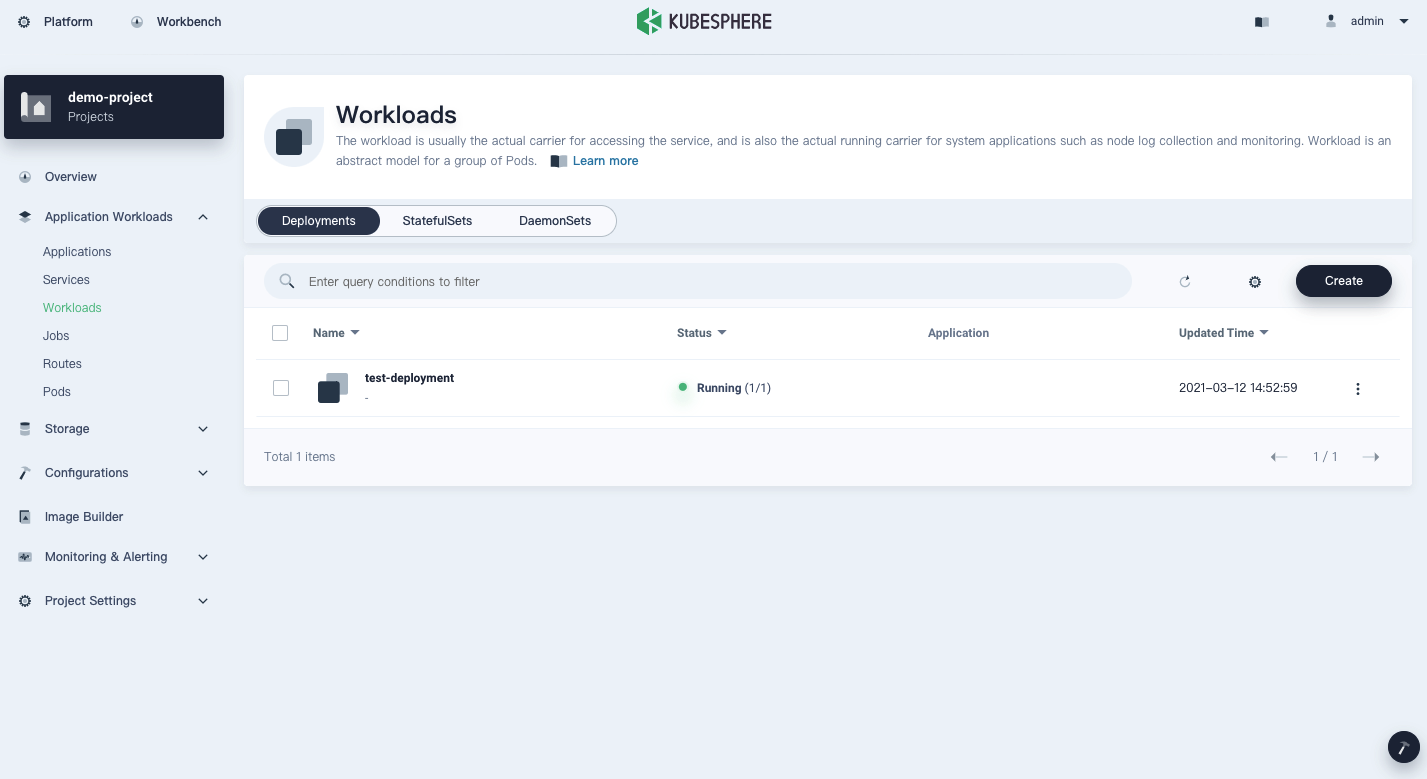
Go to Application Workloads and create a Deployment from Workloads. Here I am using NGINX as an example.
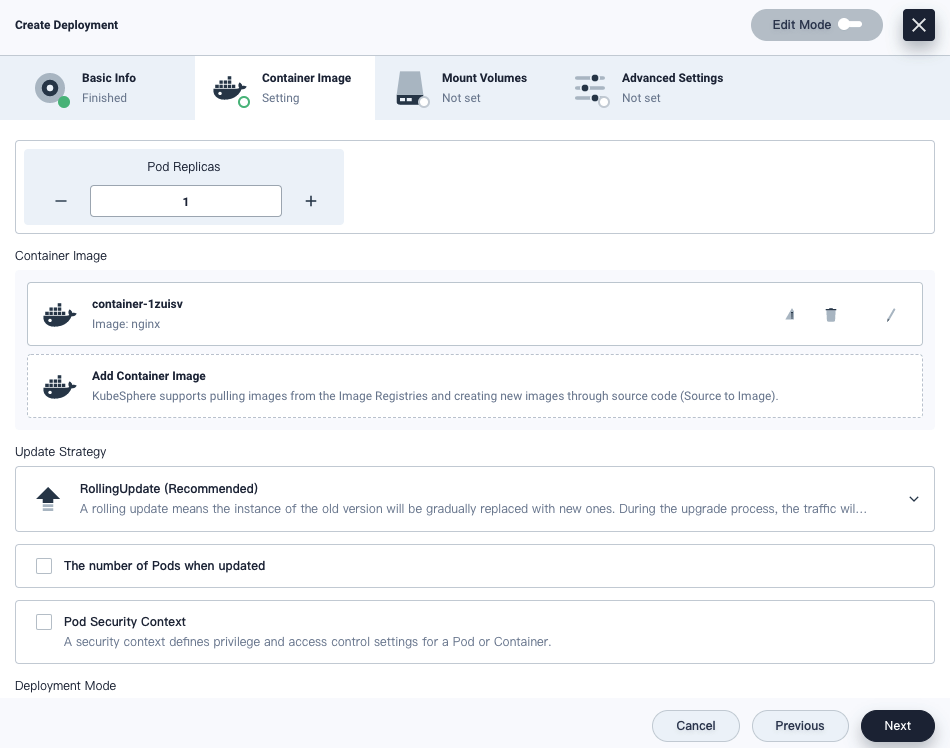
Note
To create workloads in KubeSphere, you can create and apply YAML files just as what you did before (Edit Mode in the top right corner). At the same time, you can also set parameters for your workloads on the KubeSphere dashboard one by one. I will not talk about the whole process in detail as this article is mainly about how to configure storage and create volumes. Have a look at the KubeSphere documentation to learn more about how to create workloads. -
On the Mount Volumes tab, click Add Volume and select the PVC just created. Here is my configuration for your reference. For more information about dashboard properties, see Volumes.
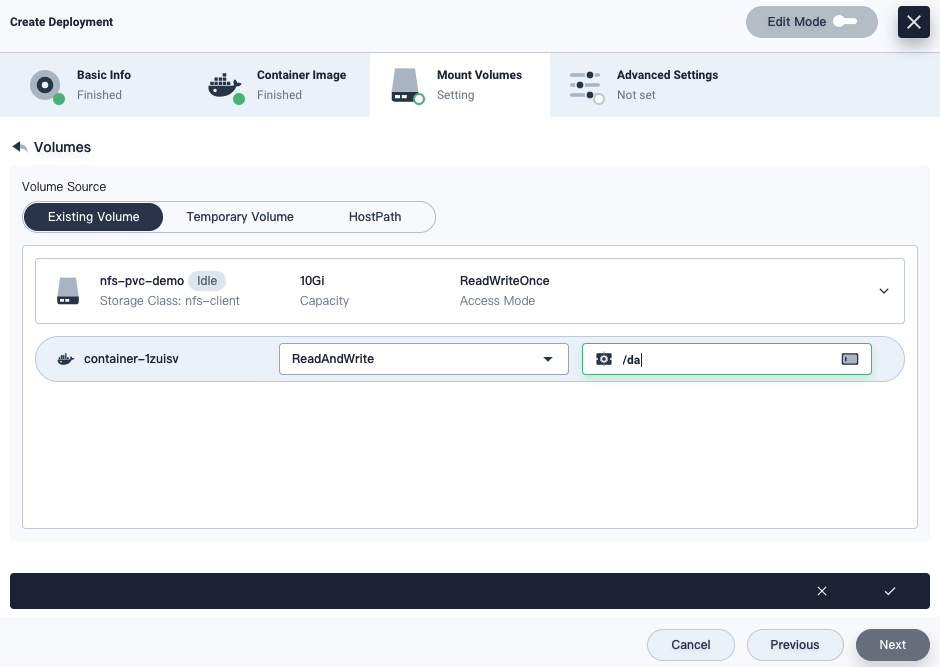
-
The Deployment will be up and running soon after creation.
-
The volume has also been mounted successfully.
-
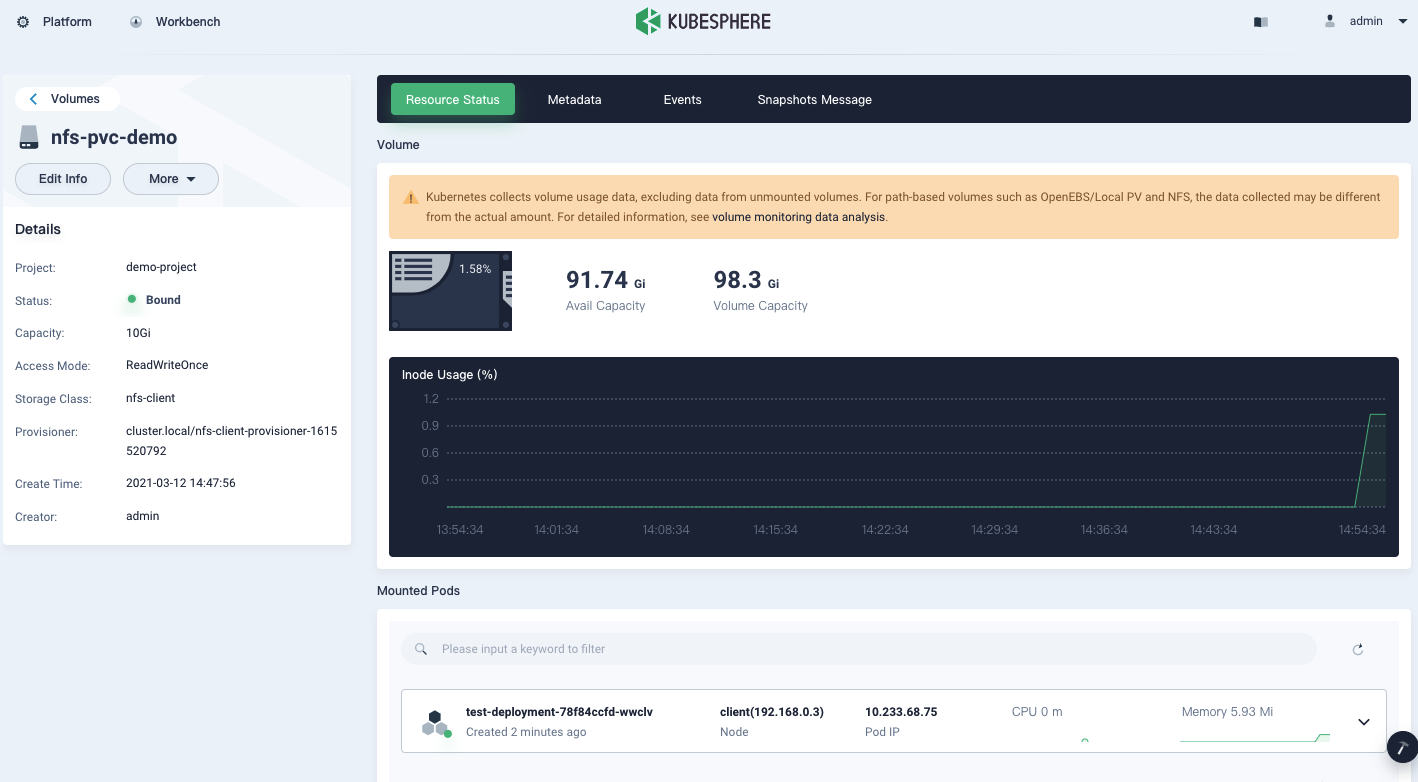
Click the PVC to see the detail page.
Summary
I think once you have your NFS storage server ready, it will not be a complicated task to install the storage class by Helm (KubeSphere installs Helm for you by default). As for creating and using PVCs, KubeSphere provides consistent user experiences as you can create your resources from the command line as always. That said, it is not a bad idea to try its dashboard to create PVCs which frees you from creating and applying any YAML configurations manually.
References
Table of Contents