


You are viewing documentation for KubeSphere version:v3.0.0
KubeSphere v3.0.0 documentation is no longer actively maintained. The version you are currently viewing is a static snapshot. For up-to-date documentation, see the latest version.


Kubernetes Application Lifecycle Management
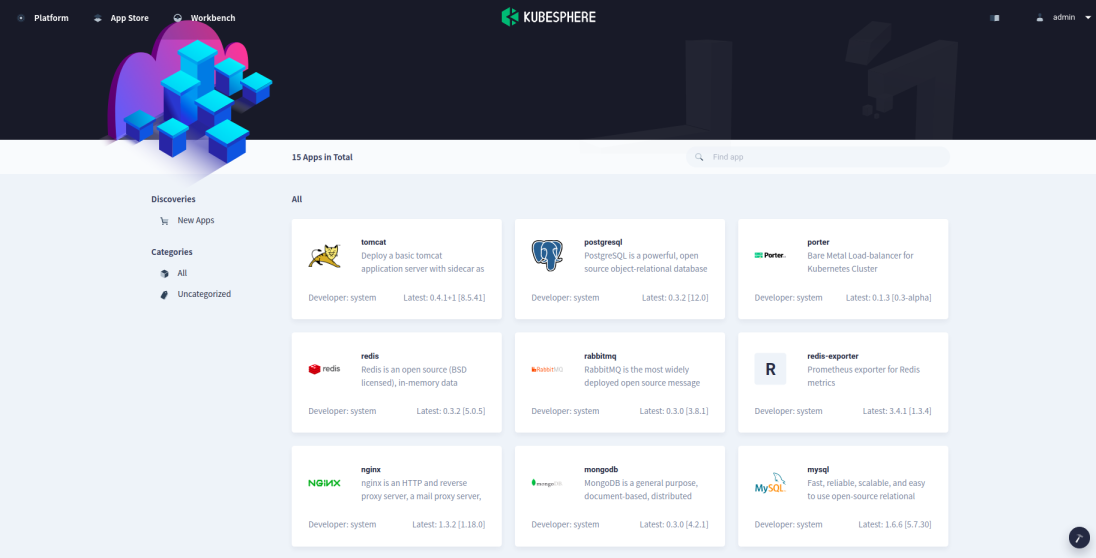
KubeSphere integrates OpenPitrix, an open-source multi-cloud application management platform, to set up the App Store, managing Kubernetes applications throughout their entire lifecycle. The App Store supports two kinds of application deployment:
- App templates provide a way for developers and independent software vendors (ISVs) to share applications with users in a workspace. You can also import third-party app repositories within a workspace.
- Composing apps help users quickly build a complete application using multiple microservices to compose it. KubeSphere allows users to select existing services or create new services to create a composing app on the one-stop console.
Using Redis as an example application, this tutorial demonstrates how to manage the Kubernetes app throughout the entire lifecycle, including submission, review, test, release, upgrade and removal.
Prerequisites
- You need to enable the KubeSphere App Store (OpenPitrix).
- You need to create a workspace, a project and an account (
project-regular). For more information, see Create Workspaces, Projects, Accounts and Roles.
Hands-on Lab
Step 1: Create a customized role and account
You need to create two accounts first, one for ISVs (isv) and the other (reviewer) for app technical reviewers.
-
Log in to the KubeSphere console with the account
admin. Click Platform in the top left corner and select Access Control. In Account Roles, click Create.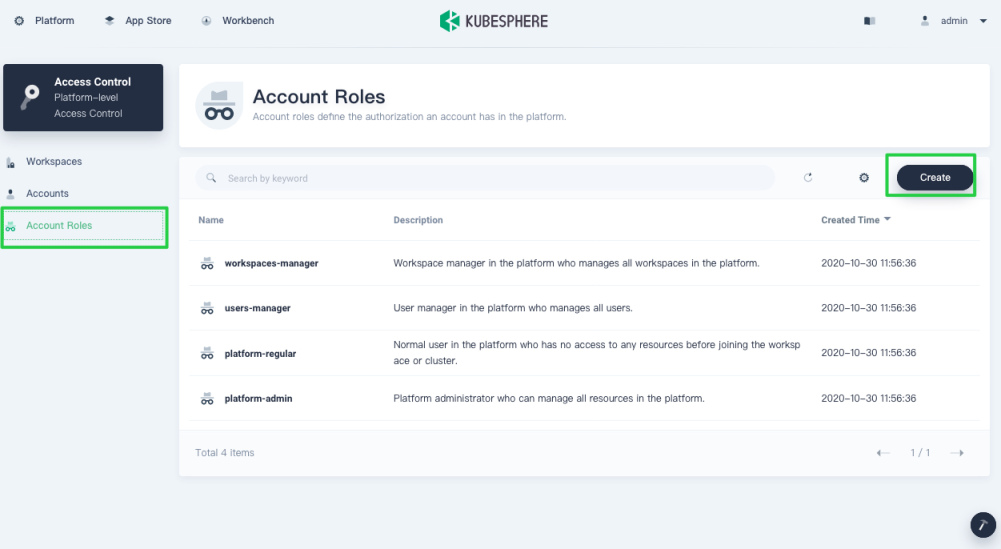
-
Set a name for the role, such as
app-review, and click Edit Authorization.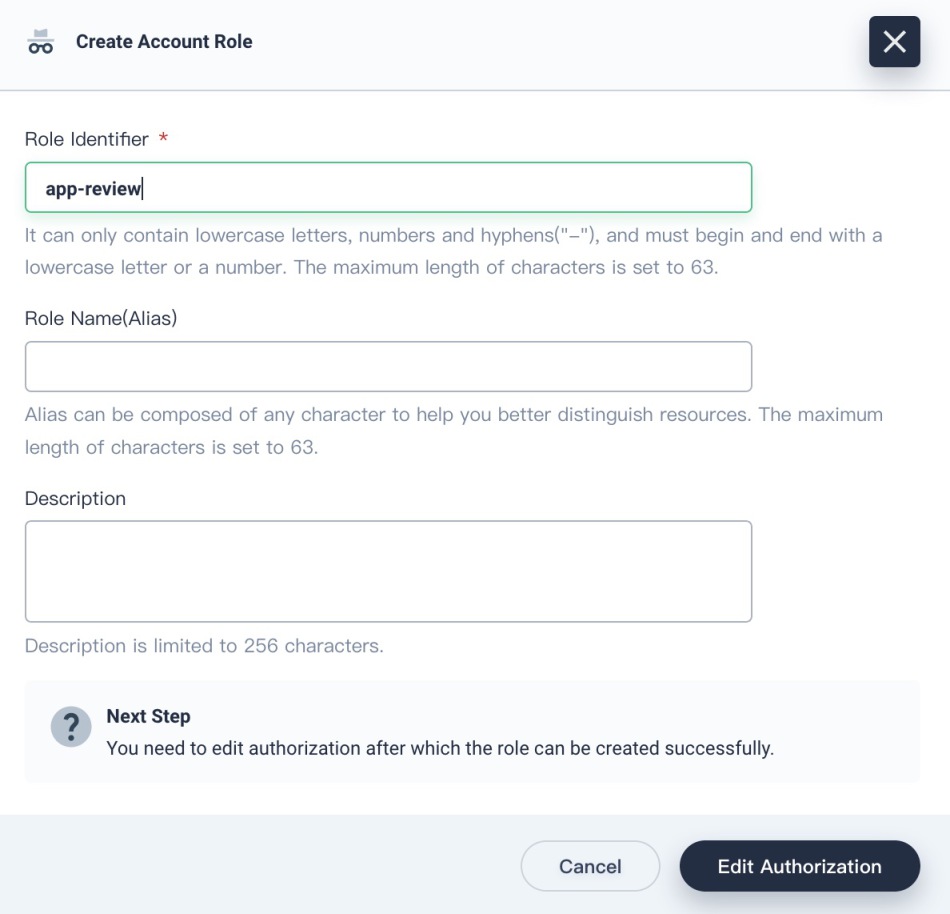
-
In Apps Management, choose App Templates Management and App Templates View in the authorization list, then click OK.

Note
The account granted the roleapp-reviewis able to view the App Store on the platform and manage apps, including review and removal. -
As the role is ready now, you need to create an account and grant the role of
app-reviewto it. In Accounts, click Create. Provide the required information and click OK.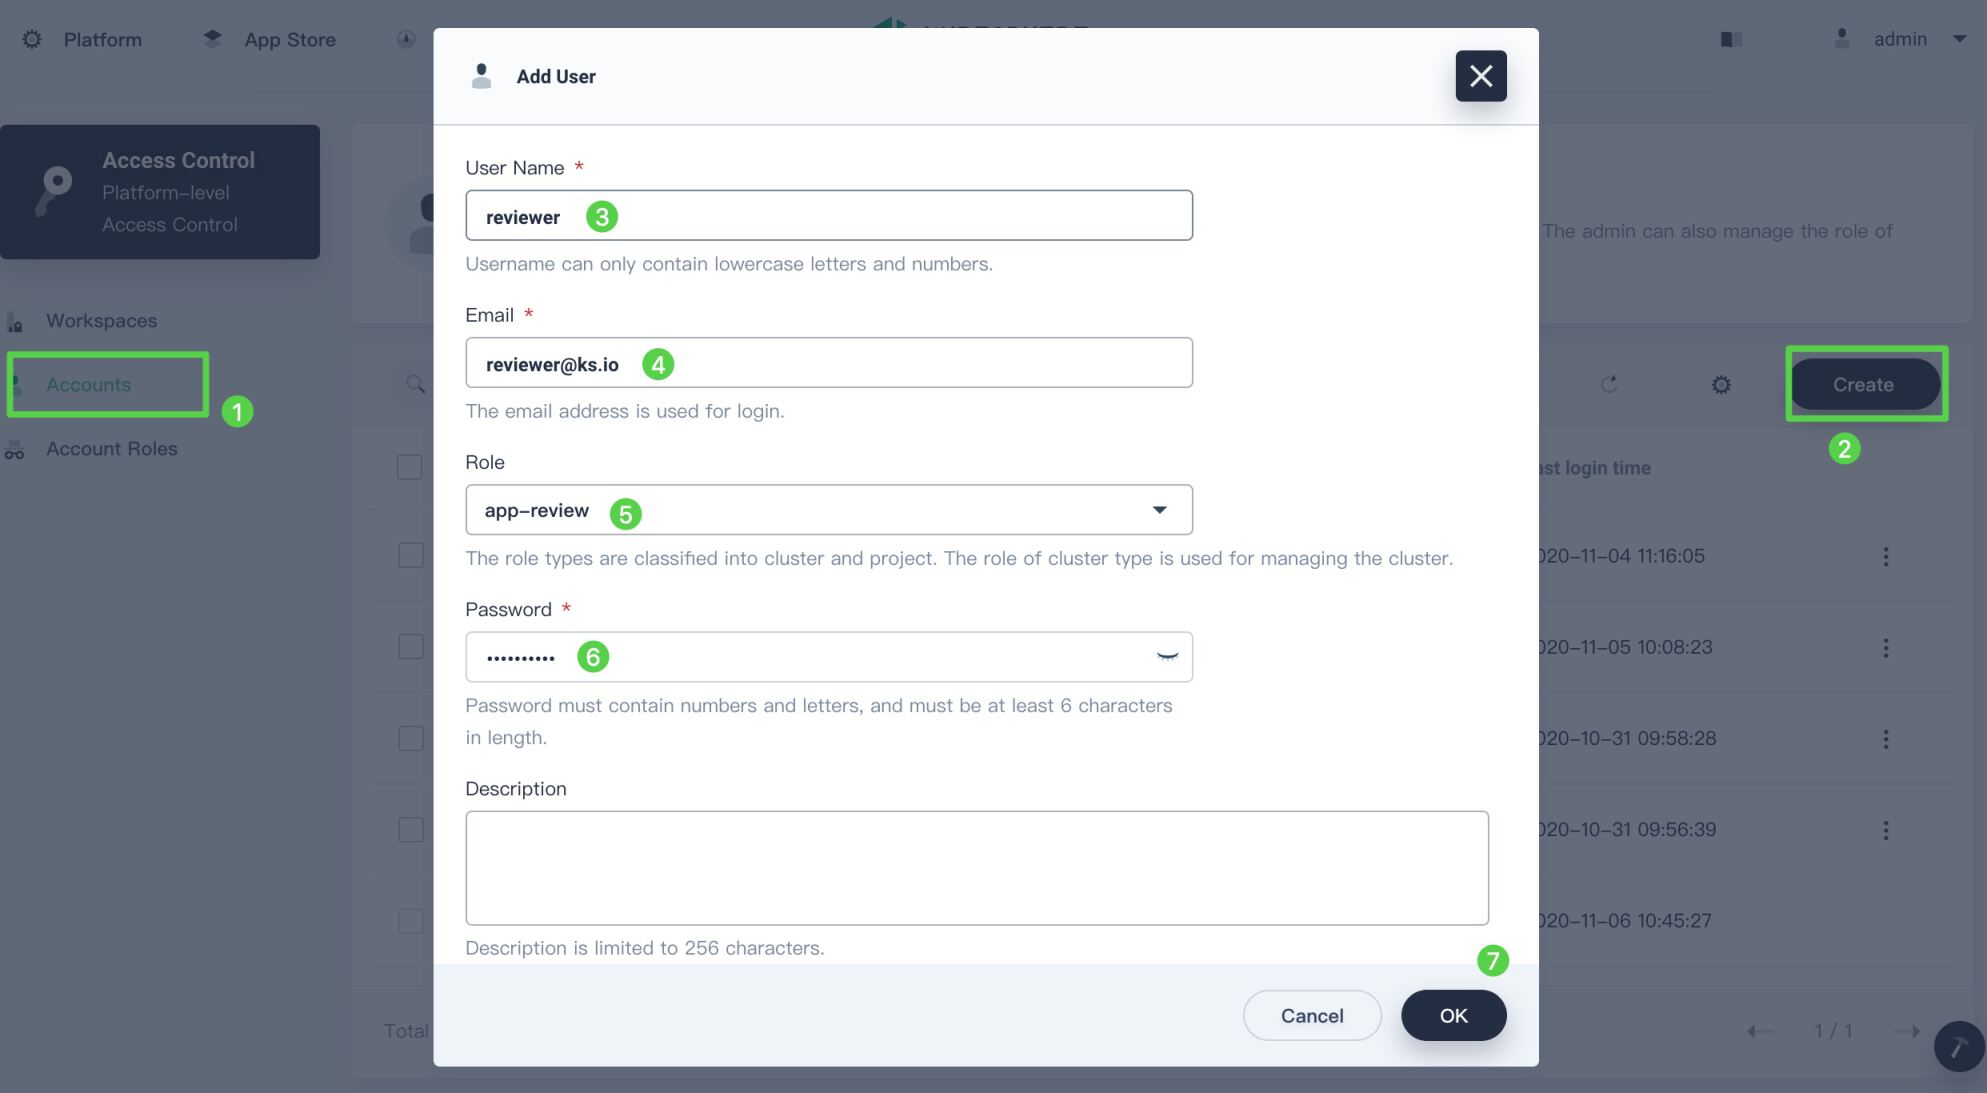
-
Similarly, create another account
isv, and grant the role ofplatform-regularto it.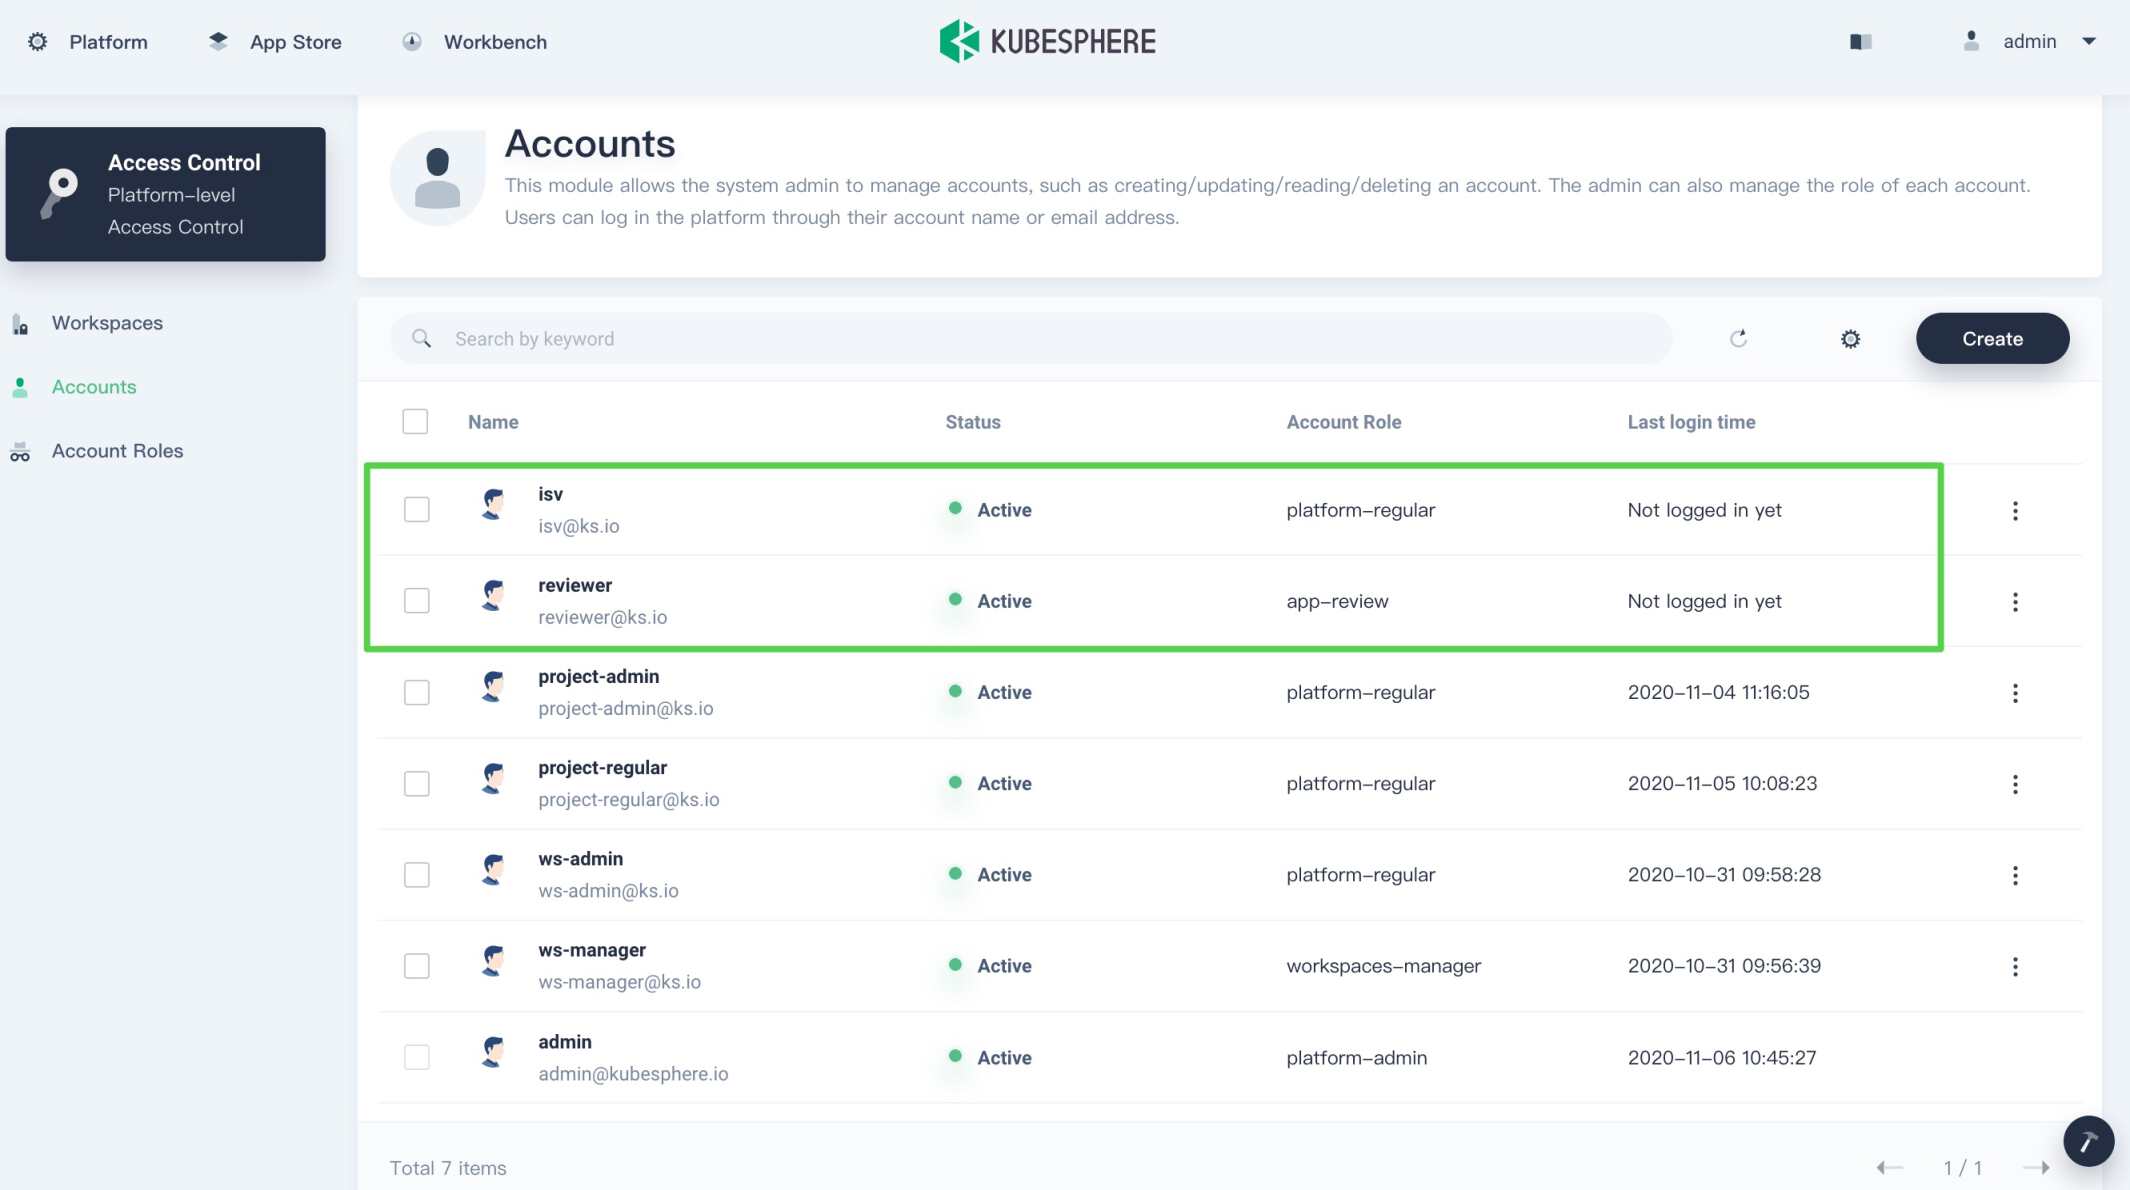
-
Invite both accounts created above to an existing workspace such as
demo-workspace, and grant them the role ofworkspace-admin.
Step 2: Upload and submit an application
-
Log in to KubeSphere as
isvand go to your workspace. You need to upload the example app Redis to this workspace so that it can be used later. First, download the app Redis 11.3.4 and click Upload Template in App Templates.
Note
In this example, a new version of Redis will be uploaded later to demonstrate the upgrade feature. -
In the dialog that appears, click Upload Helm Chart Package to upload the chart file. Click OK to continue.

-
Basic information of the app displays under App Info. To upload an icon for the app, click Upload icon. You can also skip it and click OK directly.
Note
Maximum accepted resolutions of the app icon: 96 x 96 pixels.
-
The app displays in the template list with the status draft after successfully uploaded, which means this app is under development. The uploaded app is visible to all members in the same workspace.
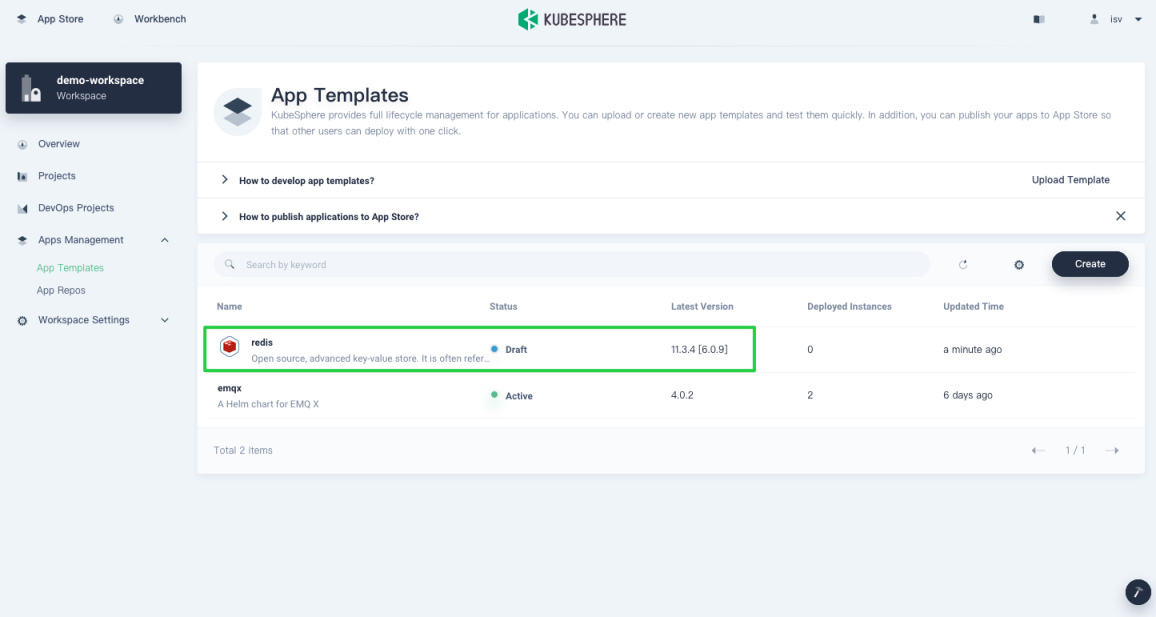
-
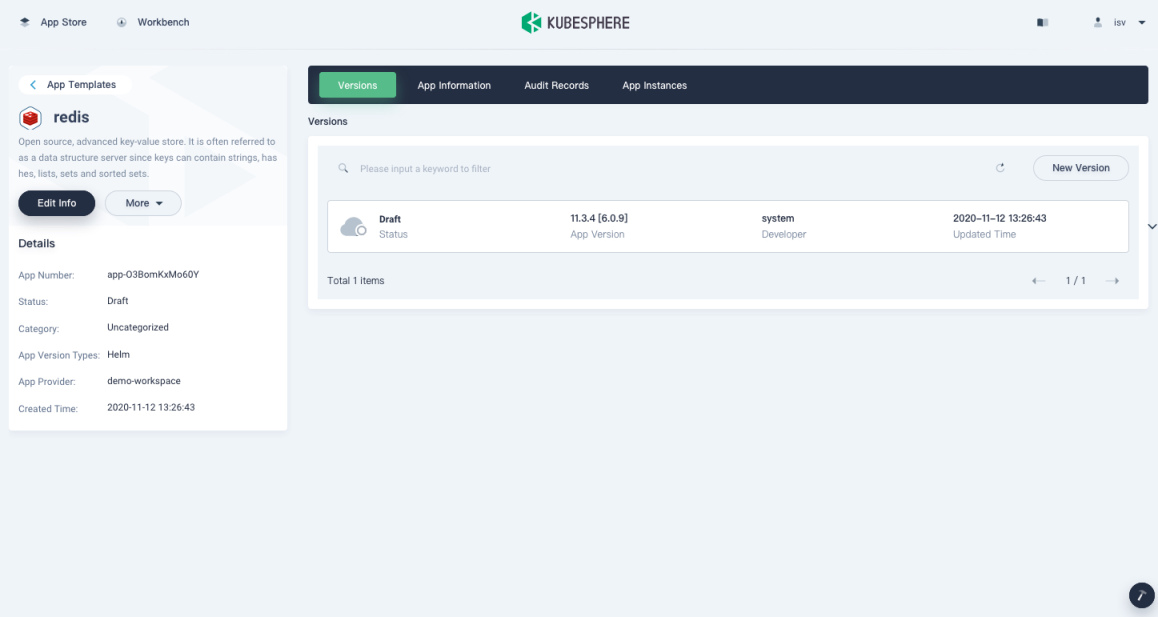
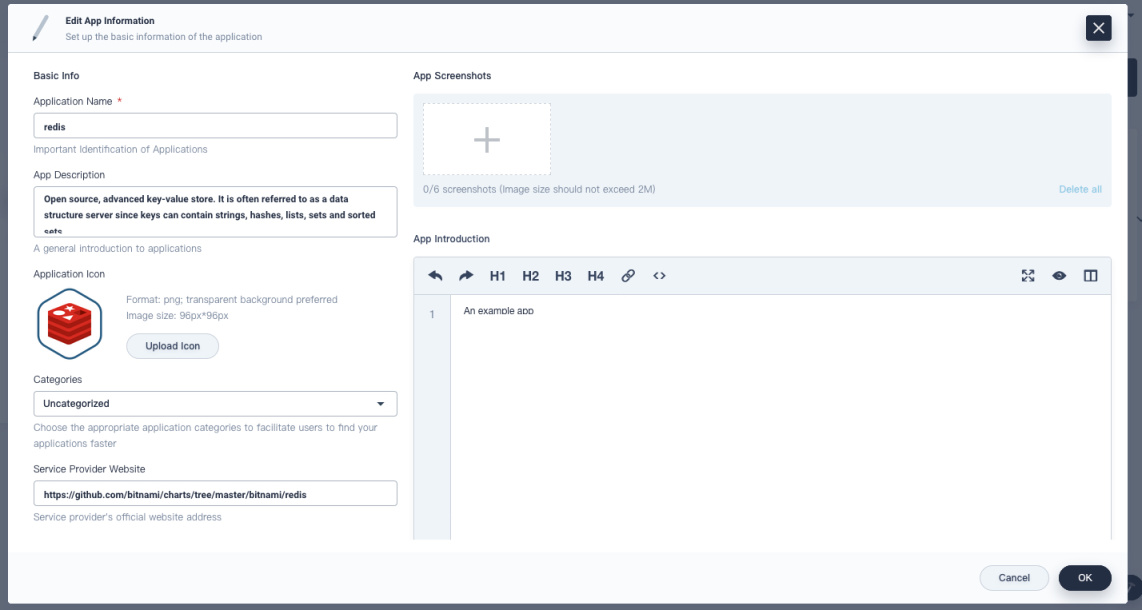
Go to the detail page of the app template by clicking Redis from the list. You can edit the basic information of this app by clicking Edit Info.
-
You can customize the app’s basic information by specifying the fields in the pop-up window.
-
Click OK to save your changes, then you can test this application by deploying it to Kubernetes. Click the draft version to expand the menu and select Test Deploy.
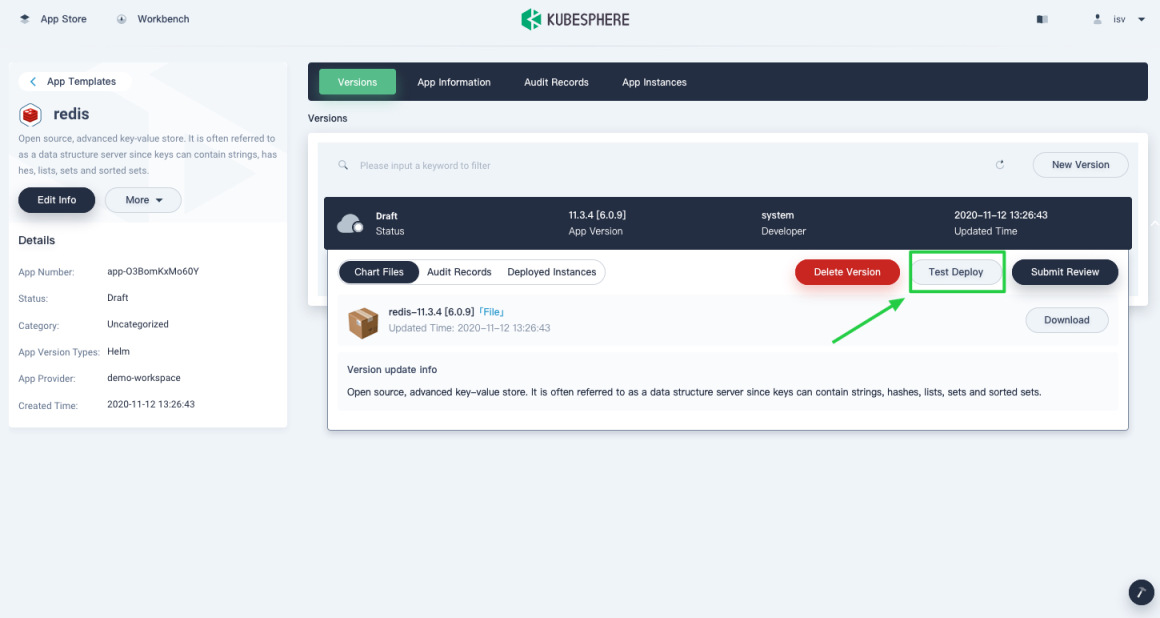
Note
If you don’t want to test the app, you can submit it for review directly. However, it is recommended that you test your app deployment and function first before you submit it for review, especially in a production environment. This helps you detect any problems in advance and accelerate the review process. -
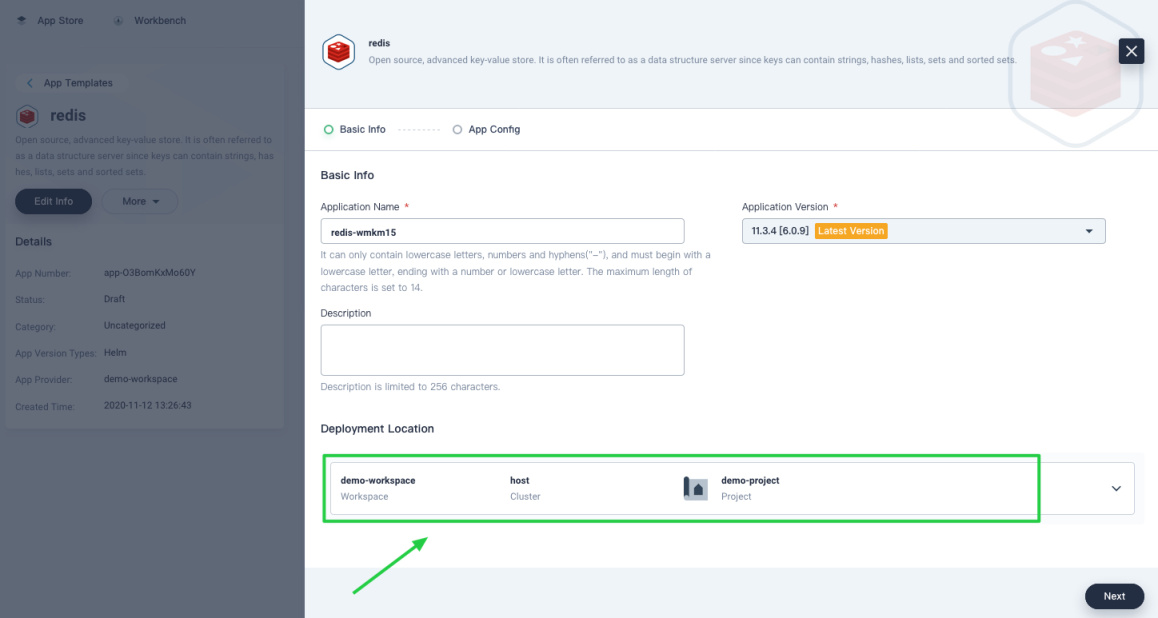
Select the cluster and project to which you want to deploy the app, set up different configurations for the app, and then click Deploy.
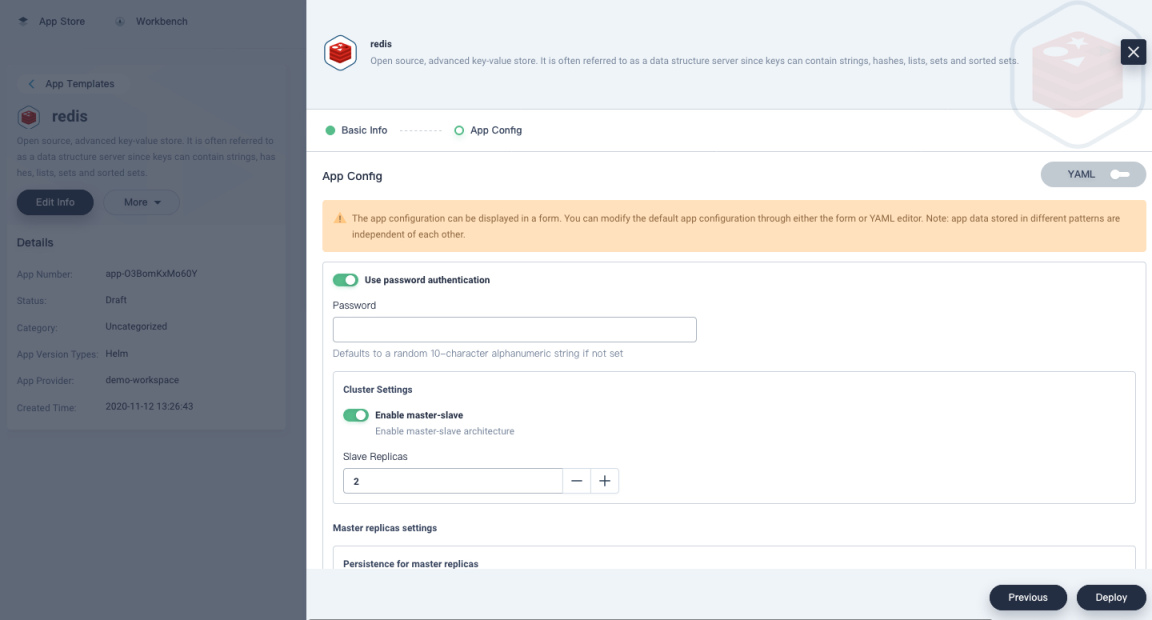
Note
Some apps can be deployed with all configurations set in a form. You can use the toggle switch to see its YAML file, which contains all parameters you need to specify in the form. -
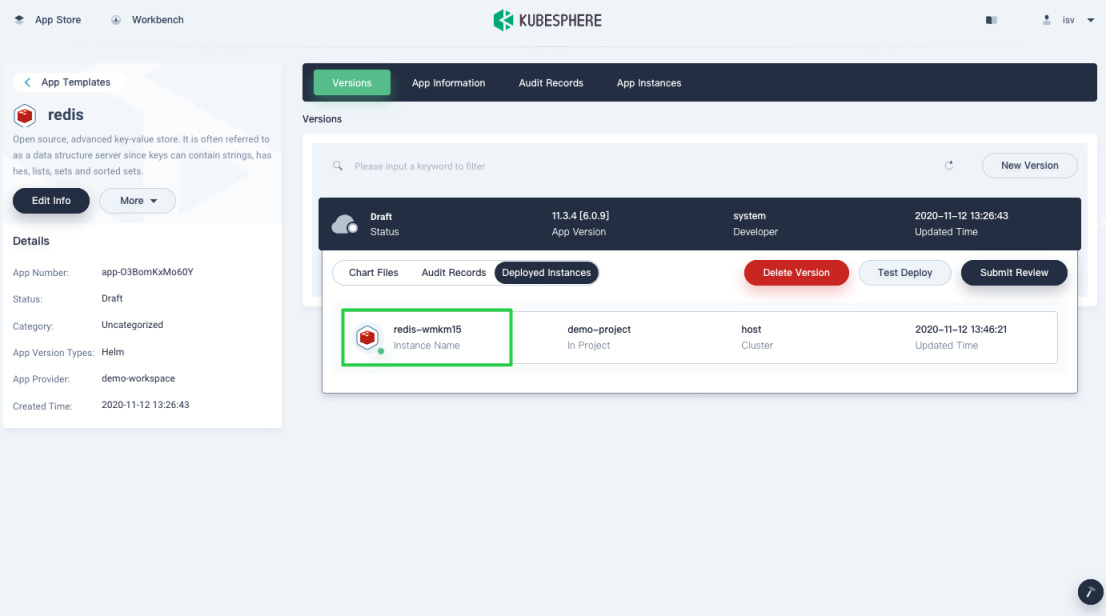
Wait for a few minutes, then switch to the tab Deployed Instances. You will find that Redis has been deployed successfully.
-
After you test the app with no issues found, you can click Submit Review to submit this application for review.
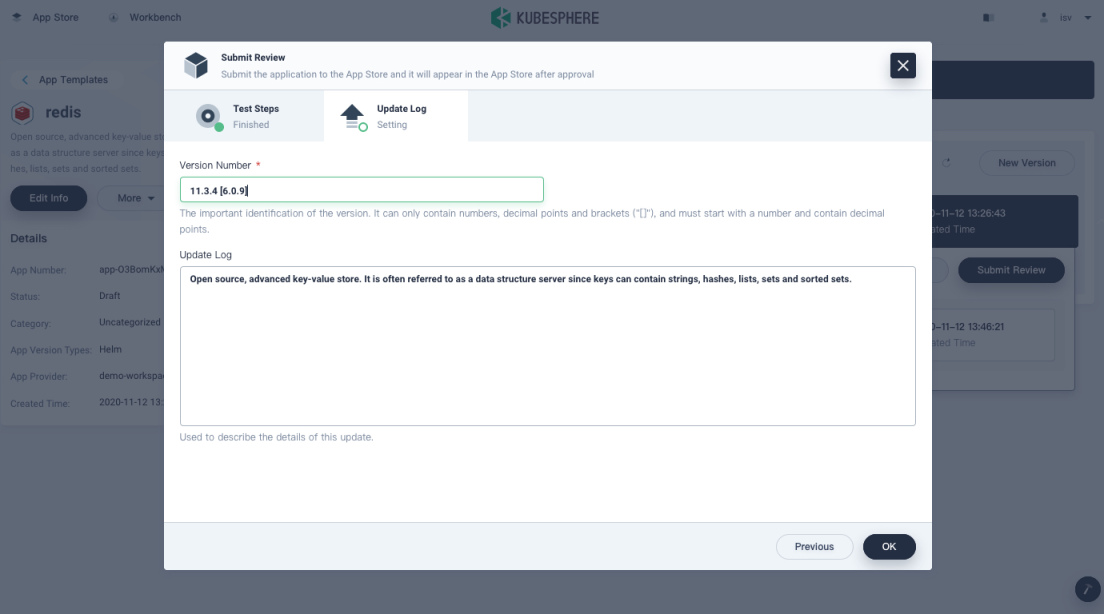
Note
The version number must start with a number and contain decimal points. -
After the app is submitted, the app status will change to Submitted. Now app reviewers can review it.

Step 3: Review the application
-
Log out of KubeSphere and log back in as
reviewer. Click Platform in the top left corner and select App Store Management. On the App Review page, the app submitted in the previous step displays under the tab Unprocessed.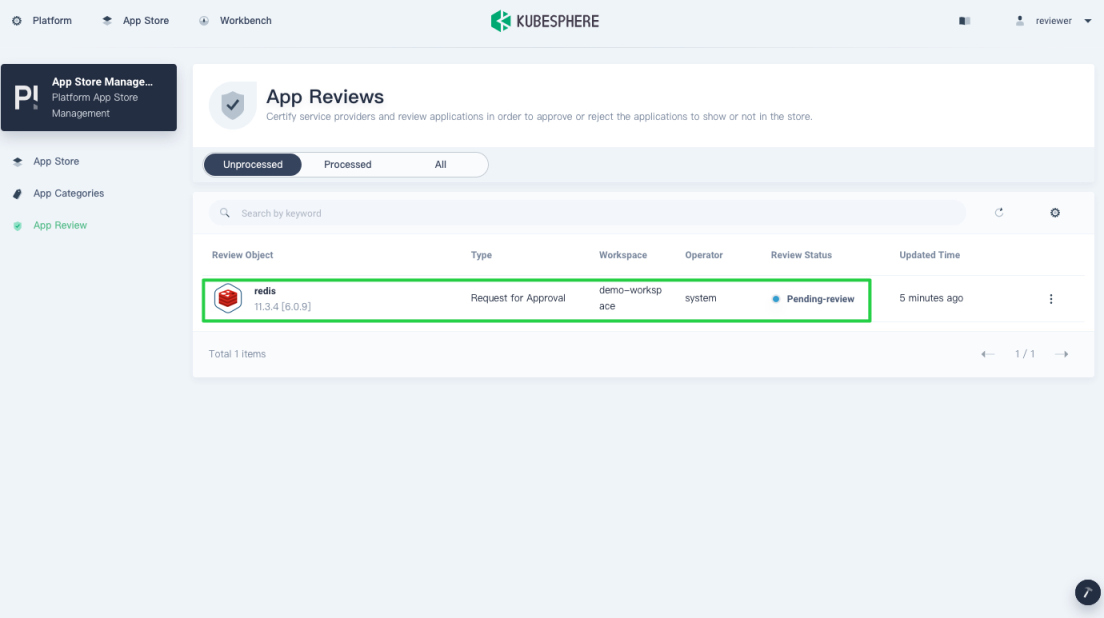
-
To review this app, click it to inspect the app information, introduction, chart file and update logs from the pop-up window.
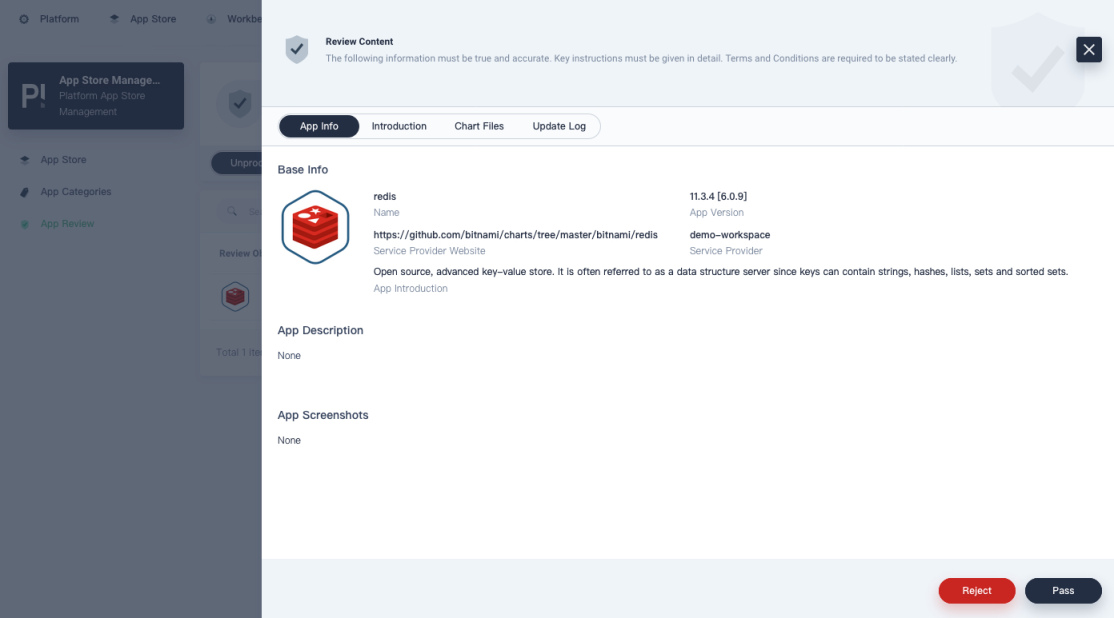
-
It is the responsibility of the reviewer to decide whether the app meets the criteria to be released to the App Store. Click Pass to approve it or Reject to deny an app submission.
Step 4: Release the application to the App Store
After the app is approved, isv can release the Redis application to the App Store, allowing all users on the platform to find and deploy this application.
-
Log out of KubeSphere and log back in as
isv. Go to your workspace and click Redis on the App Templates page. On its detail page, expand the version menu, then click Release to Store. In the pop-up prompt, click OK to confirm.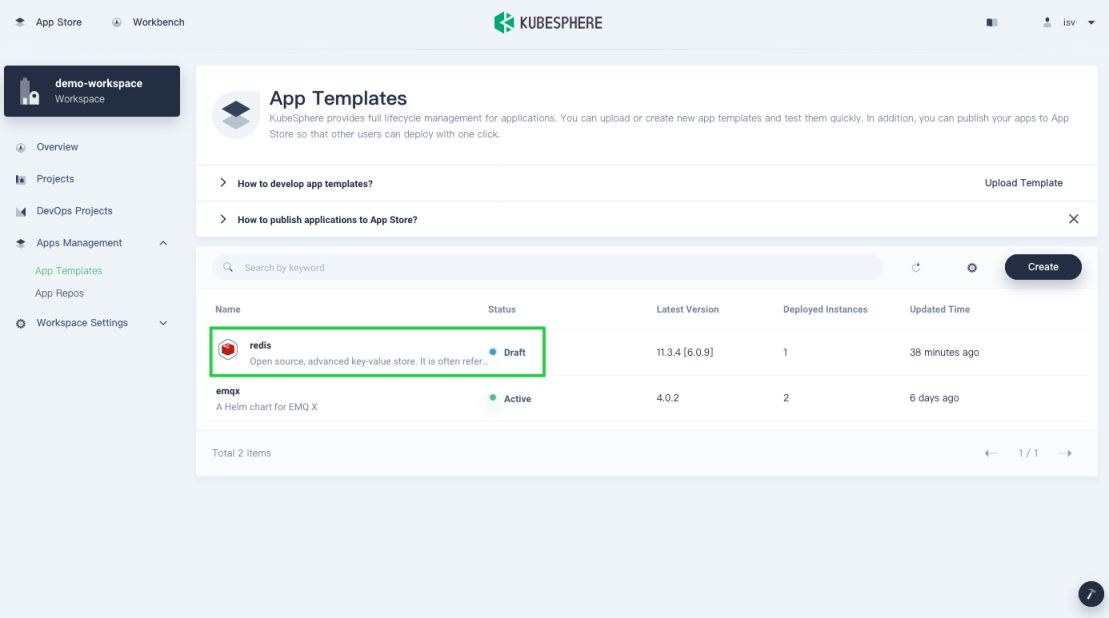
-
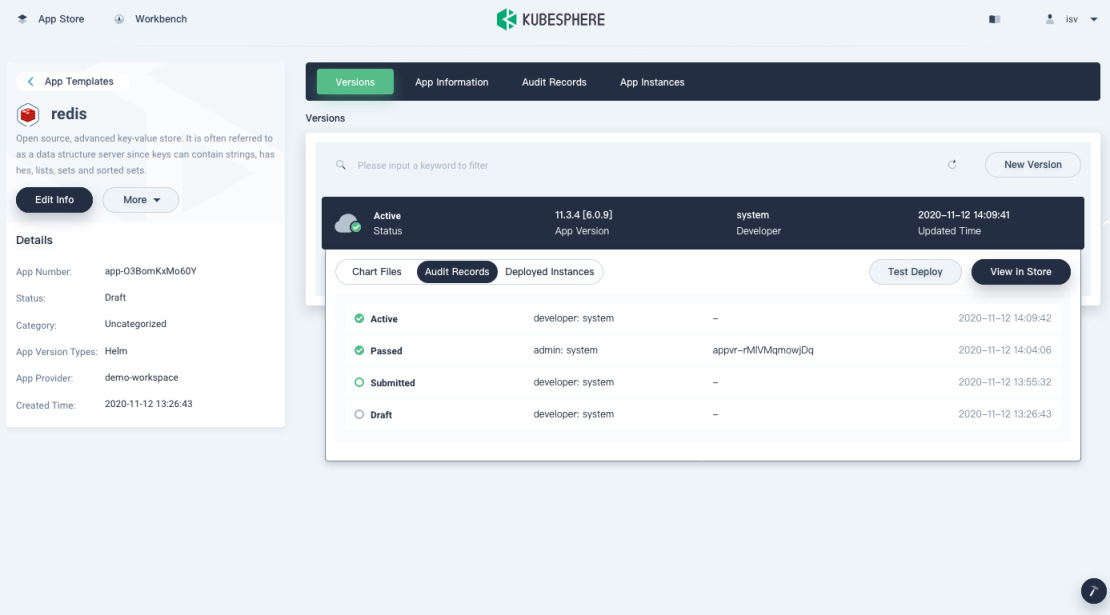
Under Audit Records, you can see the app status. Active means it is available in the App Store.
-
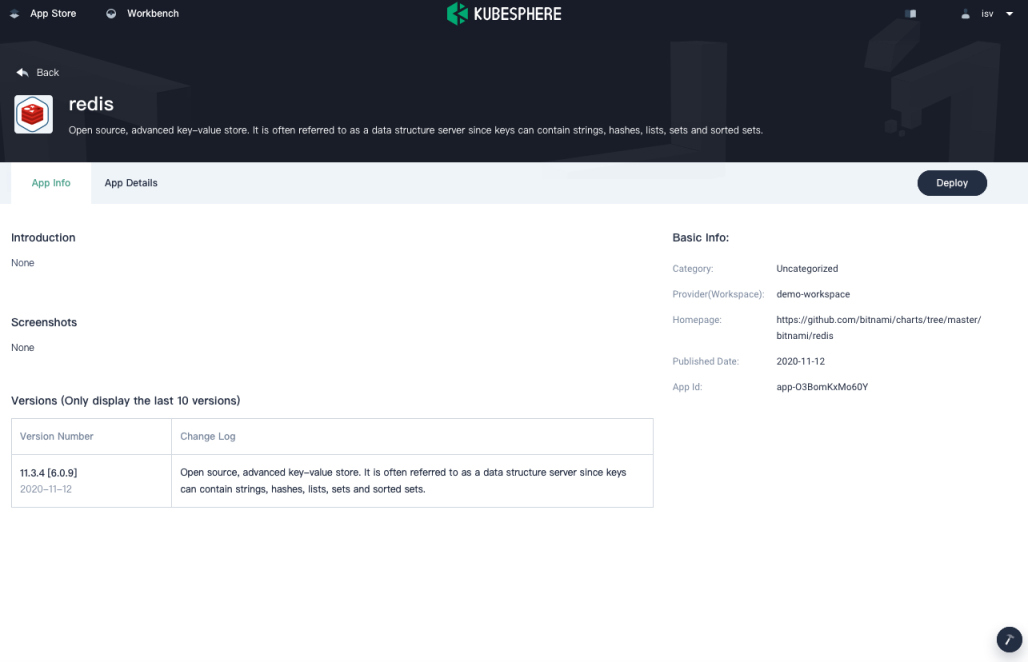
Click View in Store to go to its App Info page in the App Store. Alternatively, click App Store in the top left corner and you can also see the app.
Note
You may see two Redis apps in the App Store, one of which is a built-in app in KubeSphere. Note that a newly-released app displays at the beginning of the list in the App Store. -
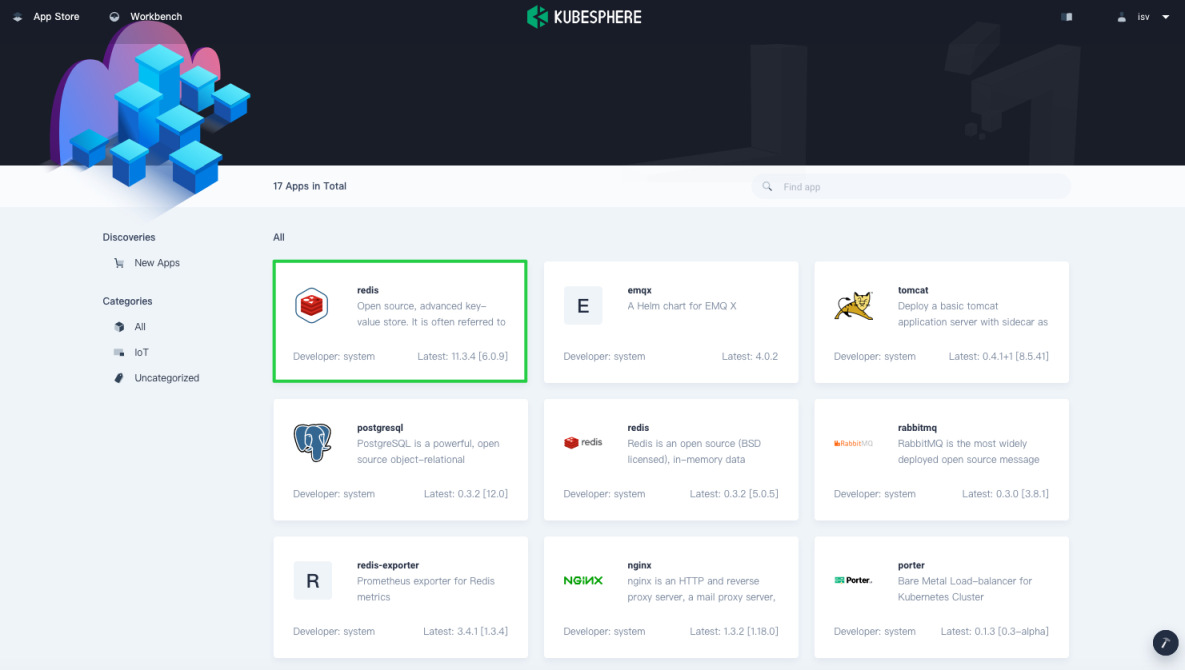
Now, users in the workspace can deploy Redis from the App Store. To deploy the app to Kubernetes, click the app to go to its App Info page, and click Deploy.
Step 5: Create an app category
reviewer can create multiple categories for different types of applications based on their function and usage. It is similar to setting tags and categories can be used in the App Store as filters, such as Big Data, Middleware, and IoT.
-
Log in to KubeSphere as
reviewer. To create a category, go to the App Store Management page and click the plus icon in App Categories.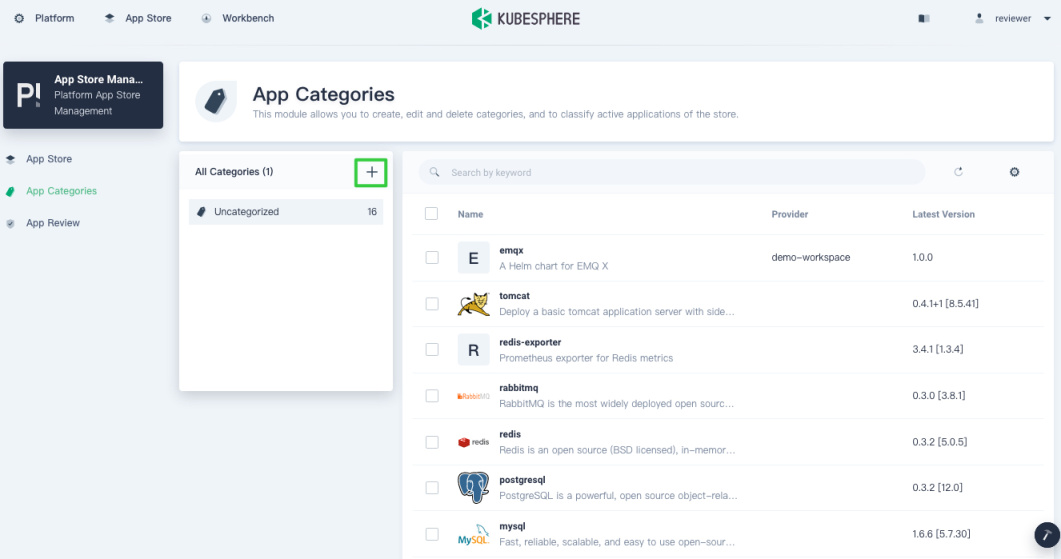
-
Set a name and icon for the category in the dialog, then click OK. For Redis, you can input
Databasefor the field Category Name.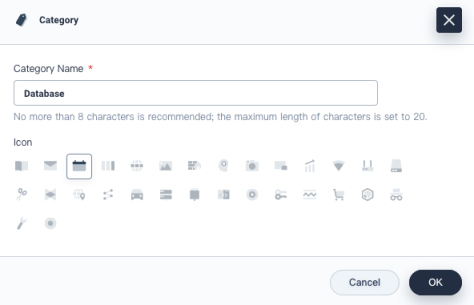
Note
Usually, an app reviewer creates necessary categories in advance and ISVs select the category in which an app appears before submitting it for review. A newly-created category has no app in it. -
As the category is created, you can assign the category to your app. In Uncategorized, select Redis and click Change Category.

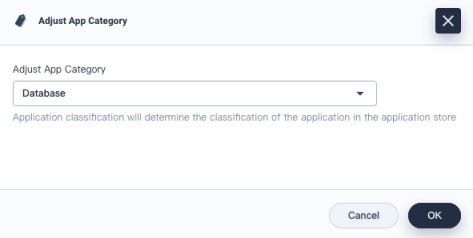
-
In the dialog, select the category (Database) from the drop-down list and click OK.
-
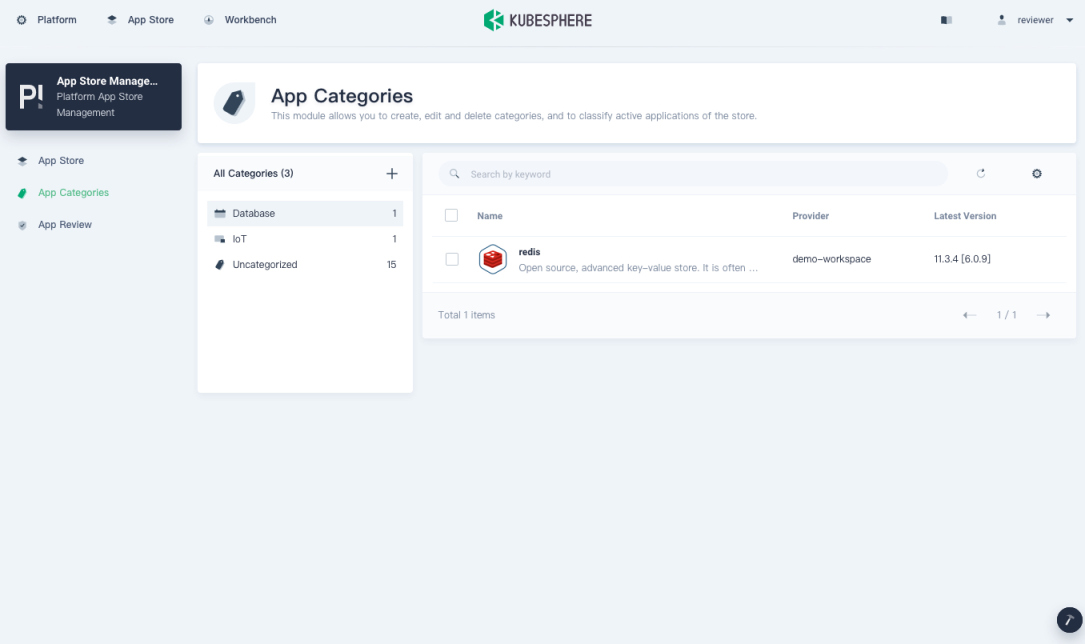
The app displays in the category as expected.
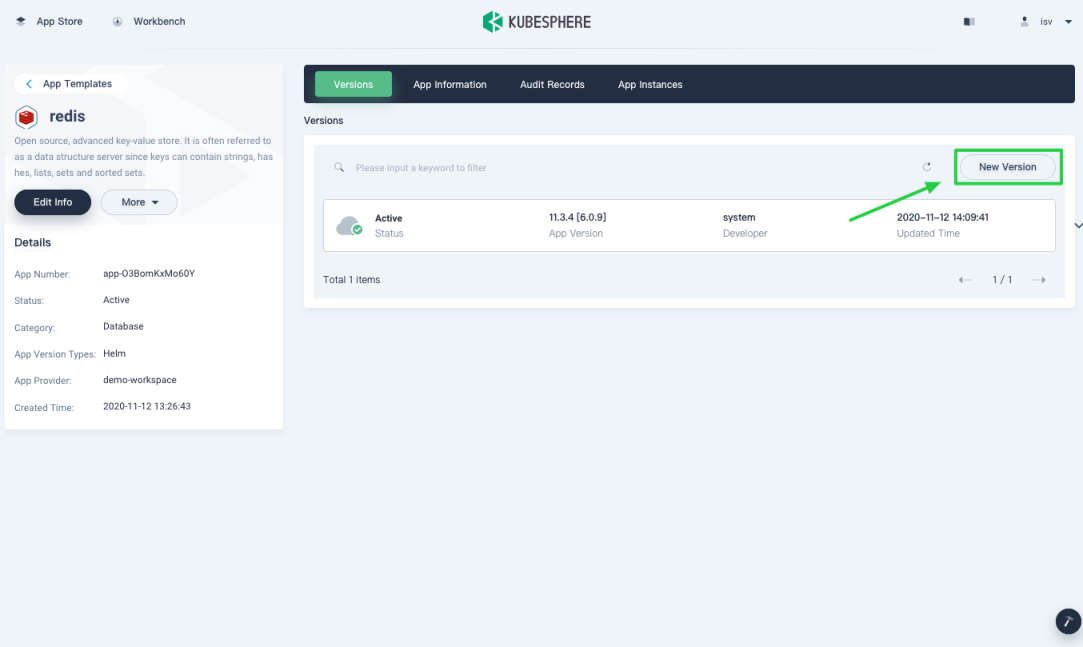
Step 6: Add a new version
To allow workspace users to upgrade apps, you need to add new app versions to KubeSphere first. Follow the steps below to add a new version for the example app.
-
Log in to KubeSphere as
isvagain and navigate to App Templates. Click the app Redis in the list.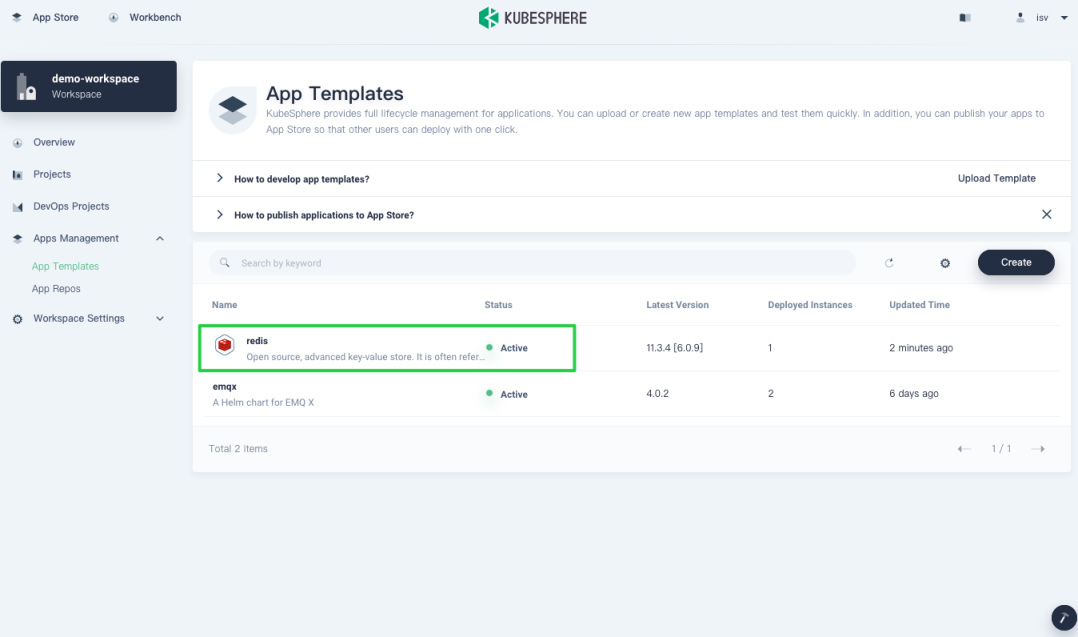
-
Download Redis 12.0.0, which is a new version of Redis for demonstration in this tutorial. In the tab Versions, click New Version on the right to upload the package you just downloaded.
-
Click Upload Helm Chart Package and click OK after it is uploaded.
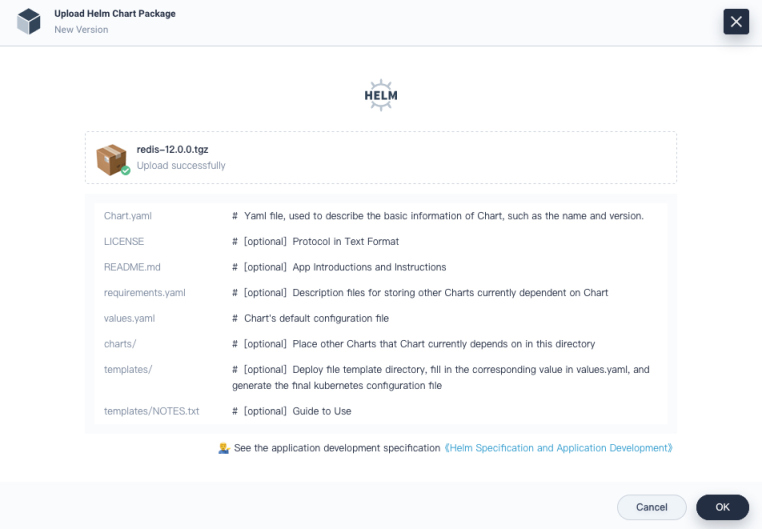
-
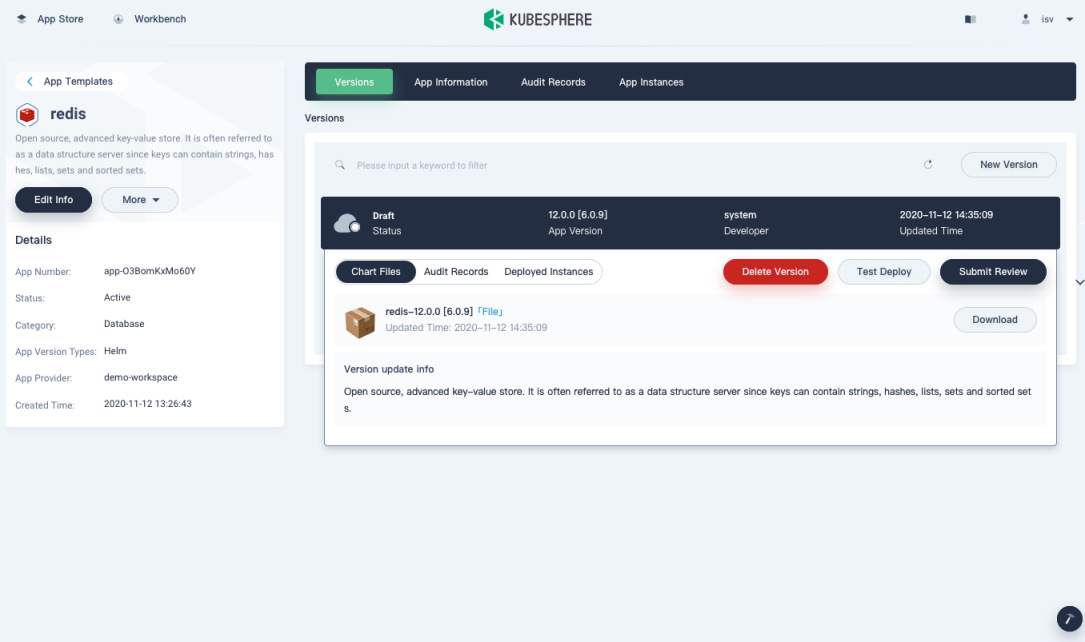
The new app version displays in the version list. You can click it to expand the menu and test the new version. Besides, you can also submit it for review and release it to the App Store, which is the same as the steps shown above.

Step 7: Upgrade
After a new version is released to the App Store, all users can upgrade this application to the new version.
Note
To follow the steps below, you must deploy an app of one of its old versions first. In this example, Redis 11.3.4 was already deployed in the project
demo-project and its new version 12.0.0 was released to the App Store.-
Log in to KubeSphere as
project-regular, navigate to the Applications page of the project, and click the app to be upgraded.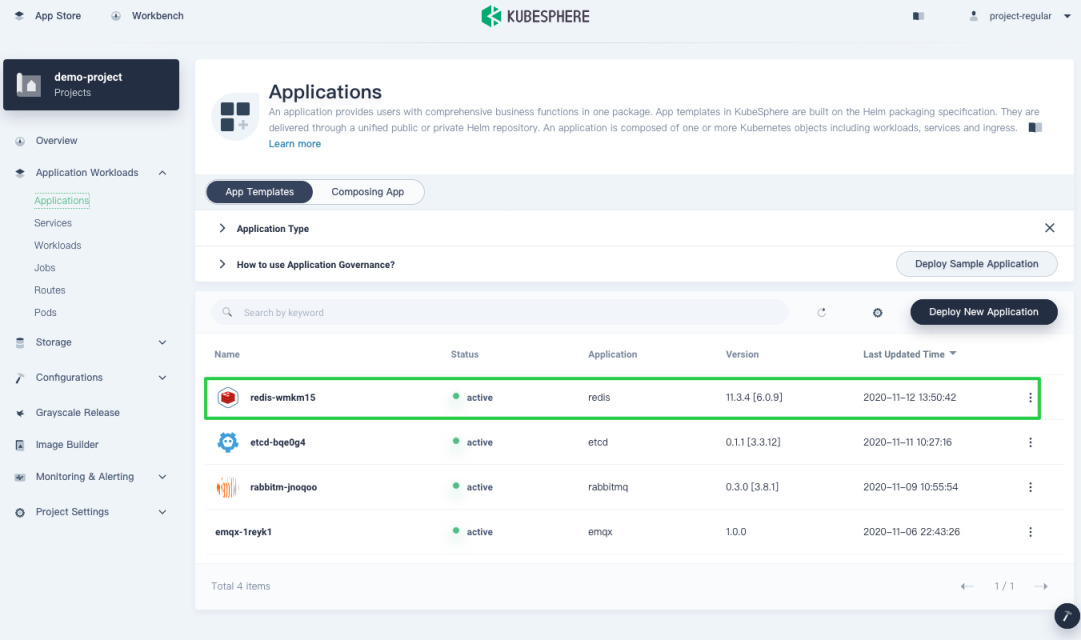
-
Under App Template, select Version Info. You can see all released app versions in the list. The app version you are using currently is marked with Current Version. To upgrade your app to a specific version, click Upgrade on the right of the version number.
Note
You must move your cursor onto the app version to see the Upgrade button.
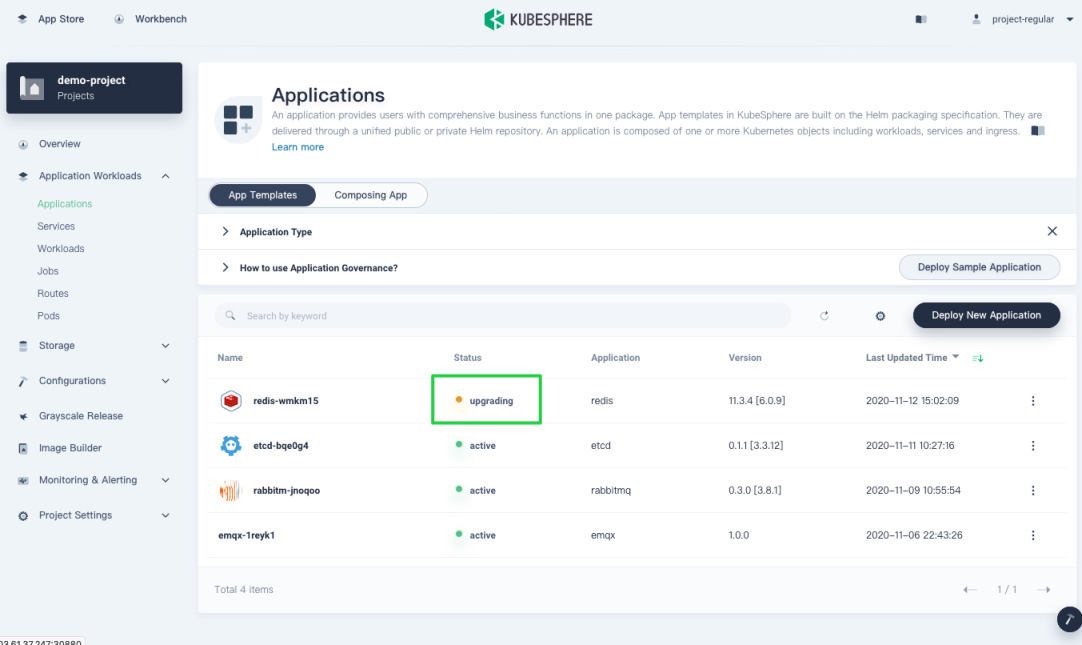
-
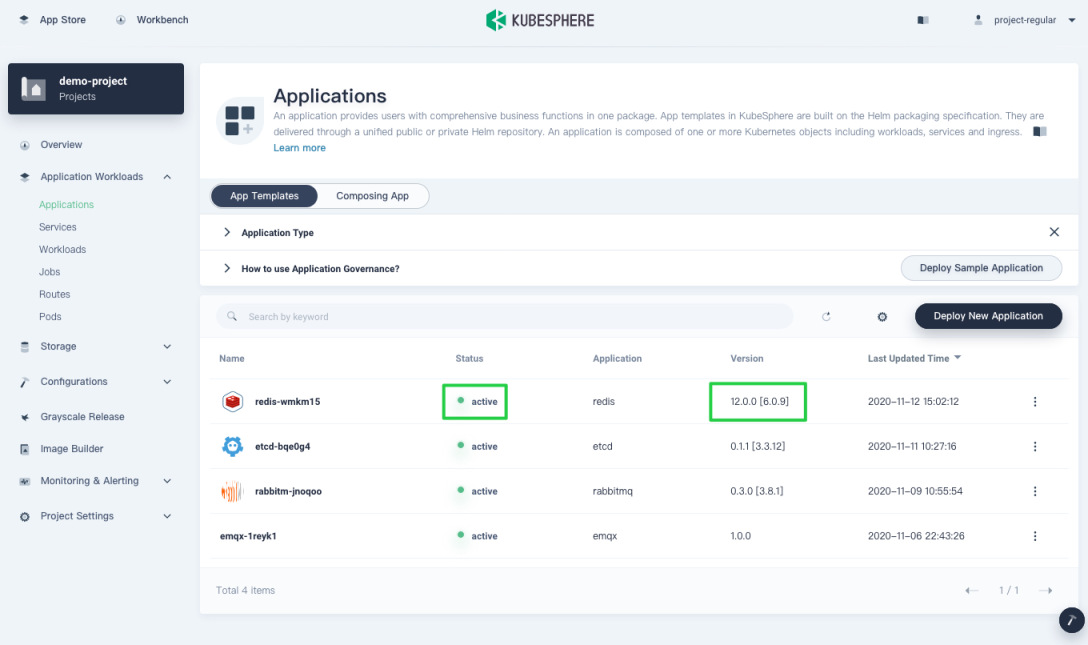
On the Applications page, you can see that the app is being upgraded. The status will change to active when the upgrade finishes.
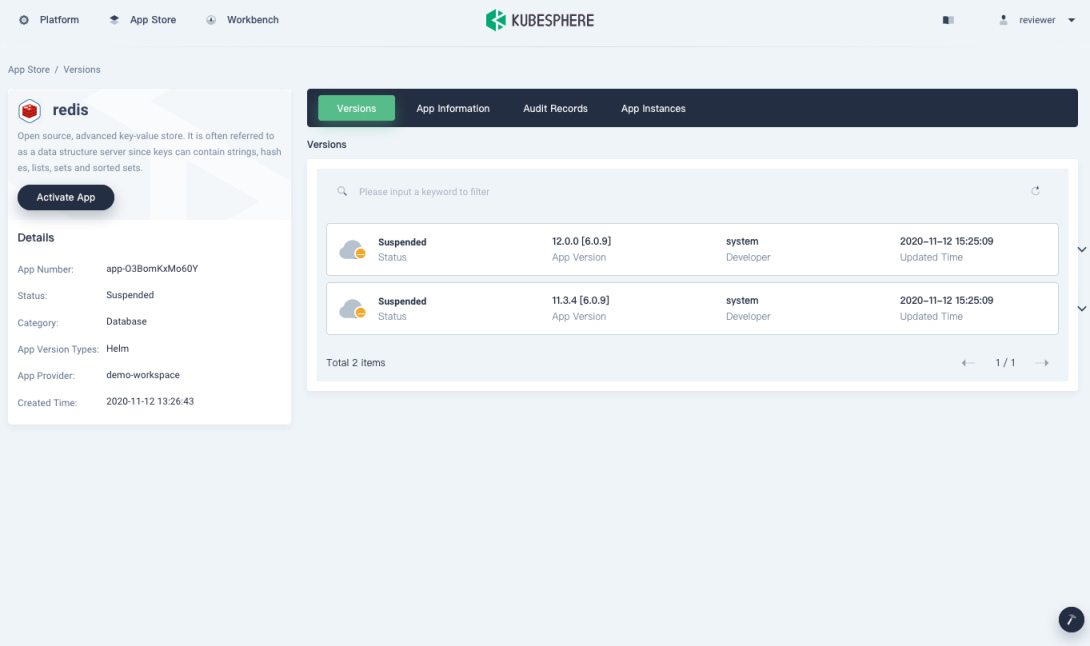
Step 8: Suspend the application
You can choose to remove an app entirely from the App Store or suspend a specific app version.
-
Log in to KubeSphere as
reviewer. Click Platform in the top left corner and go to App Store Management. On the App Store page, click Redis.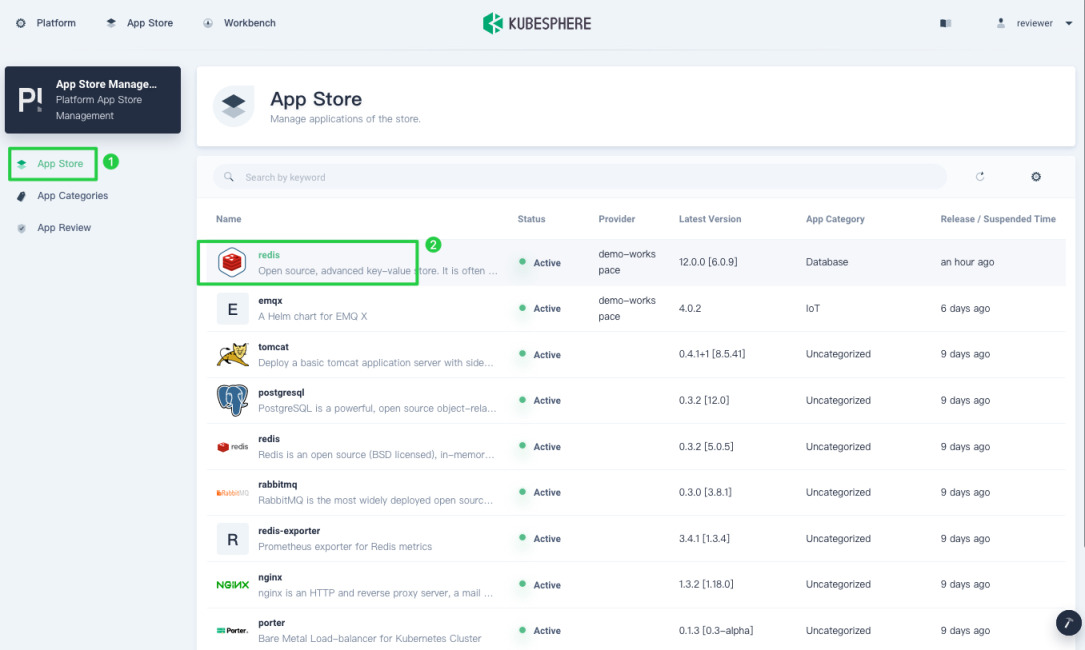
-
On the detail page, click Suspend App and select OK in the dialog to confirm the operation to remove the app from the App Store.
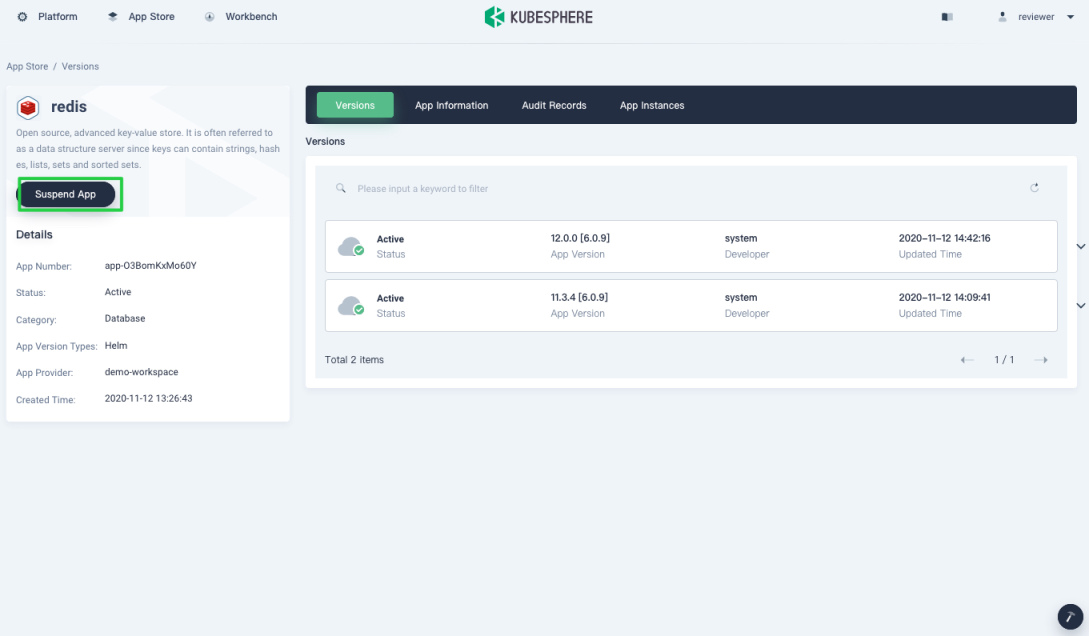
Note
Removing an app from the App Store does not affect tenants who are using the app. -
To make the app available in the App Store again, click Activate App.
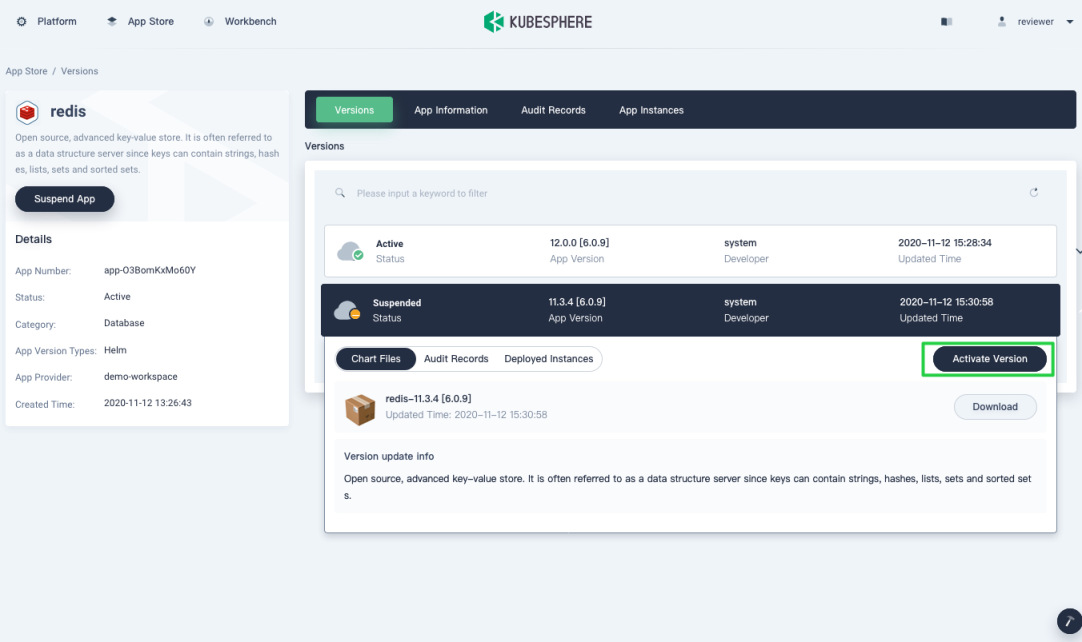
-
To suspend a specific app version, expand the version menu and click Suspend Version. In the dialog that appears, click OK to confirm.
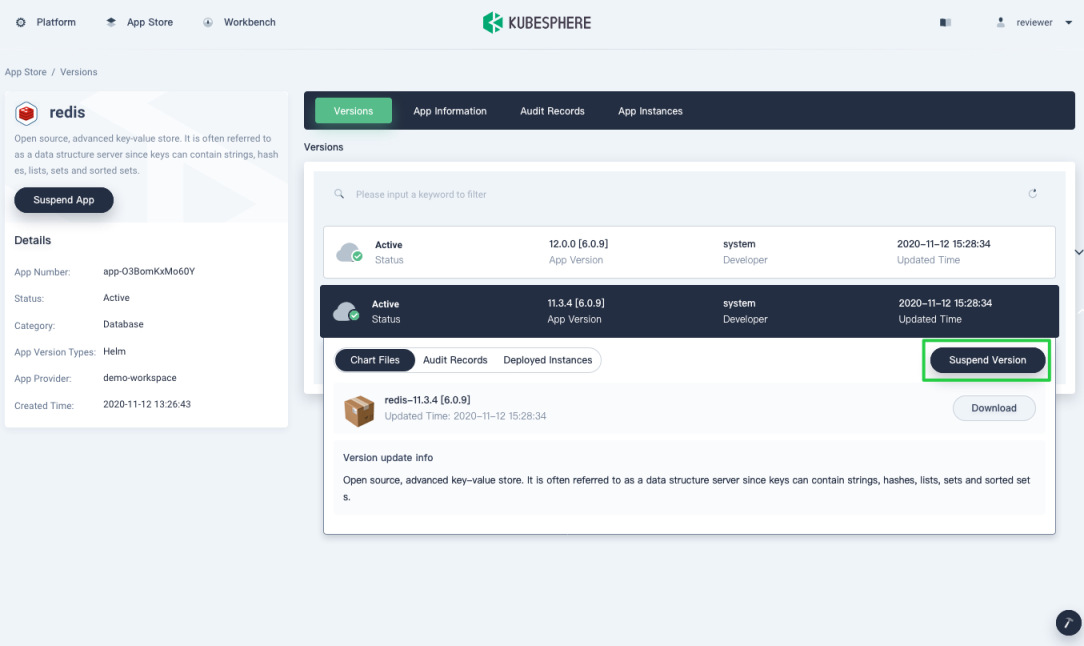
Note
After an app version is suspended, this version is not available in the App Store. Suspending an app version does not affect tenants who are using this version. -
To make the app version available in the App Store again, click Activate Version.
 Previous

What’s on this Page