


You are viewing documentation for KubeSphere version:v3.0.0
KubeSphere v3.0.0 documentation is no longer actively maintained. The version you are currently viewing is a static snapshot. For up-to-date documentation, see the latest version.


Create a Microservices-based App
With each microservice handling a single part of the app’s functionality, an app can be divided into different components. These components have their own responsibilities and limitations, independent from each other. In KubeSphere, this kind of app is called Composing App, which can be built through newly created Services or existing Services.
This tutorial demonstrates how to create a microservices-based app Bookinfo, which is composed of four Services, and set a customized domain name to access the app.
Prerequisites
- You need to create a workspace, a project, and a user account (
project-regular) for this tutorial. The account needs to be invited to the project with theoperatorrole. For more information, see Create Workspaces, Projects, Accounts and Roles. project-adminneeds to set the project gateway so thatproject-regularcan define a domain name when creating the app.
Create Microservices that Compose an App
-
Log in to the web console of KubeSphere and navigate to Applications in Application Workloads of your project. In the Composing App tab, click Create Composing Application.
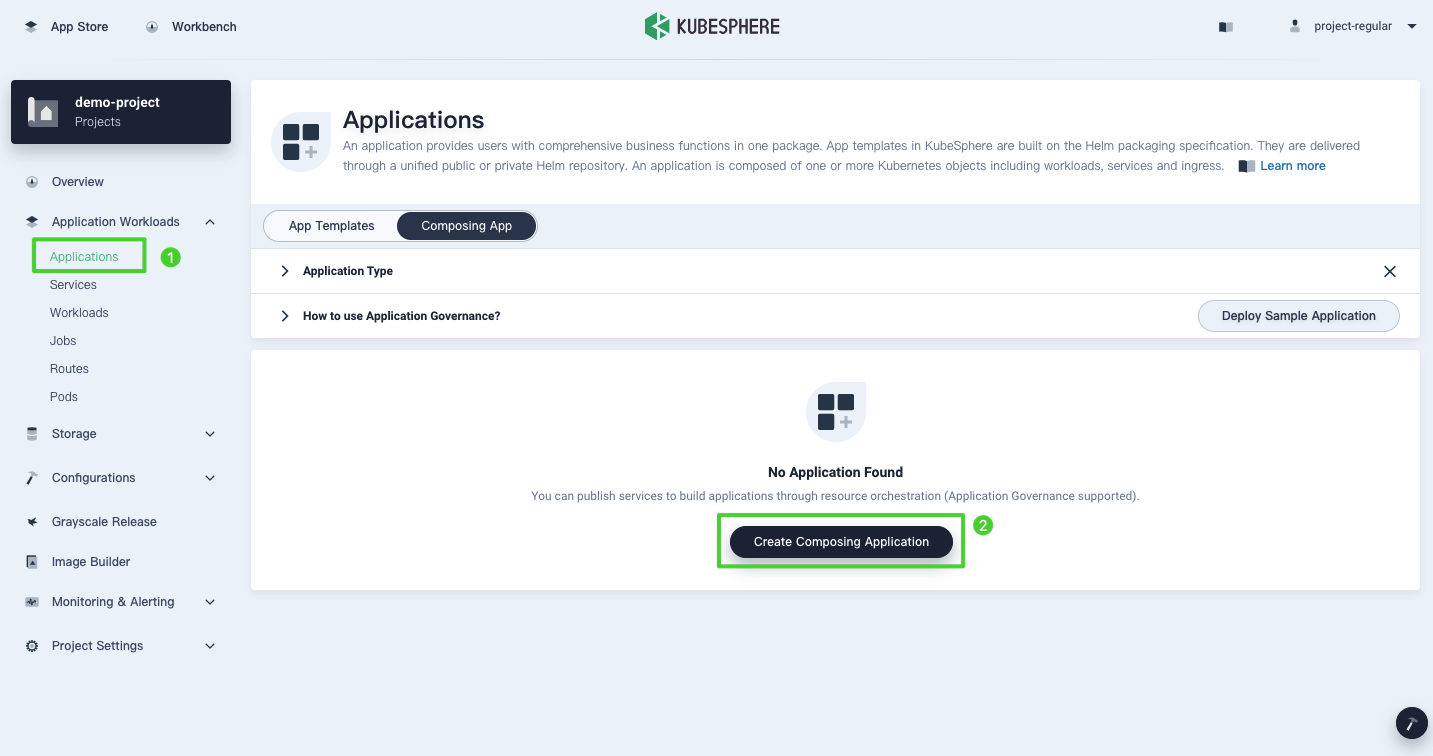
-
Set a name for the app (for example,
bookinfo) and click Next. -
On the Components page, you need to create microservices that compose the app. Click Add Service and select Stateless Service.
-
Set a name for the Service (e.g
productpage) and click Next.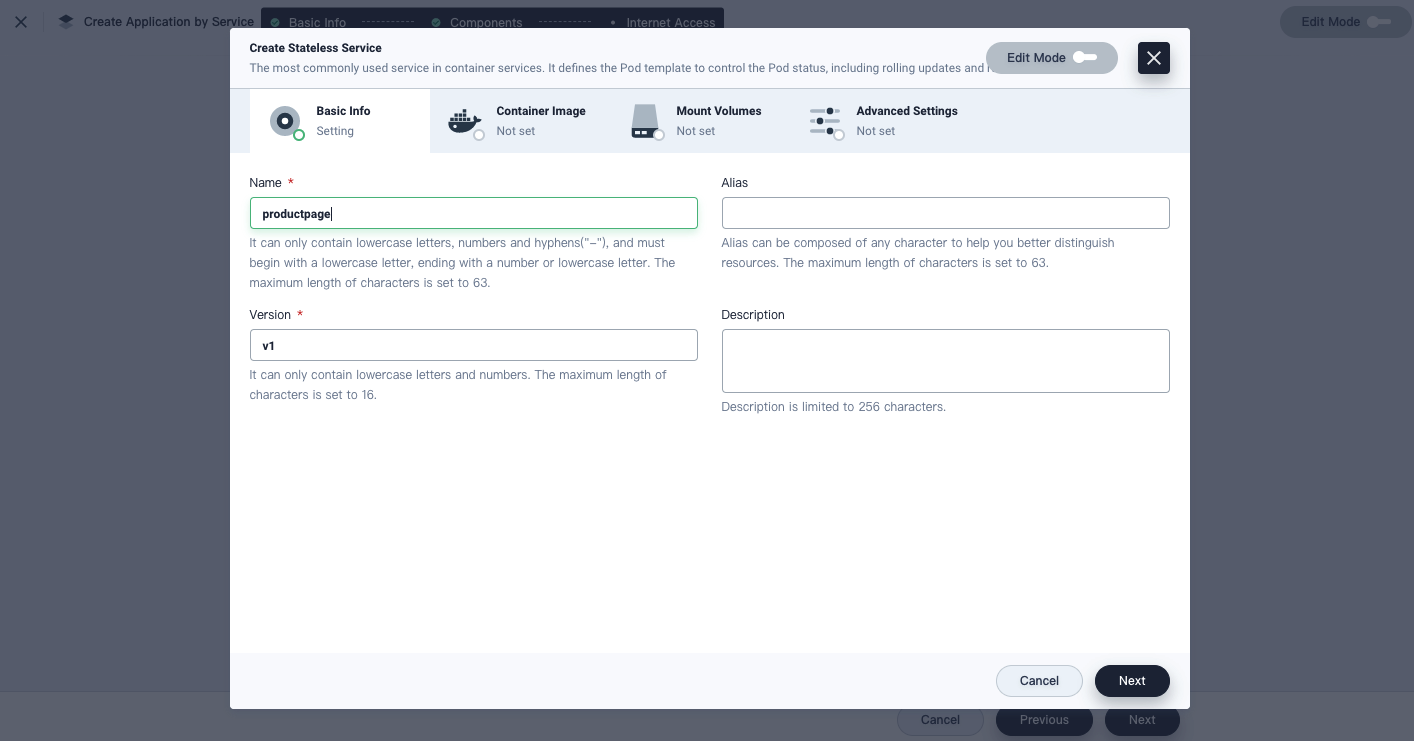
Note
You can create a Service on the dashboard directly or enable Edit Mode in the top right corner to edit the YAML file. -
Click Add Container Image under Container Image and input
kubesphere/examples-bookinfo-productpage-v1:1.13.0in the search bar to use the Docker Hub image.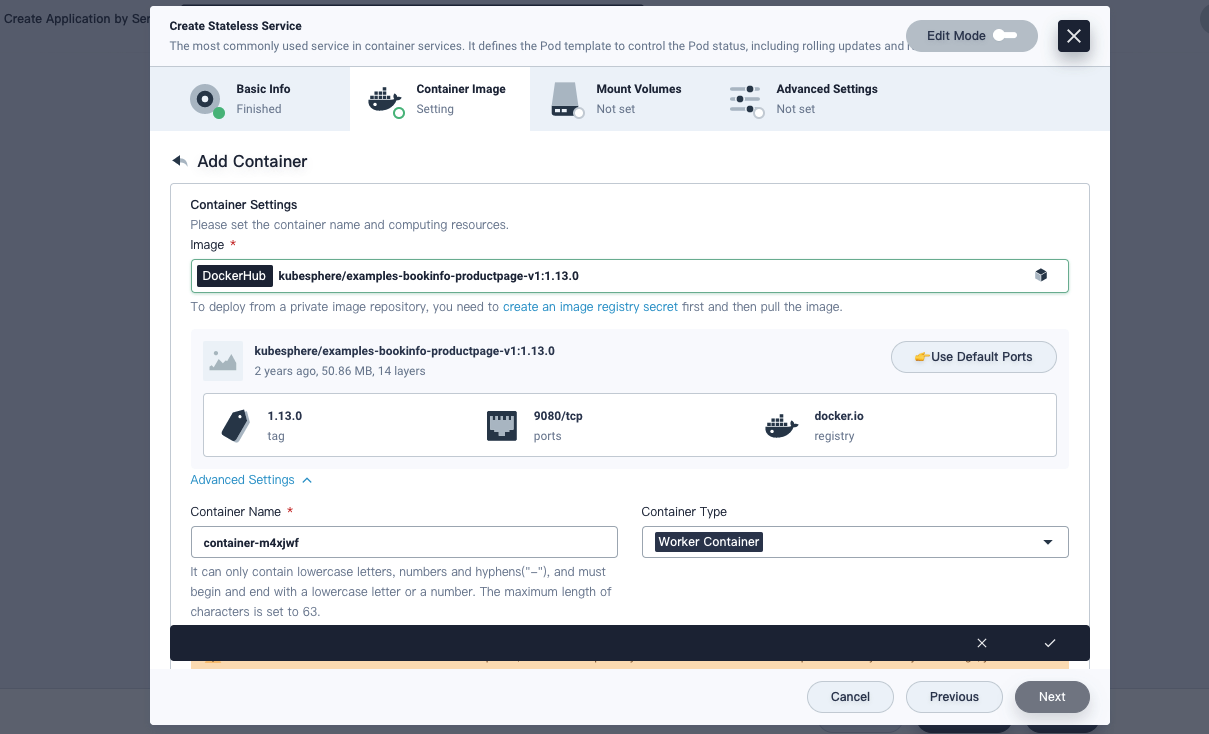
Note
You must press Enter in your keyboard after you input the image name. -
Click Use Default Ports. For more information about image settings, see Container Image Settings. Click √ in the bottom right corner and Next to continue.
-
On the Mount Volumes page, add a volume or click Next to continue.
-
Click Add on the Advanced Settings page directly.
-
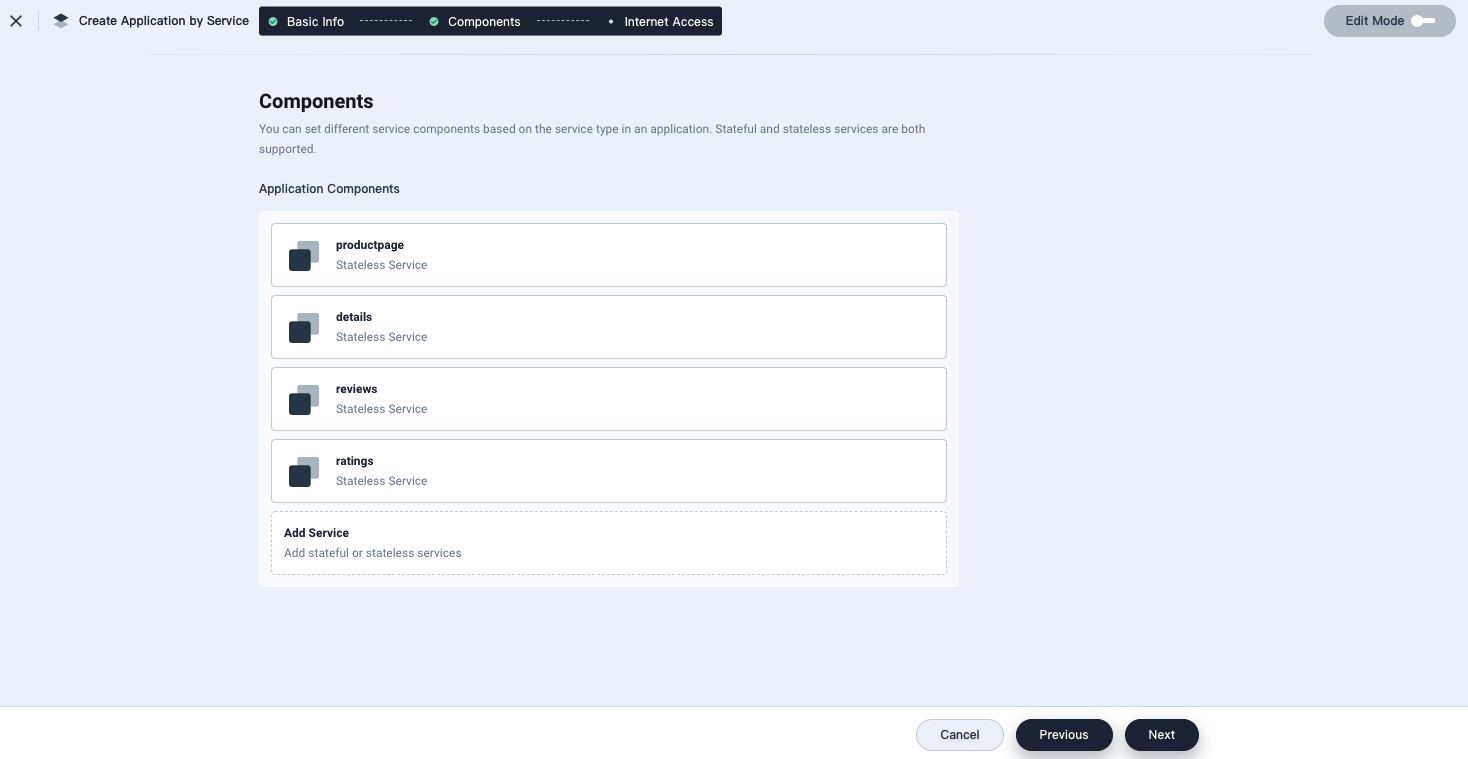
Similarly, add the other three microservices for the app. Here is the image information:
Service Name Image Stateless detailskubesphere/examples-bookinfo-details-v1:1.13.0Stateless reviewskubesphere/examples-bookinfo-reviews-v1:1.13.0Stateless ratingskubesphere/examples-bookinfo-ratings-v1:1.13.0 -
When you finish adding microservices, click Next.
-
On the Internet Access page, click Add Route Rule. In the Specify Domain tab, set a domain name for your app (for example,
demo.bookinfo) and selecthttpin the Protocol field. ForPaths, select the Serviceproductpageand port9080. Click OK to continue.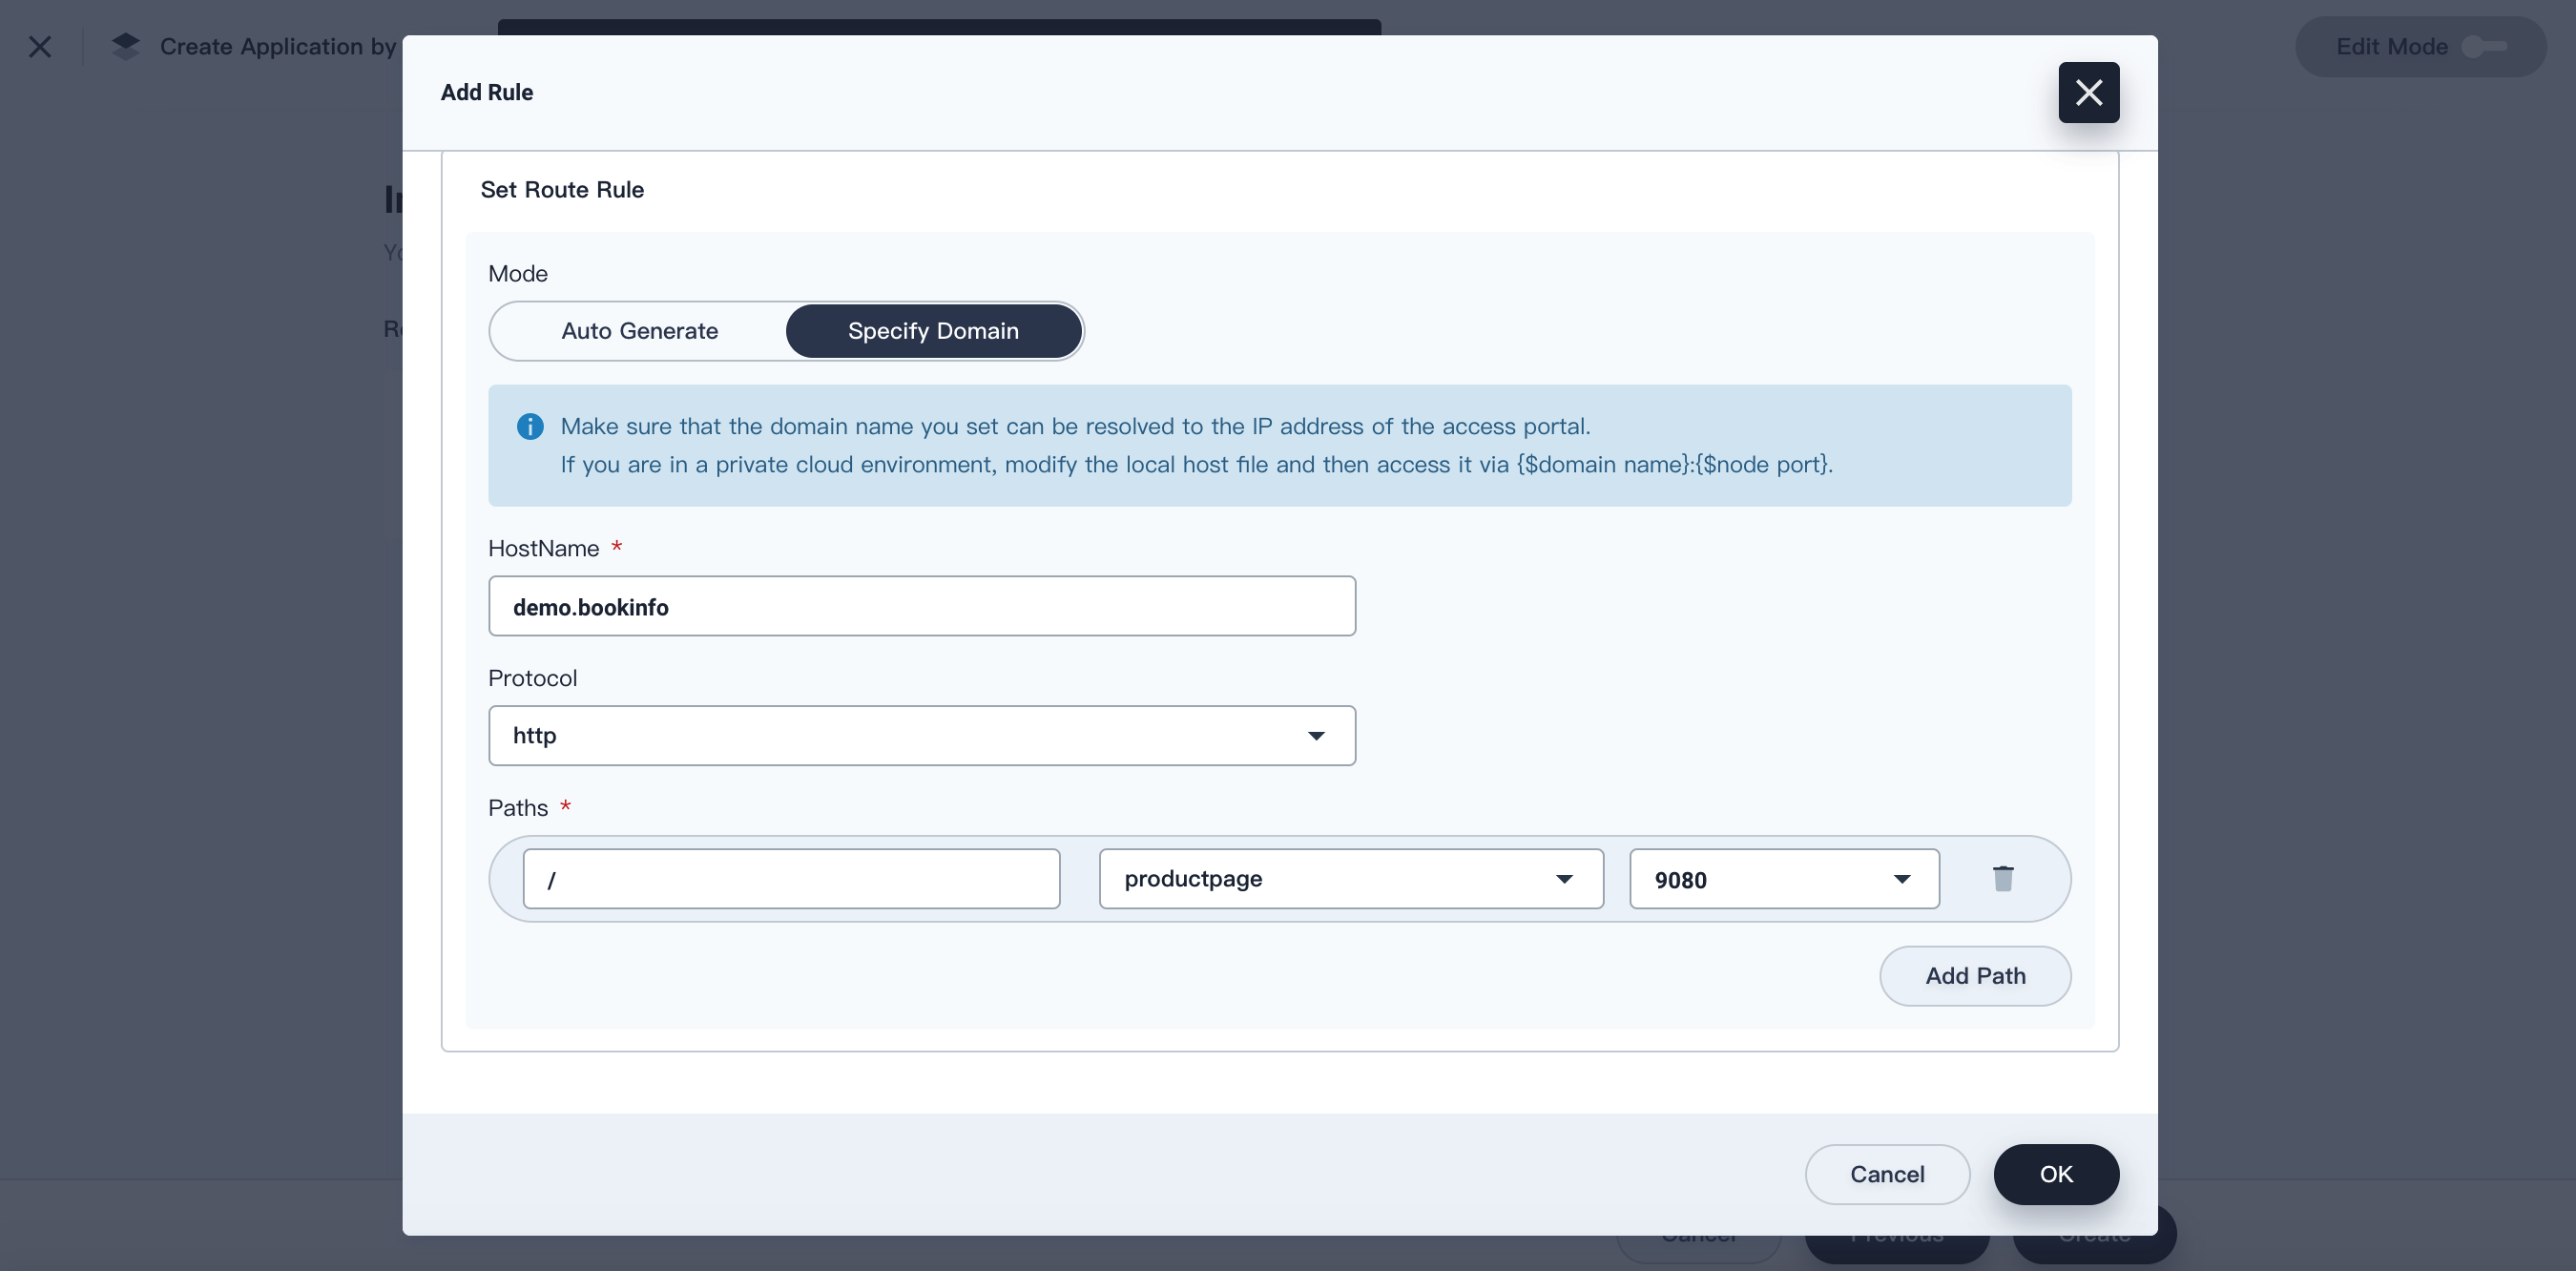
Note
The button Add Route Rule is not visible if the project gateway is not set. -
You can add more rules or click Create to finish the process.
-
Wait for your app to reach the Ready status.

Access the App
-
As you set a domain name for the app, you need to add an entry in the hosts (
/etc/hosts) file. For example, add the IP address and hostname as below:192.168.0.9 demo.bookinfoNote
You must add your own IP address and hostname. -
In Composing App, click the app you just created.
-
In Application Components, click Click to visit to access the app.
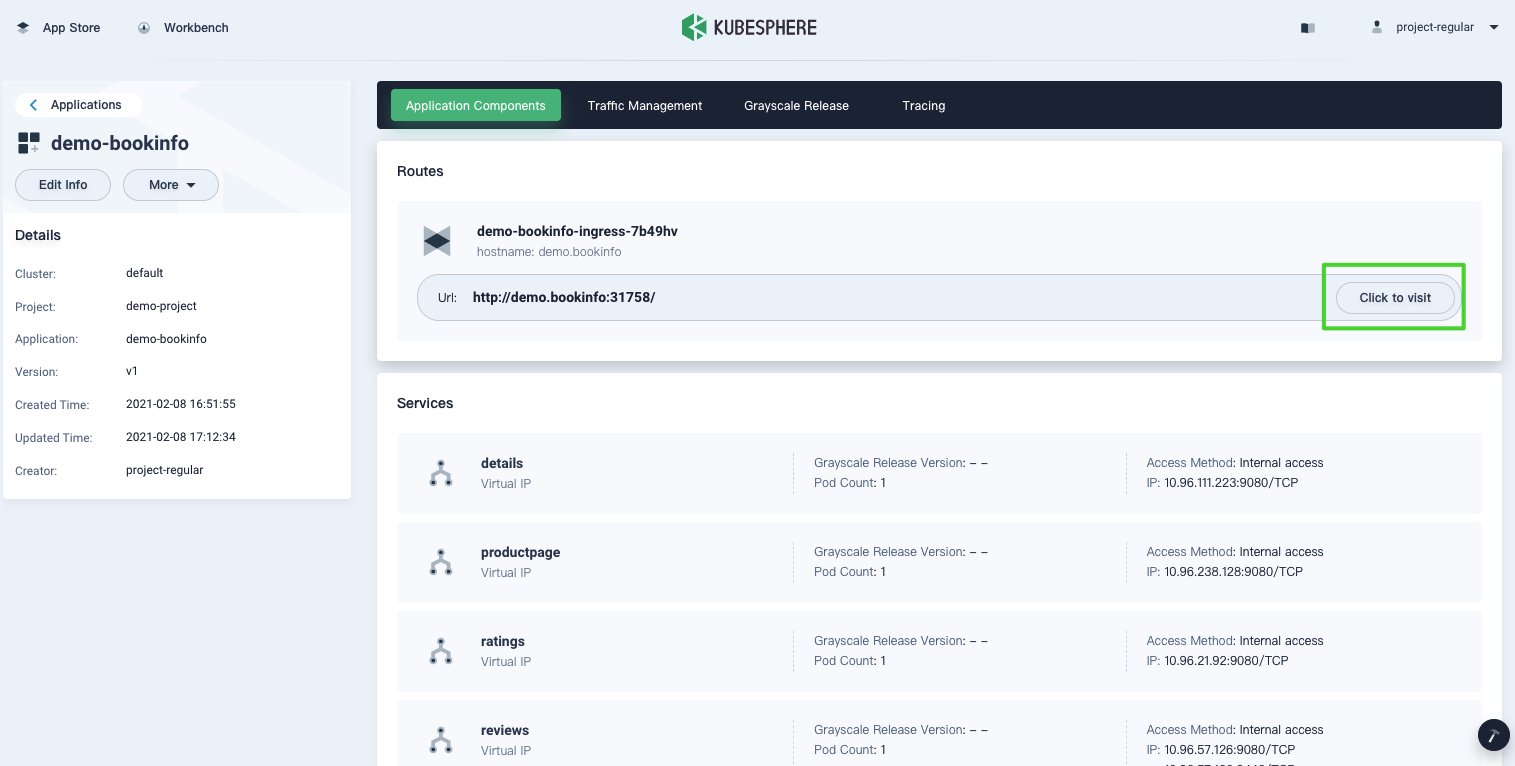
Note
Make sure you open the port in your security group. -
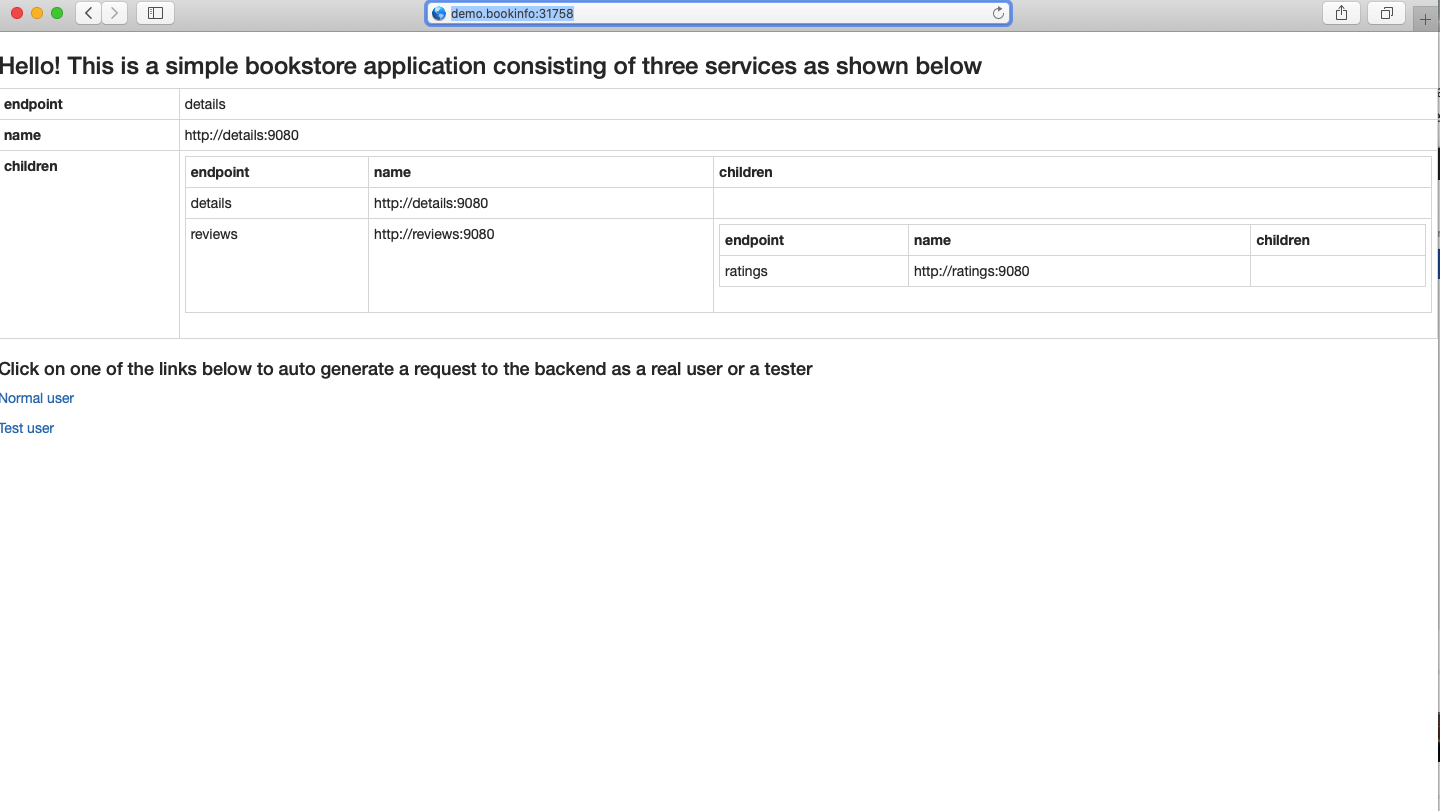
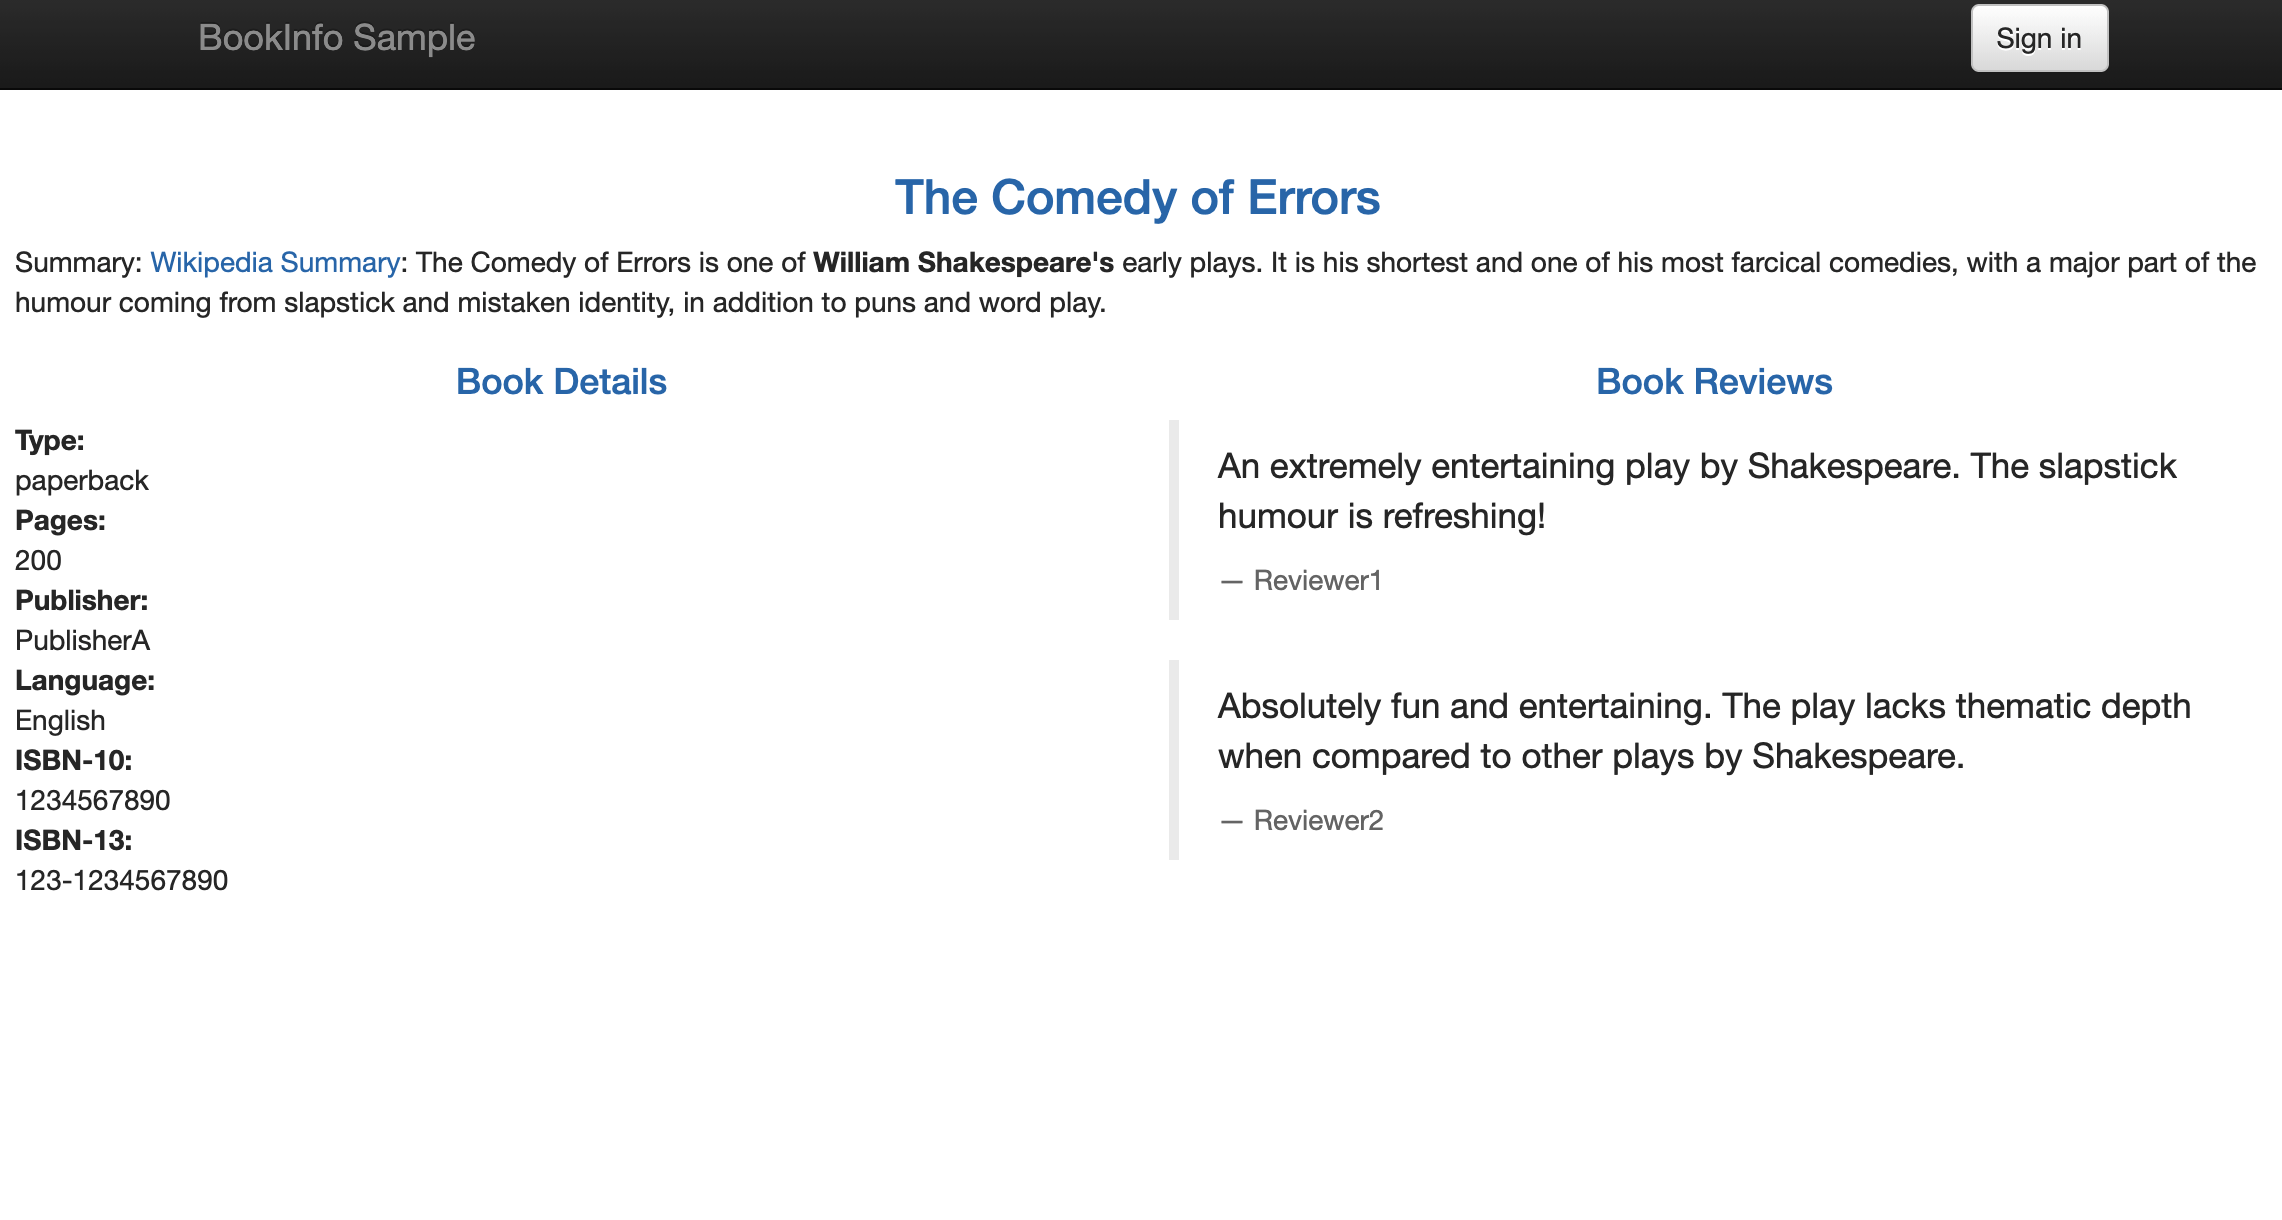
Click Normal user and Test user respectively to see other Services.
 Previous

What’s on this Page