


You are viewing documentation for KubeSphere version:v3.0.0
KubeSphere v3.0.0 documentation is no longer actively maintained. The version you are currently viewing is a static snapshot. For up-to-date documentation, see the latest version.


Canary Release
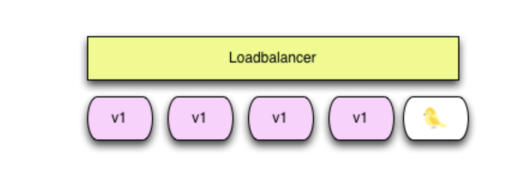
On the back of Istio, KubeSphere provides users with necessary control to deploy canary services. In a canary release, you introduce a new version of a service and test it by sending a small percentage of traffic to it. At the same time, the old version is responsible for handling the rest of the traffic. If everything goes well, you can gradually increase the traffic sent to the new version, while simultaneously phasing out the old version. In the case of any occurring issues, KubeSphere allows you to roll back to the previous version as you change the traffic percentage.
This method serves as an efficient way to test performance and reliability of a service. It can help detect potential problems in the actual environment while not affecting the overall system stability.
Prerequisites
- You need to enable KubeSphere Service Mesh.
- You need to create a workspace, a project and an account (
project-regular). The account must be invited to the project with the role ofoperator. For more information, see Create Workspaces, Projects, Accounts and Roles. - You need to enable Application Governance and have an available app so that you can implement the canary release for it. The sample app used in this tutorial is Bookinfo. For more information, see Deploy and Access Bookinfo.
Step 1: Create a Canary Release Job
-
Log in to KubeSphere as
project-regular. Under Categories, click Create Job on the right of Canary Release.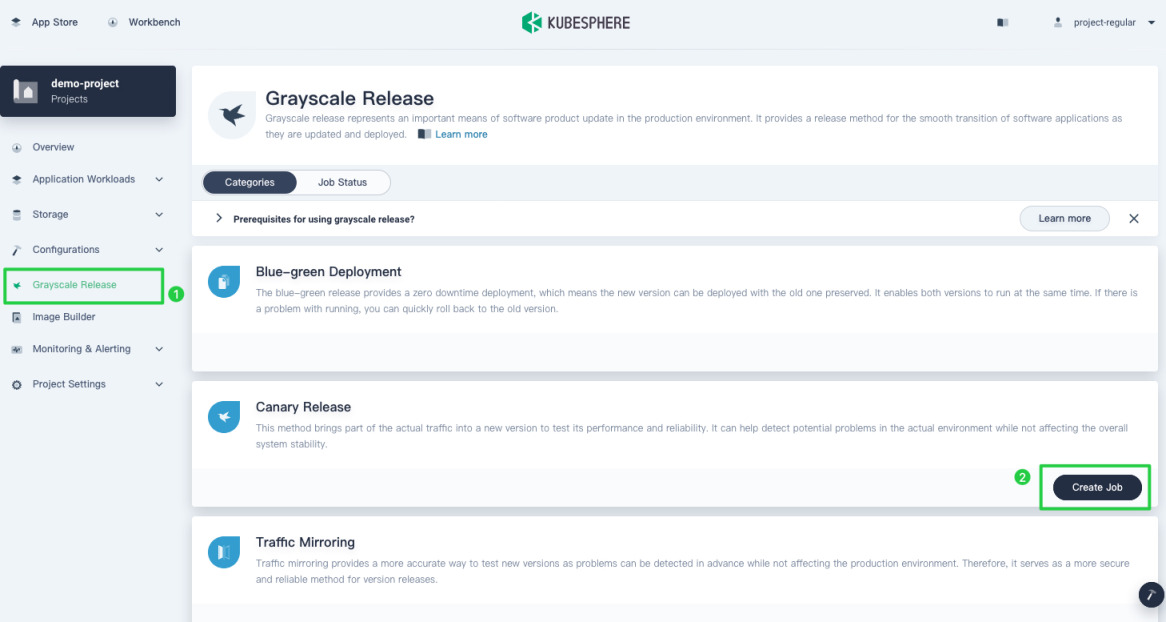
-
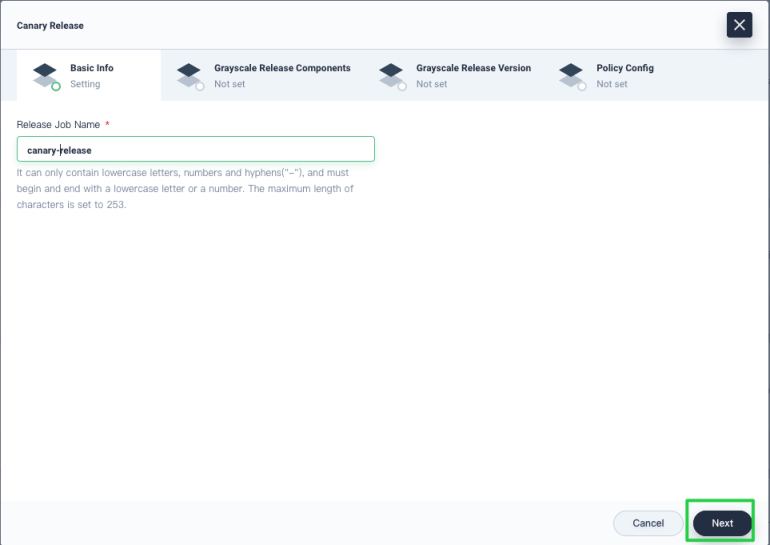
Set a name for it and click Next.
-
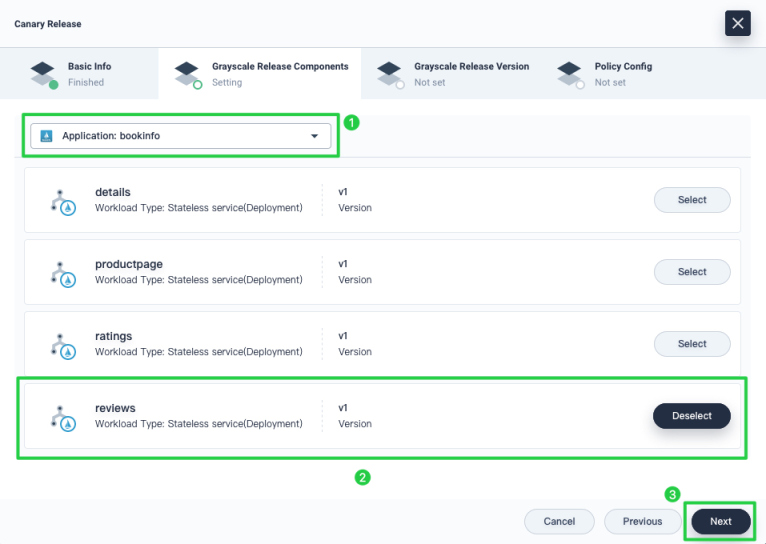
Select your app from the drop-down list and the Service for which you want to implement the canary release. If you also use the sample app Bookinfo, select reviews and click Next.
-
On the Grayscale Release Version tab, add another version of it (e.g
kubesphere/examples-bookinfo-reviews-v2:1.13.0; changev1tov2) as shown in the image below and click Next: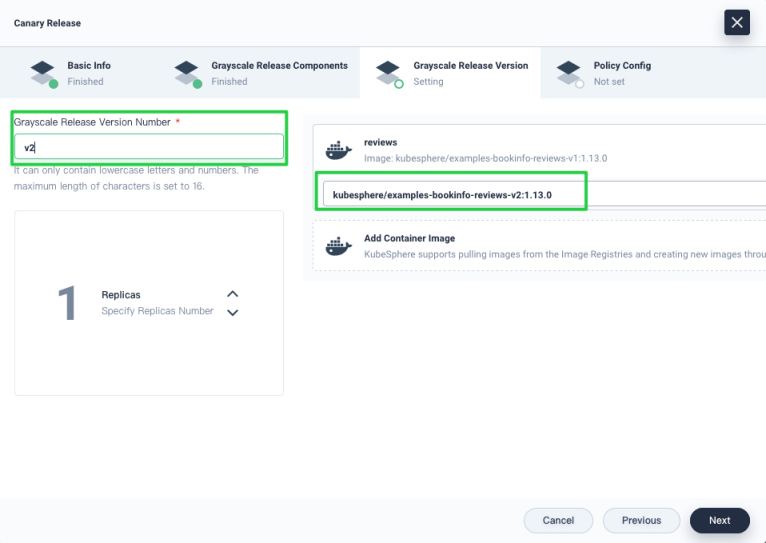
Note
The image version isv2in the screenshot. -
You send traffic to these two versions (
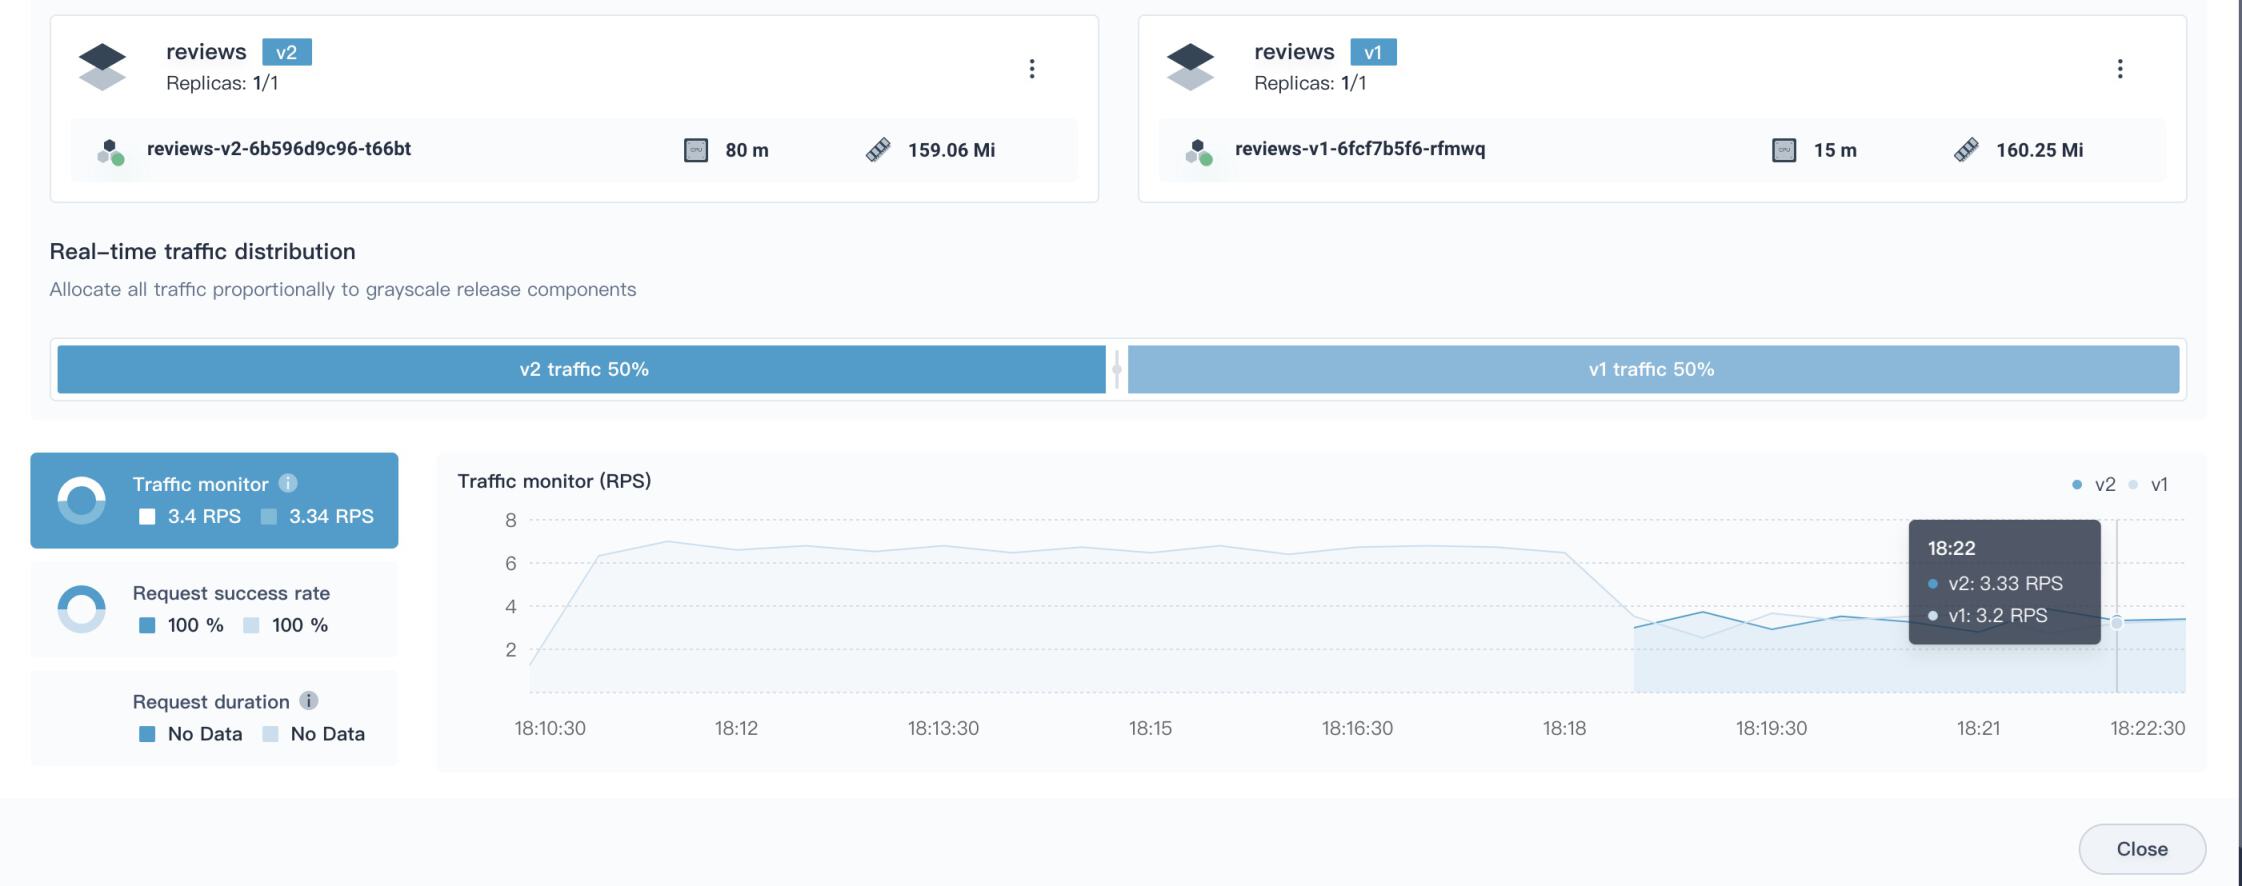
v1andv2) either by a specific percentage or by the request content such asHttp Header,CookieandURI. Select Forward by traffic ratio and drag the icon in the middle to change the percentage of traffic sent to these two versions respectively (for example, set 50% for either one). When you finish, click Create.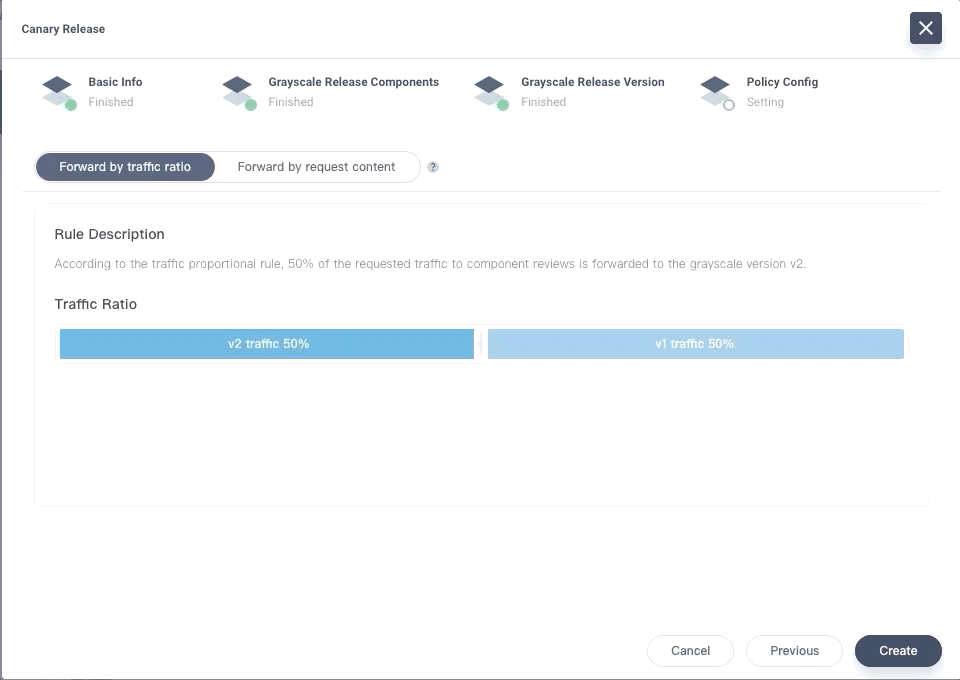
Step 2: Verify the Canary Release
Now that you have two available app versions, access the app to verify the canary release.
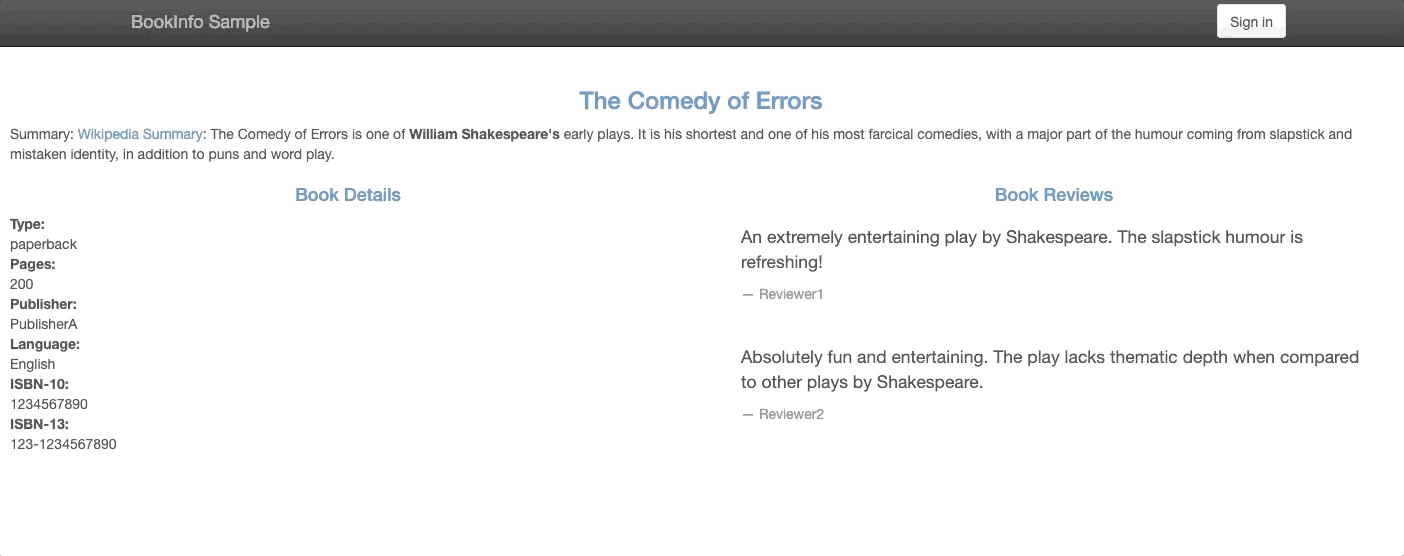
-
Visit the Bookinfo website and refresh your browser repeatedly. You will be able to see the Book Reviews section switching between v1 and v2 at a rate of 50%.
-
The canary release job created displays under the tab Job Status. Click it to view details.
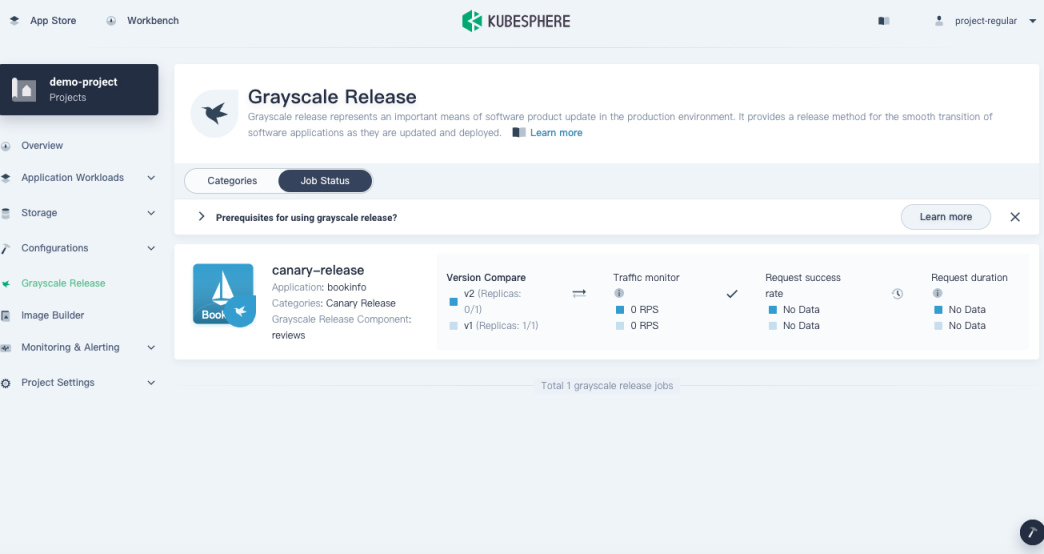
-
You can see half of the traffic goes to each of them:
-
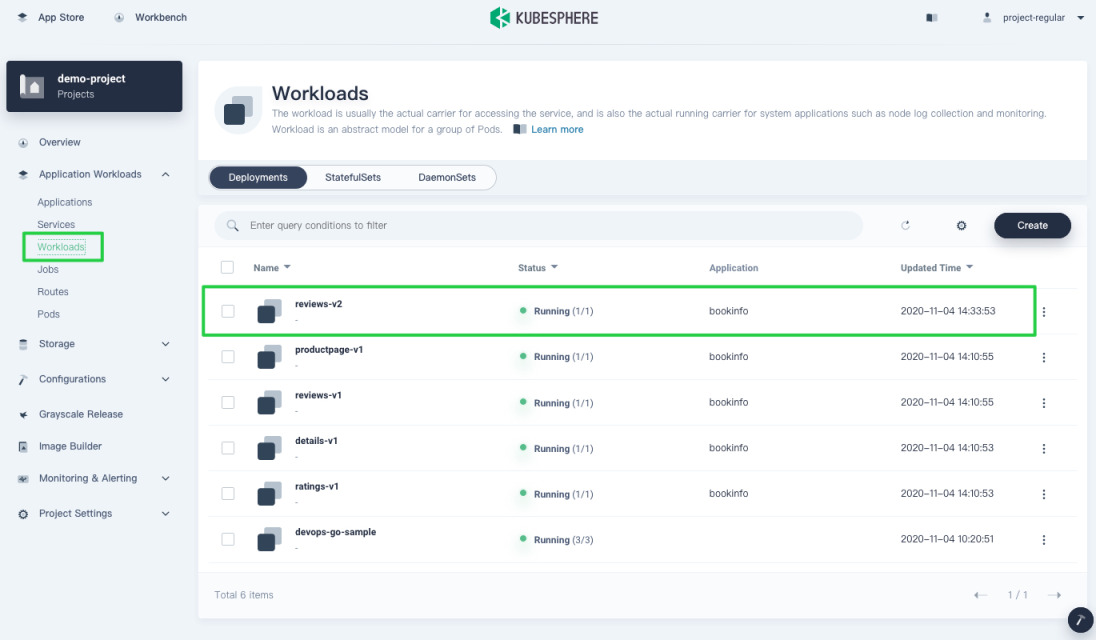
The new Deployment is created as well.
-
You can directly get the virtual Service to identify the weight by executing the following command:
kubectl -n demo-project get virtualservice -o yamlNote
- When you execute the command above, replace
demo-projectwith your own project (i.e. namespace) name. - If you want to execute the command from the web kubectl on the KubeSphere console, you need to use the account
admin.
- When you execute the command above, replace
-
Expected output:
...
spec:
  hosts:
  - reviews
  http:
  - route:
    - destination:
        host: reviews
        port:
          number: 9080
        subset: v1
      weight: 50
    - destination:
        host: reviews
        port:
          number: 9080
        subset: v2
      weight: 50
      ...
Step 3: View Network Topology
-
Execute the following command on the machine where KubeSphere runs to bring in real traffic to simulate the access to Bookinfo every 0.5 seconds.
watch -n 0.5 "curl http://productpage.demo-project.192.168.0.2.nip.io:32277/productpage?u=normal"Note
Make sure you replace the hostname and port number in the above command with your own. -
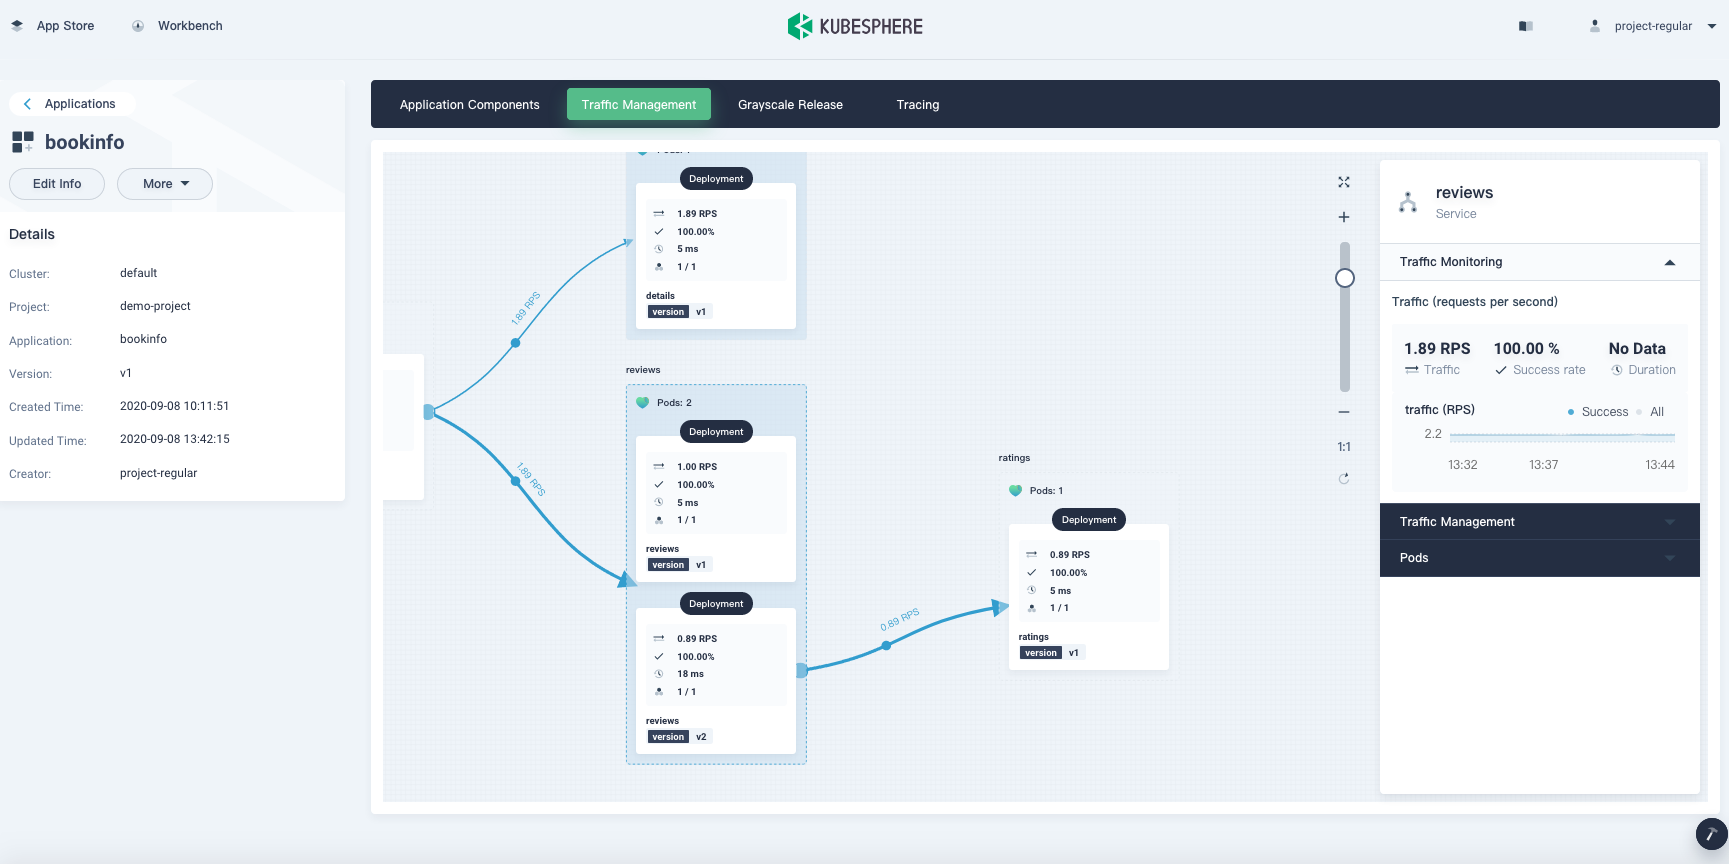
In Traffic Management, you can see communications, dependency, health and performance among different microservices.
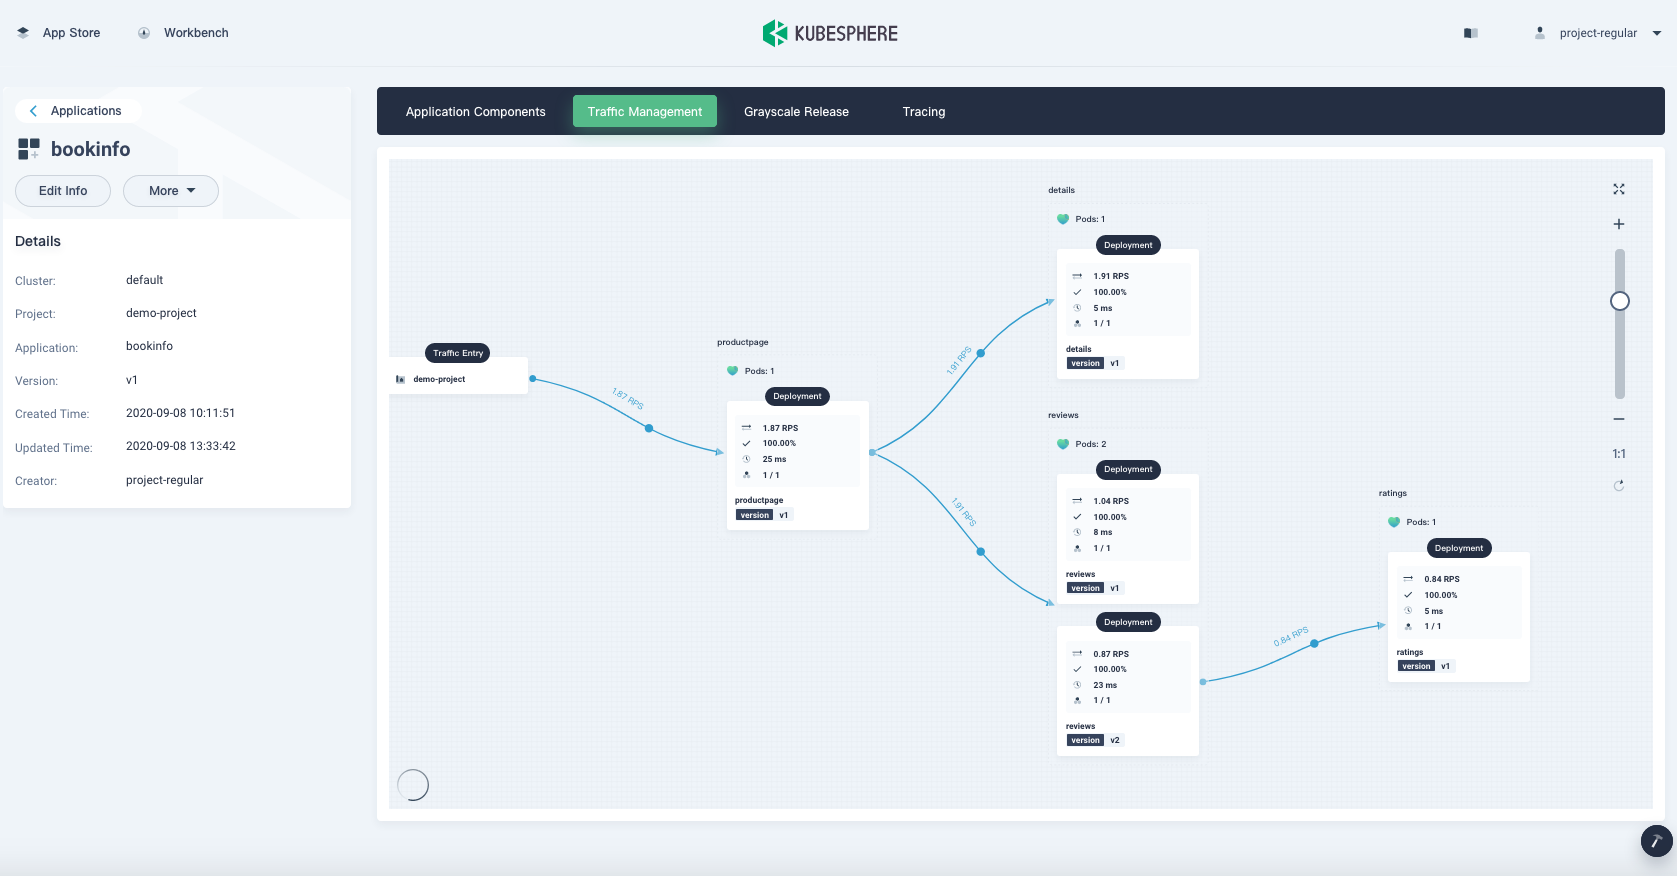
-
Click a component (for example, reviews) and you can see the information of traffic monitoring on the right, displaying real-time data of Traffic, Success rate and Duration.
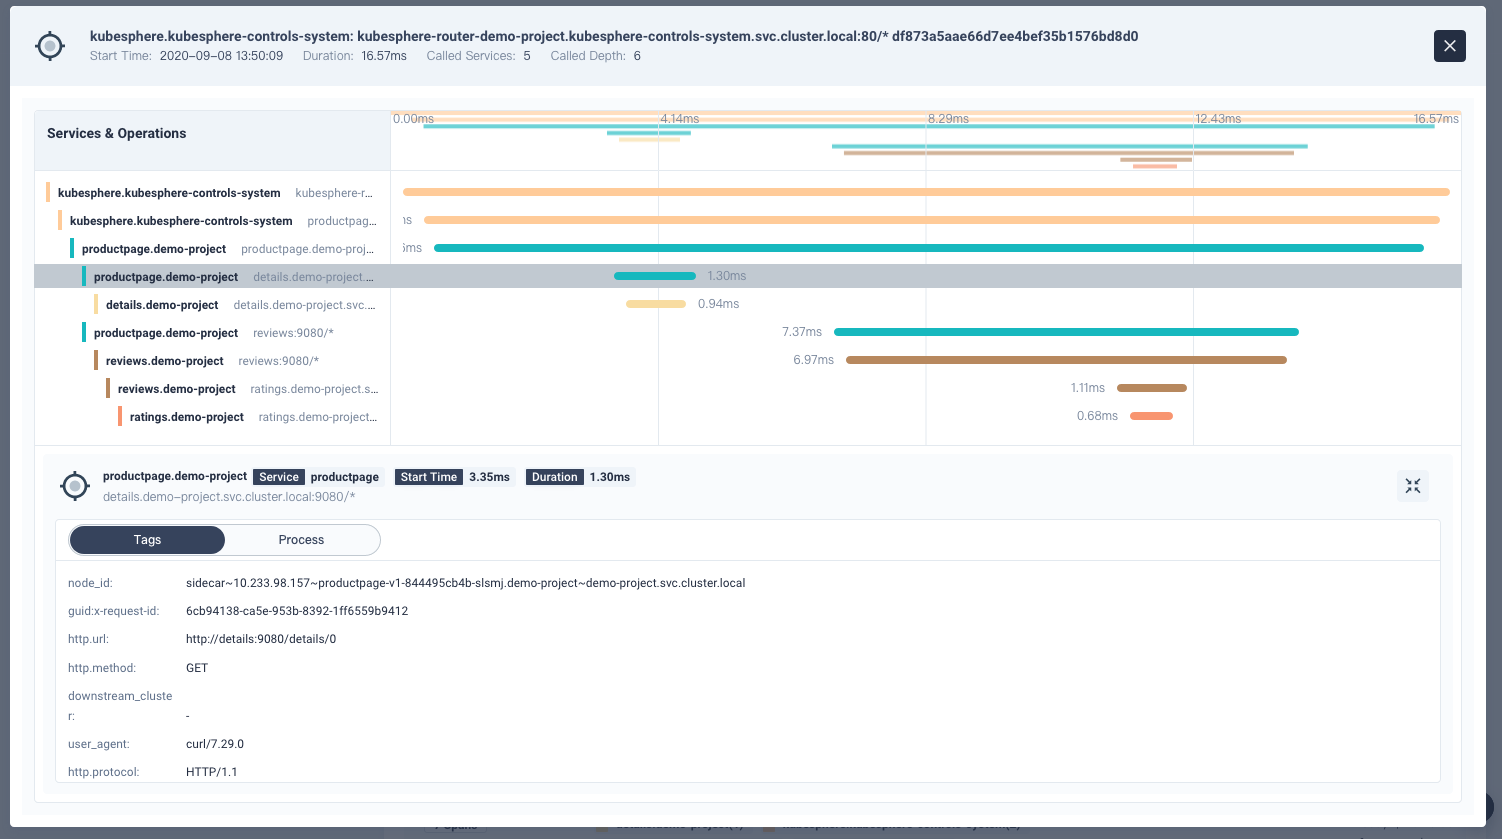
Step 4: View Tracing Details
KubeSphere provides the distributed tracing feature based on Jaeger, which is used to monitor and troubleshoot microservices-based distributed applications.
-
On the Tracing tab, you can clearly see all phases and internal calls of requests, as well as the period in each phase.
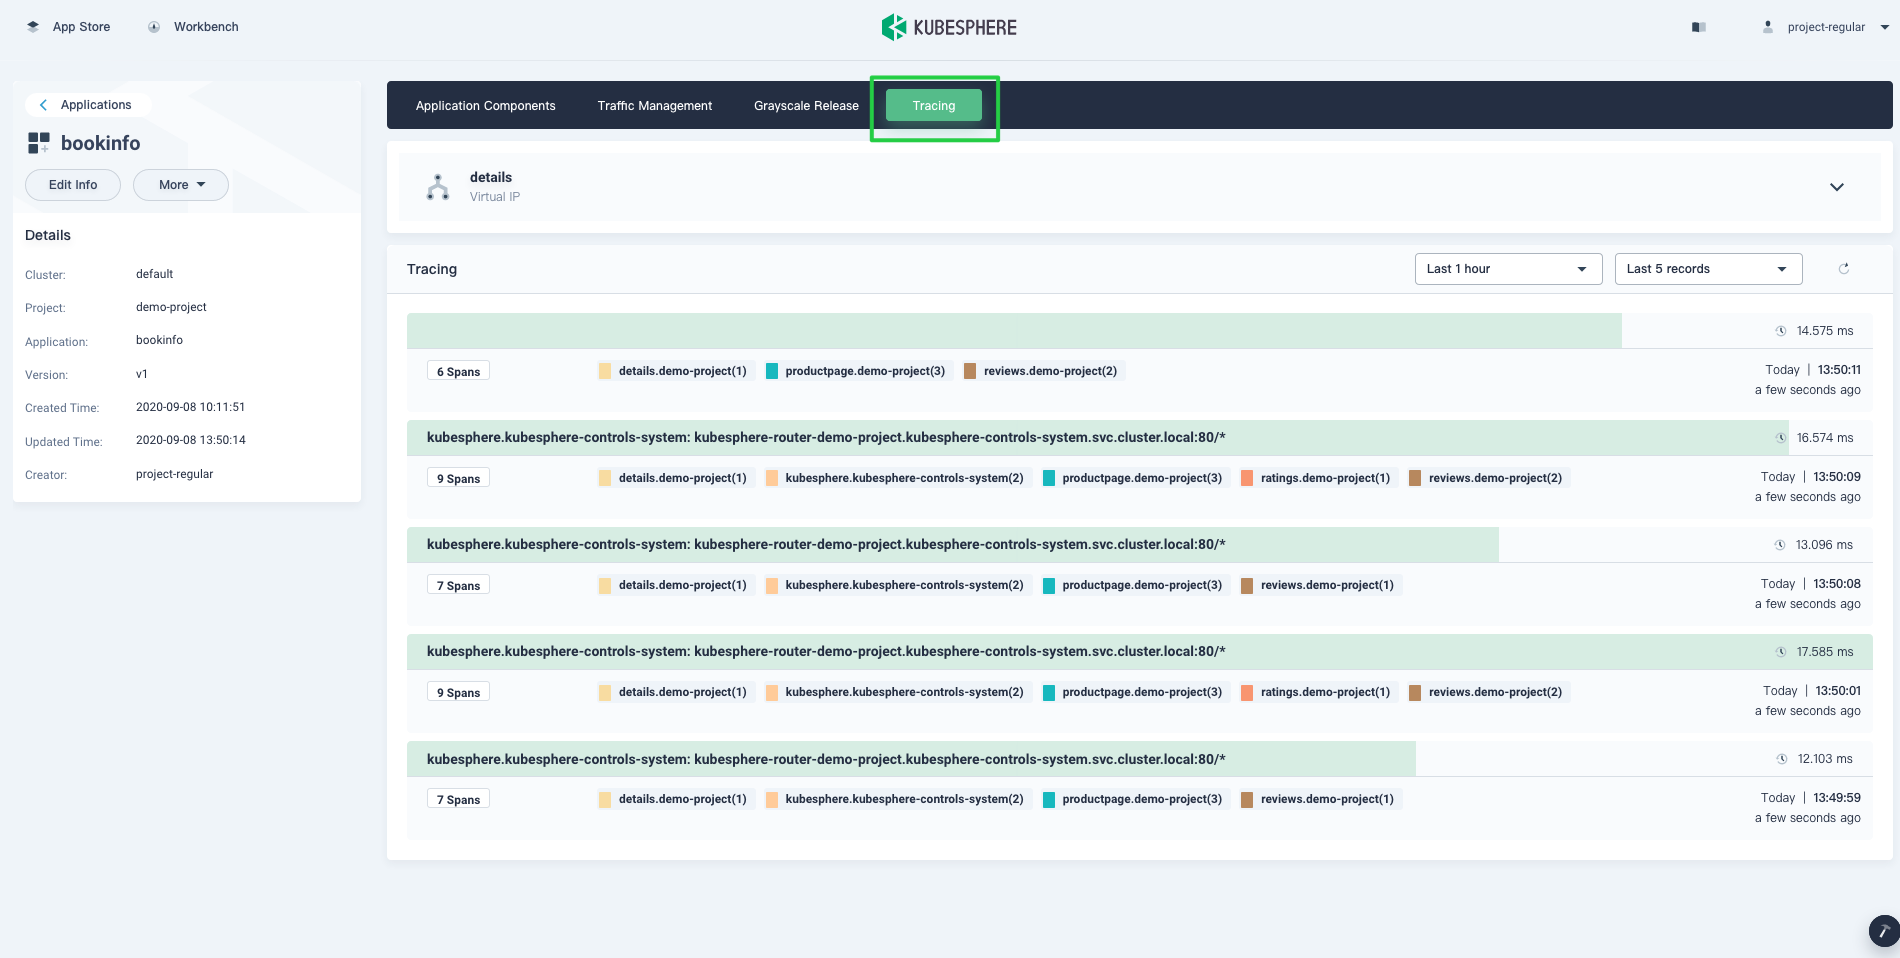
-
Click any item, and you can even drill down to see request details and where this request is being processed (which machine or container).
Step 5: Take Over All Traffic
If everything runs smoothly, you can bring all the traffic to the new version.
-
In Grayscale Release, click the canary release job.
-
In the dialog that appears, click the three dots of reviews v2 and select Take Over. It means 100% of the traffic will be sent to the new version (v2).
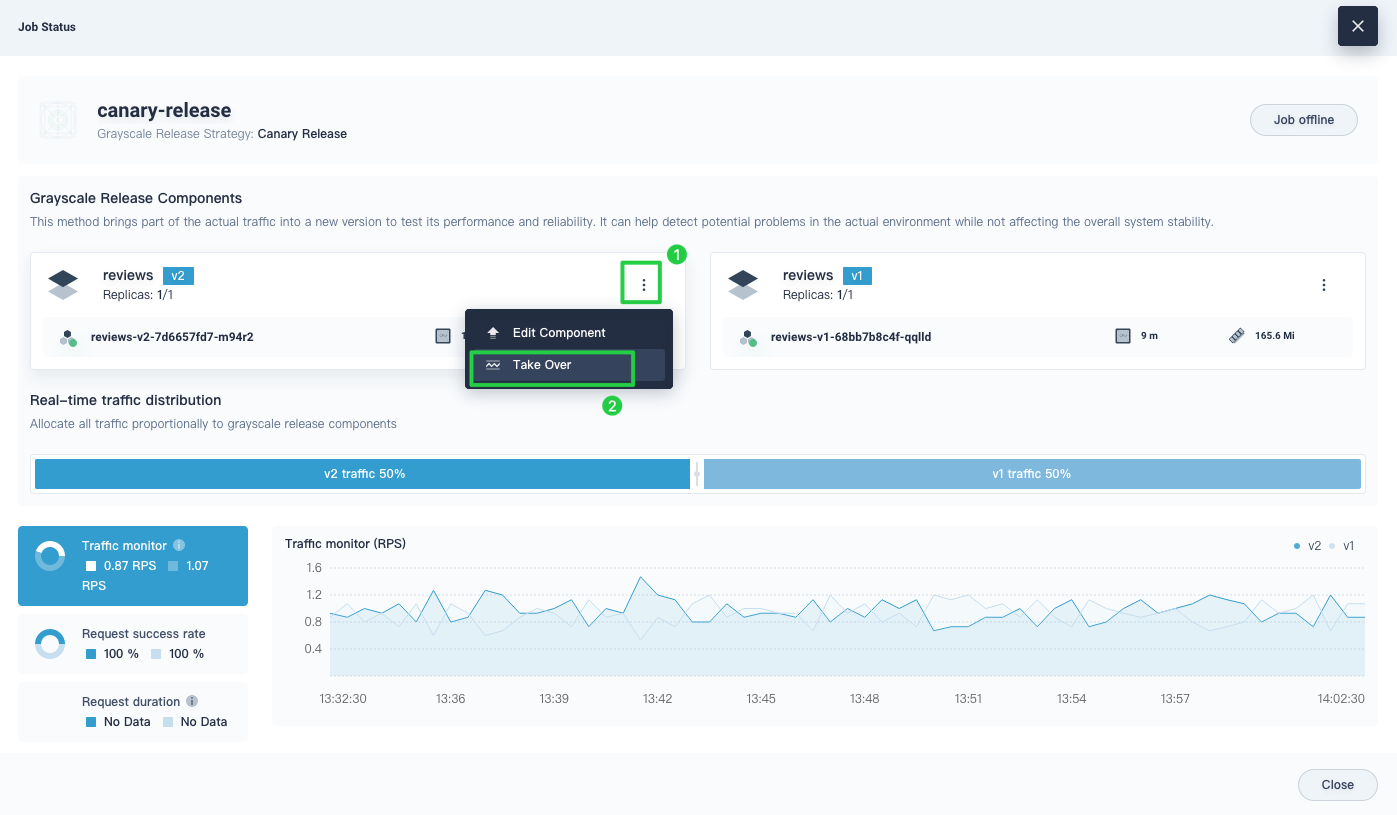
Note
If anything goes wrong with the new version, you can roll back to the previous version v1 anytime. -
Access Bookinfo again and refresh the browser several times. You can find that it only shows the result of reviews v2 (i.e. ratings with black stars).

 Previous

What’s on this Page