


您正在查看 KubeSphere 版本的文档:v3.0.0
KubeSphere v3.0.0 版本的文档已不再维护。您现在看到的版本来自于一份静态的快照。如需查阅最新文档,请点击 最新版本。


安装 NFS Client
本教程演示了如何搭建 KubeSphere 集群并配置 NFS 存储。
备注
本教程以 Ubuntu 16.04 为例。
准备工作
您必须准备好提供外部存储服务的 NFS 服务器。请确保已在客户端机器允许访问的 NFS 服务器上创建并导出目录。有关更多信息,请参见搭建 NFS 服务器。
步骤 1:配置客户端机器
请在所有客户端上安装 nfs-common,它提供必要的 NFS 功能,而无需安装其他服务器组件。
-
执行以下命令确保使用最新软件包。
sudo apt-get update -
在所有客户端上安装
nfs-common。sudo apt-get install nfs-common -
访问稍后想要下载 KubeKey 到其上的一台客户端机器(任务机)。创建一个配置文件,其中包含 NFS 服务器的全部必要参数,KubeKey 将在安装过程中引用该文件。
vi nfs-client.yaml示例配置文件:
nfs:
  server: "192.168.0.2"    # This is the server IP address. Replace it with your own.
  path: "/mnt/demo"    # Replace the exported directory with your own.
storageClass:
  defaultClass: false
备注
- 如果想要配置更多的值,请参见 NFS-client Chart 配置。
storageClass.defaultClass字段决定是否将 NFS-client Provisioner 的存储类型设置为默认存储类型。如果您输入false,KubeKey 将安装 OpenEBS 来提供本地存储卷,您在集群上创建工作负载时,不会动态供应本地存储卷。安装 KubeSphere 之后,您可以直接在控制台上更改默认存储类型。
-
保存文件。
步骤 2:下载 KubeKey
根据以下步骤在任务机上下载 KubeKey。
从 GitHub Release Page 下载 KubeKey 或者直接运行以下命令。
curl -sfL https://get-kk.kubesphere.io | VERSION=v1.0.1 sh -
首先运行以下命令,确保您从正确的区域下载 KubeKey。
export KKZONE=cn
运行以下命令来下载 KubeKey:
curl -sfL https://get-kk.kubesphere.io | VERSION=v1.0.1 sh -
备注
下载 KubeKey 之后,如果您将其转移到访问 Googleapis 受限的新机器上,请务必再次运行
export KKZONE=cn,然后继续执行以下步骤。备注
通过以上命令,可以下载 KubeKey 的最新版本 (v1.0.1)。您可以更改命令中的版本号来下载特定的版本。
使 kk 可执行:
chmod +x kk
步骤 3:创建集群
-
指定您想要安装的 Kubernetes 版本和 KubeSphere 版本,例如:
./kk create config --with-kubernetes v1.17.9 --with-kubesphere v3.0.0备注
-
支持的 Kubernetes 版本:v1.15.12,v1.16.13,v1.17.9(默认),v1.18.6。
-
如果您在此步骤的命令中不添加标志
--with-kubesphere,则不会部署 KubeSphere,只能使用配置文件中的addons字段安装,或者在您后续使用./kk create cluster命令时再次添加这个标志。 -
如果您添加标志
--with-kubesphere时不指定 KubeSphere 版本,则会安装最新版本的 KubeSphere。
-
-
如果您不自定义名称,将创建默认文件
config-sample.yaml。编辑文件:vi config-sample.yaml... metadata: name: sample spec: hosts: - {name: client1, address: 192.168.0.3, internalAddress: 192.168.0.3, user: ubuntu, password: Testing123} - {name: client2, address: 192.168.0.4, internalAddress: 192.168.0.4, user: ubuntu, password: Testing123} - {name: client3, address: 192.168.0.5, internalAddress: 192.168.0.5, user: ubuntu, password: Testing123} roleGroups: etcd: - client1 master: - client1 worker: - client2 - client3 controlPlaneEndpoint: domain: lb.kubesphere.local address: "" port: "6443" kubernetes: version: v1.17.9 imageRepo: kubesphere clusterName: cluster.local network: plugin: calico kubePodsCIDR: 10.233.64.0/18 kubeServiceCIDR: 10.233.0.0/18 registry: registryMirrors: [] insecureRegistries: [] addons: - name: nfs-client namespace: kube-system sources: chart: name: nfs-client-provisioner repo: https://charts.kubesphere.io/main values: /home/ubuntu/nfs-client.yaml # Use the path of your own NFS-client configuration file. ... -
请特别注意
addons字段,您必须在该字段下提供 NFS-client 的信息。有关文件中每个参数的更多信息,请参见多节点安装。 -
保存文件,执行以下命令安装 Kubernetes 和 KubeSphere:
./kk create cluster -f config-sample.yaml -
安装完成后,可以使用以下命令检查安装日志:
kubectl logs -n kubesphere-system $(kubectl get pod -n kubesphere-system -l app=ks-install -o jsonpath='{.items[0].metadata.name}') -f预期输出:
#####################################################
###              Welcome to KubeSphere!           ###
#####################################################

Console: http://192.168.0.3:30880
Account: admin
Password: P@88w0rd

NOTES:
  1. After you log into the console, please check the
     monitoring status of service components in
     "Cluster Management". If any service is not
     ready, please wait patiently until all components
     are up and running.
  2. Please change the default password after login.

#####################################################
https://kubesphere.io             20xx-xx-xx xx:xx:xx
#####################################################
步骤 4:验证安装
您可以使用命令行或者从 KubeSphere 的 Web 控制台来验证 NFS-client 是否安装成功。
命令行
-
运行以下命令检查存储类型:
kubectl get sc预期输出:
NAME              PROVISIONER                                       RECLAIMPOLICY   VOLUMEBINDINGMODE      ALLOWVOLUMEEXPANSION   AGE
local (default)   openebs.io/local                                  Delete          WaitForFirstConsumer   false                  16m
nfs-client        cluster.local/nfs-client-nfs-client-provisioner   Delete          Immediate              true                   16m
备注
若将nfs-client设置为默认存储类型,KubeKey 则不会安装 OpenEBS。 -
运行以下命令检查 Pod 的状态。
kubectl get pod -n kube-system请注意,
nfs-client安装在命名空间kube-system中,预期输出(不包括无关 Pod):NAME READY STATUS RESTARTS AGE nfs-client-nfs-client-provisioner-6fc95f4f79-92lsh 1/1 Running 0 16m
KubeSphere 控制台
-
使用默认帐户和密码 (
admin/P@88w0rd) 通过<NodeIP>:30880登录 Web 控制台。点击左上角的平台管理,选择集群管理。 -
访问应用负载中的容器组,从下拉菜单中选择
kube-system,可以看到nfs-client的 Pod 正常运行。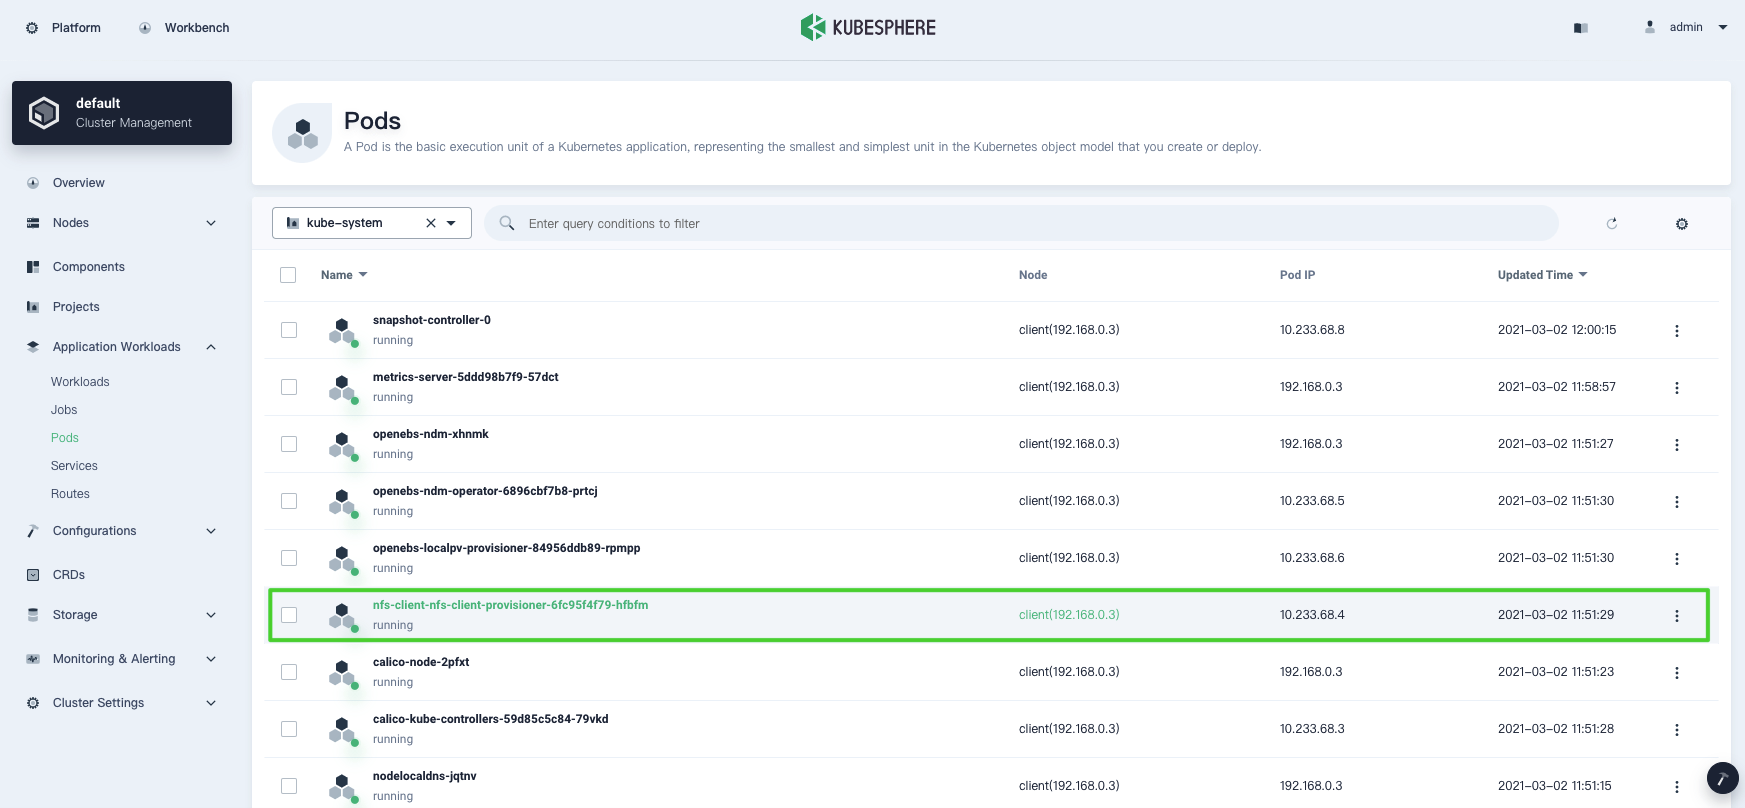
-
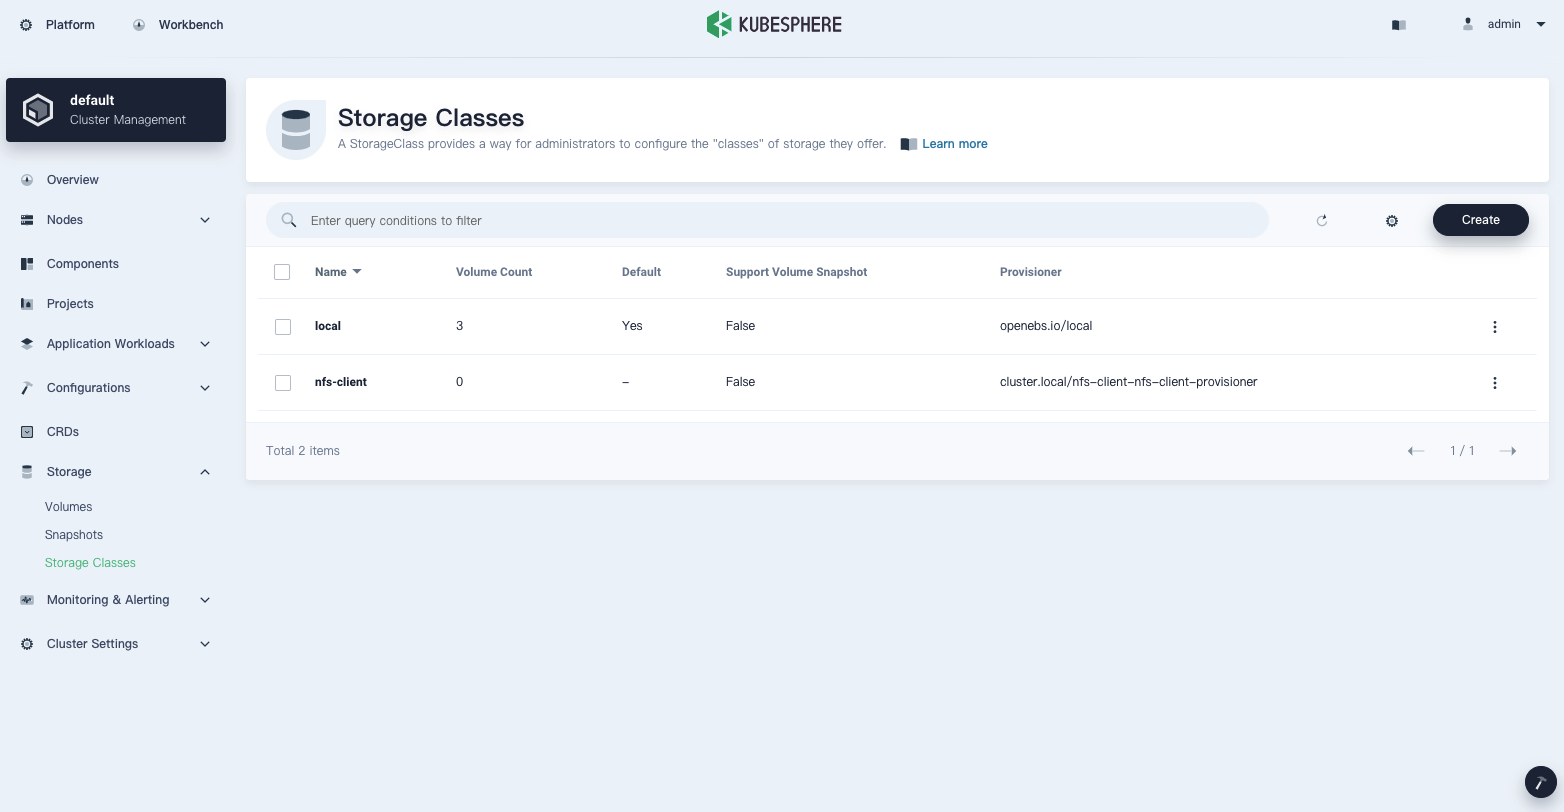
访问存储管理下的存储类型,可以看到集群中可用的存储类型。
备注
有关如何在 KubeSphere 控制台上创建存储卷的更多信息,请参见存储卷。
 上一篇
上一篇

页面内容