
You are viewing documentation for KubeSphere version:v3.0.0
KubeSphere v3.0.0 documentation is no longer actively maintained. The version you are currently viewing is a static snapshot. For up-to-date documentation, see the latest version.
Disk Log Collection
KubeSphere supports multiple log collection methods so that Ops teams can collect, manage and analyze logs in a unified and flexible way.
This tutorial demonstrates how to collect disk logs for an example app.
Prerequisites
- You need to create a workspace, a project and an account (
project-admin). The account must be invited to the project with the role ofadminat the project level. For more information, see Create Workspaces, Projects, Accounts and Roles. - You need to enable the KubeSphere Logging System.
Enable Disk Log Collection
-
Log in to the web console of KubeSphere as
project-adminand go to your project. -
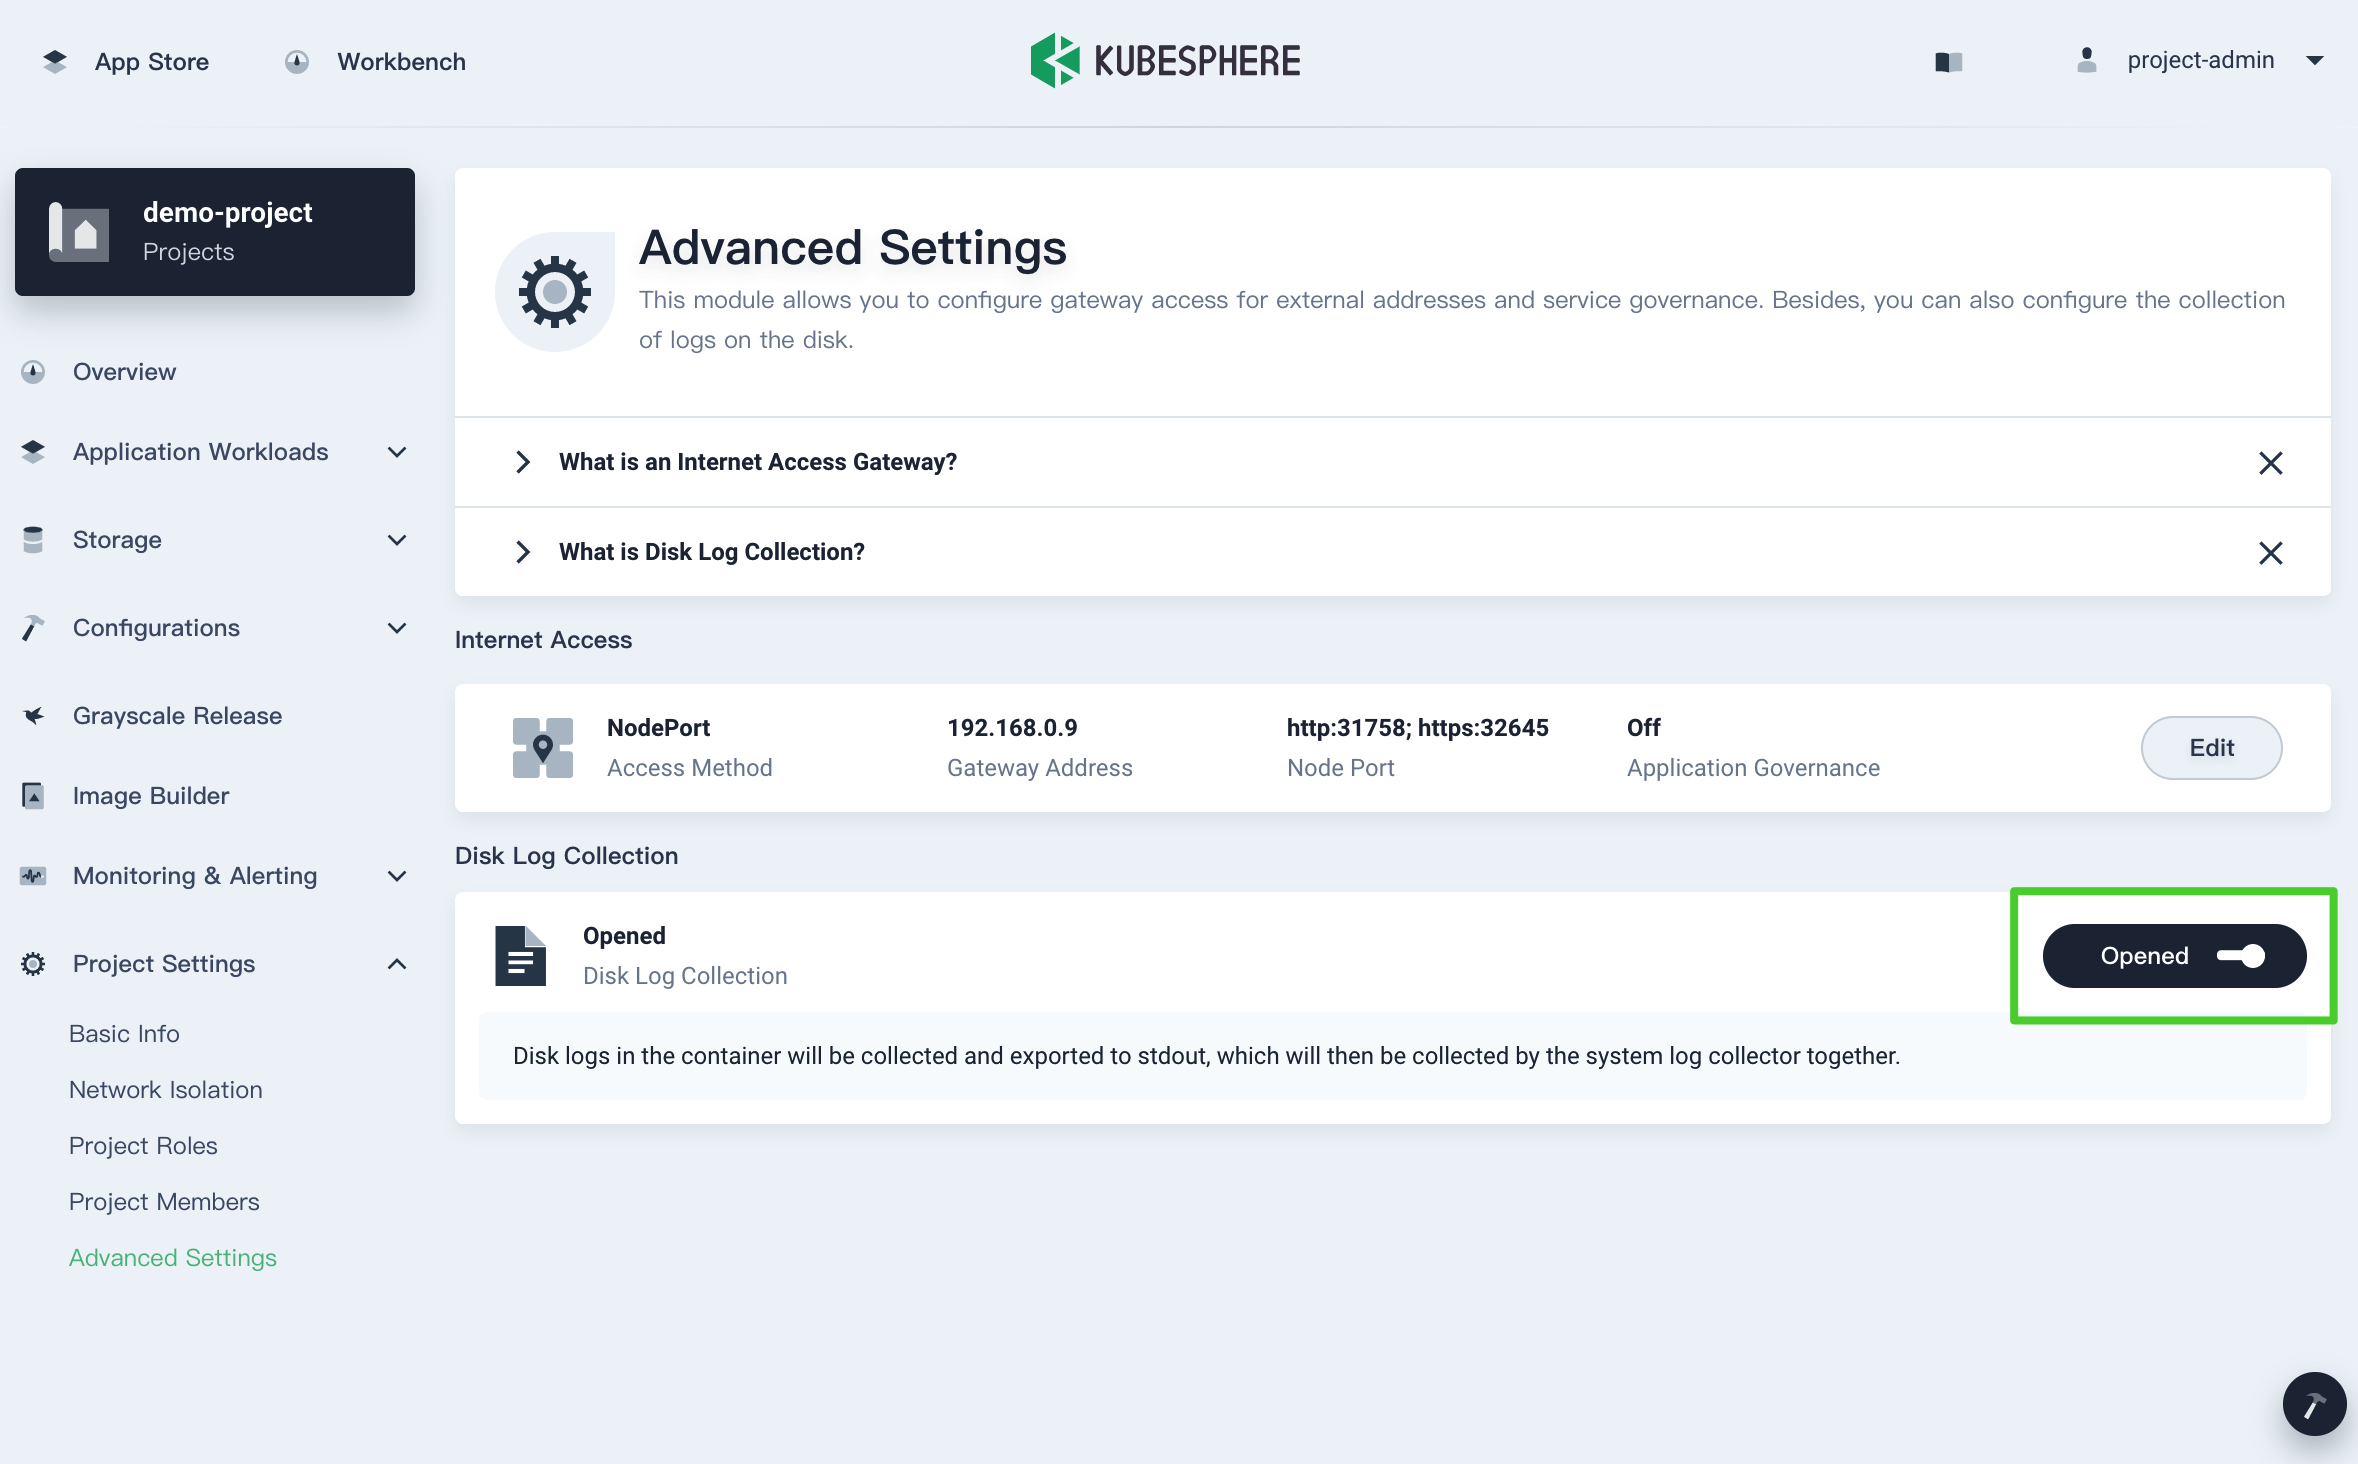
From the left navigation bar, select Advanced Settings in Project Settings. Under Disk Log Collection, enable the feature through the toggle switch.
Create a Deployment
-
From the left navigation bar, select Workloads in Application Workloads. Under the Deployments tab, click Create.
-
In the dialog that appears, set a name for the Deployment (for example,
demo-deployment) and click Next. -
Under Container Image, click Add Container Image.
-
Enter
alpinein the search bar to use the image (tag:latest) as an example.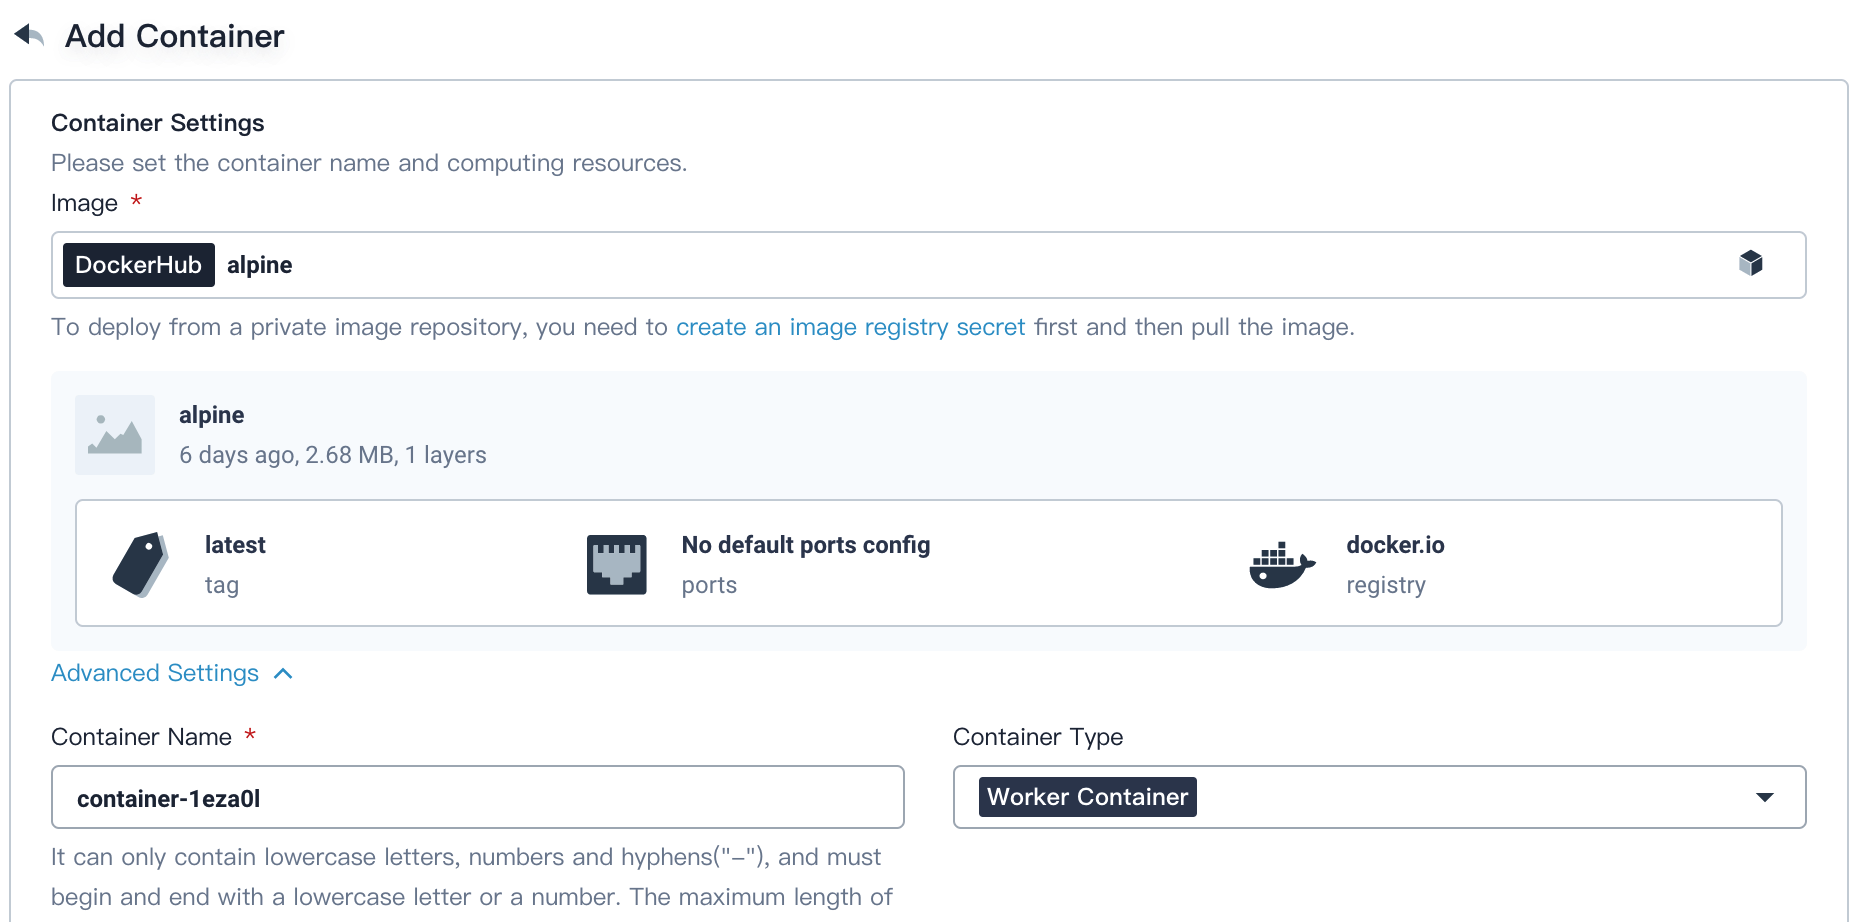
-
Scroll down to Start Command and check it. Input the following values for Run Command and Parameters respectively, click √, and then click Next.
Run Command
/bin/shParameters
-c,if [ ! -d /data/log ];then mkdir -p /data/log;fi; while true; do date >> /data/log/app-test.log; sleep 30;doneNote
The command and parameters above mean that the date information will be exported toapp-test.login/data/logevery 30 seconds.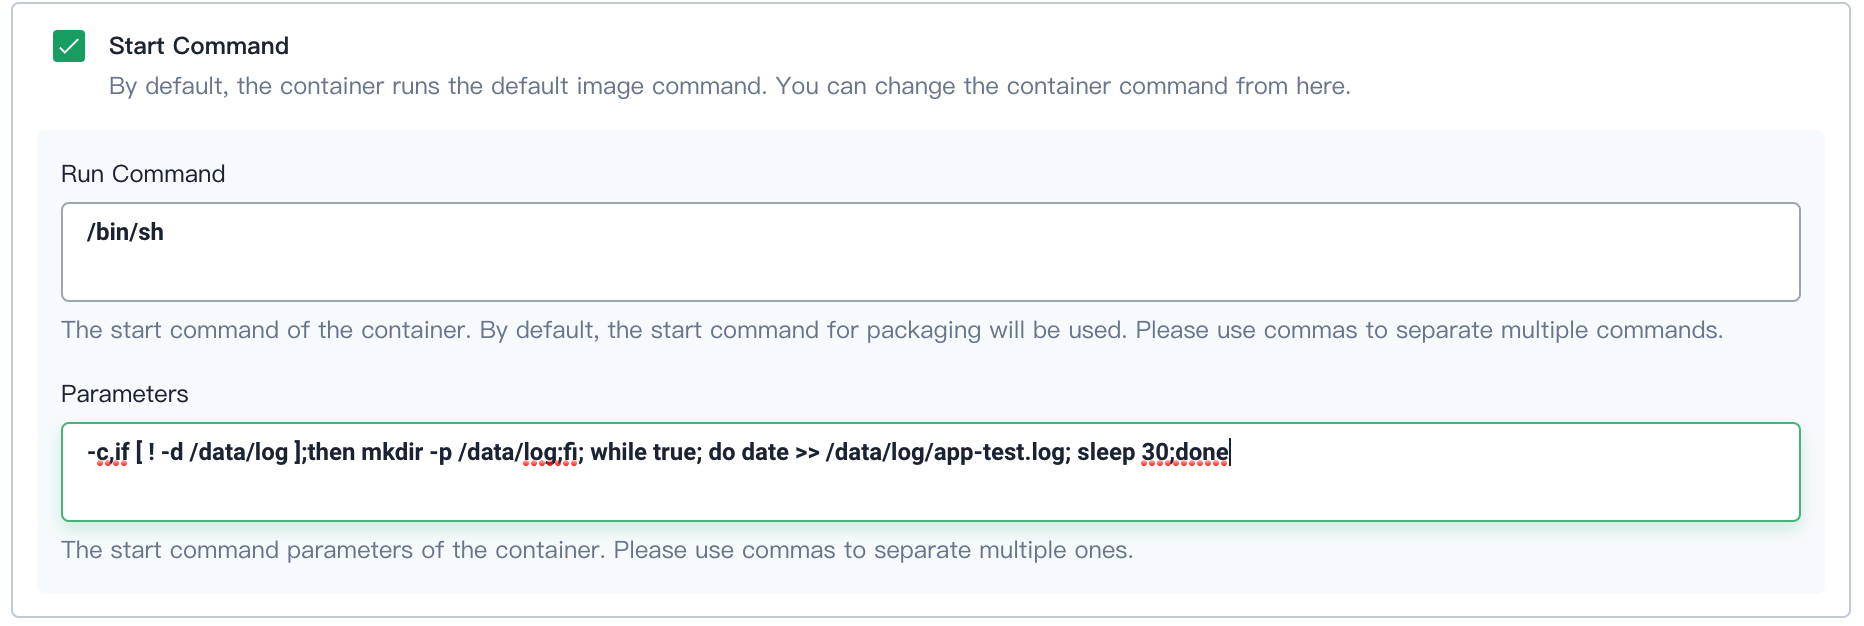
-
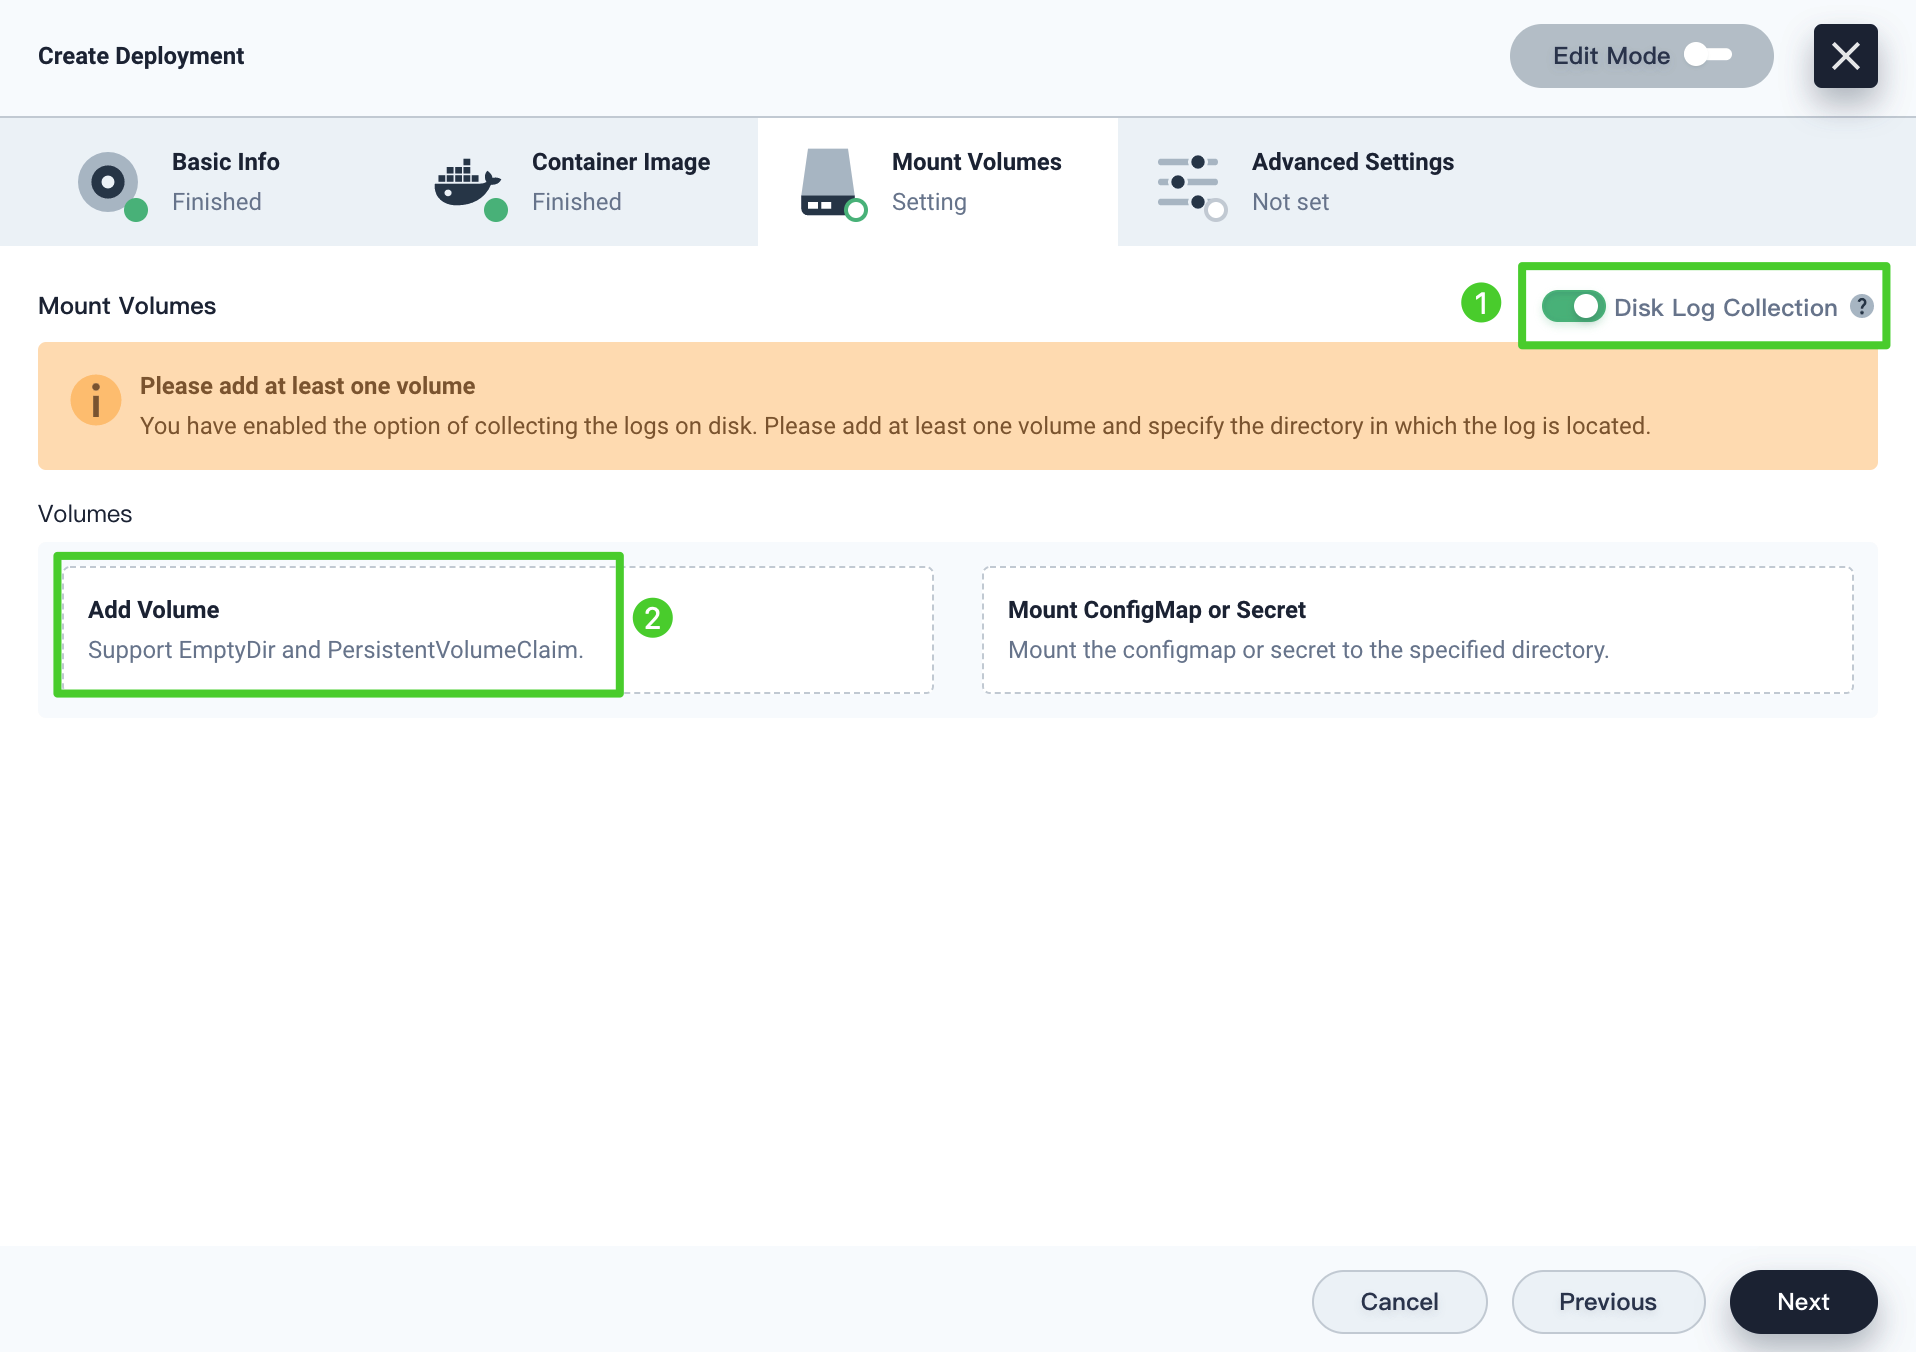
On the Mount Volumes tab, enable Disk Log Collection and click Add Volume.
-
On the Temporary Volume tab, input a name for the volume (for example,
demo-disk-log-collection) and set the access mode and path. Refer to the image below as an example.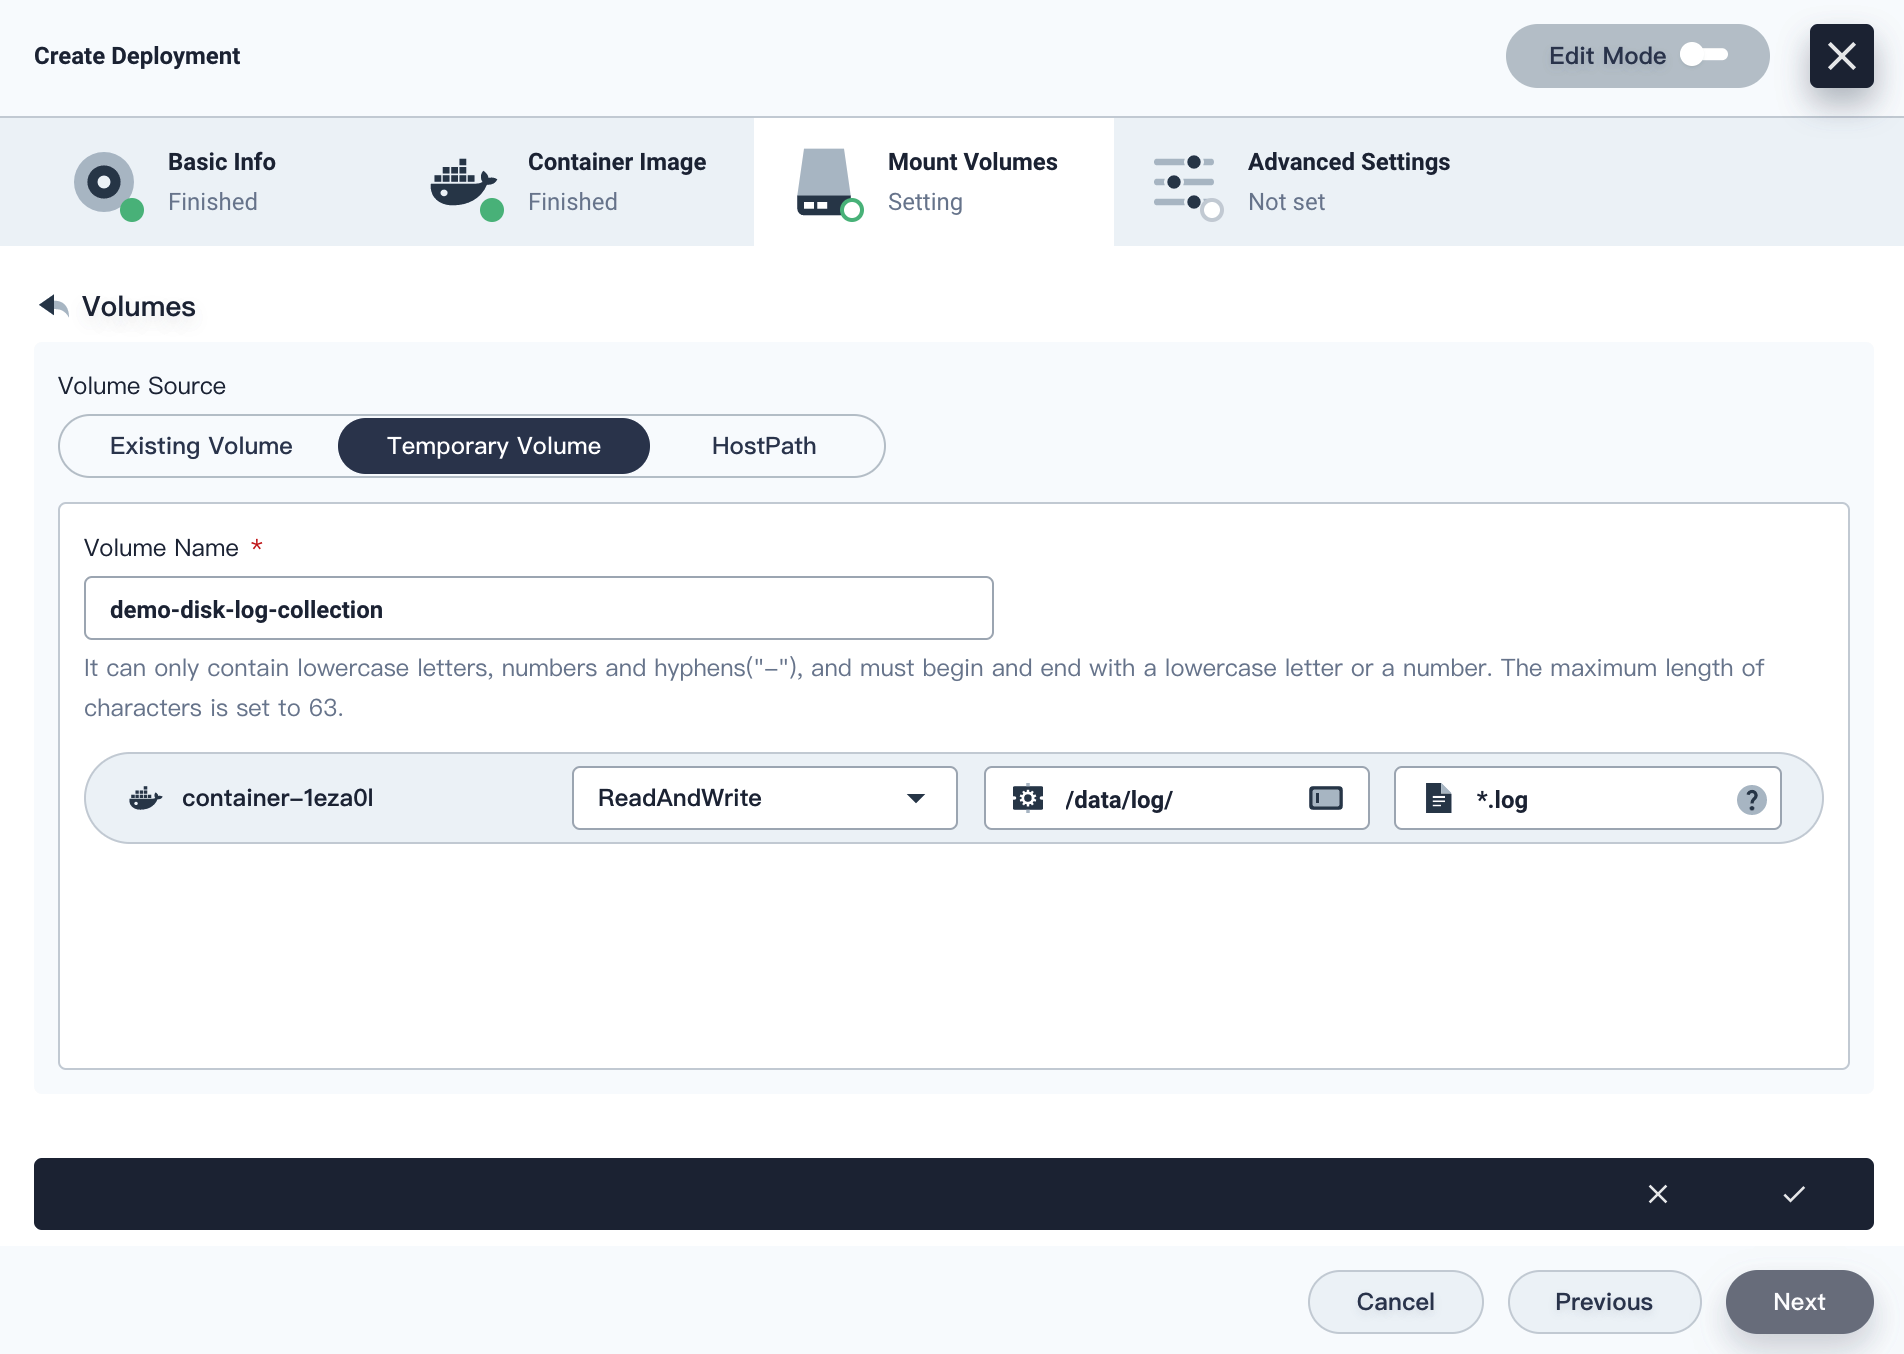
Click √, and then click Next to continue.
-
Click Create in Advanced Settings to finish the process.
Note
For more information, see Deployments.
View Logs
-
Under the Deployments tab, click the Deployment just created to go to its detail page.
-
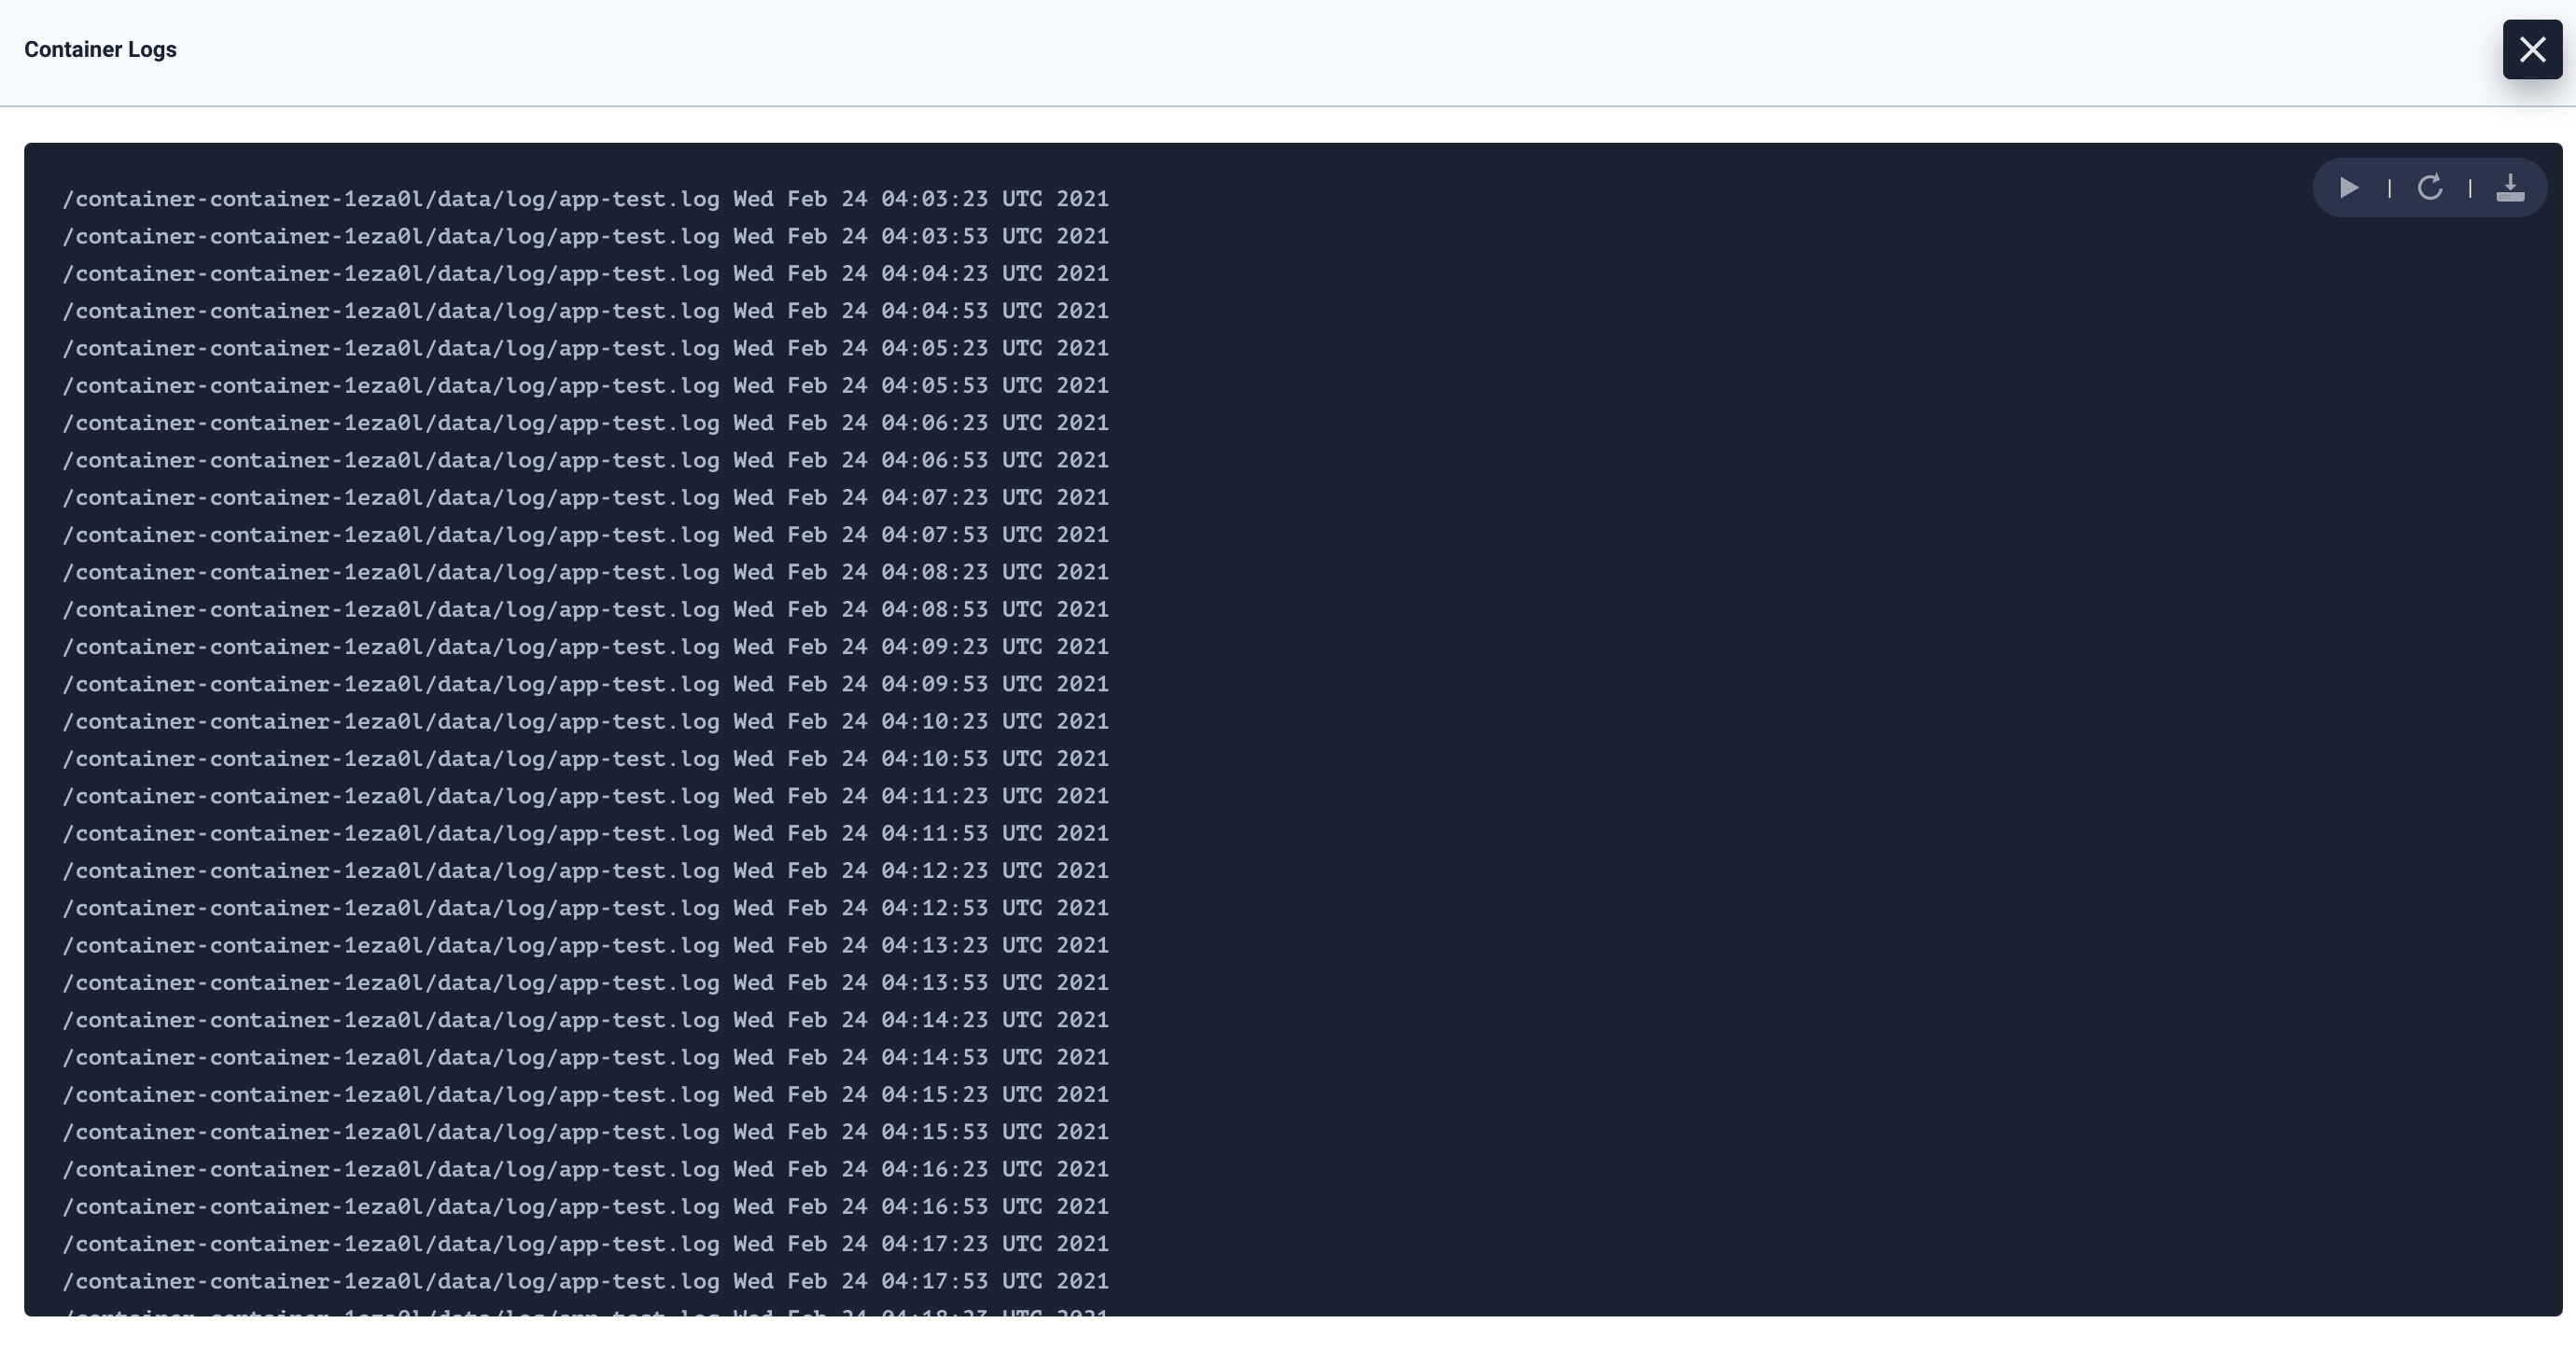
In Resource Status, click the arrow on the right to view container details, and then click the log icon of
logsidecar-container(filebeat container) to inspect disk logs.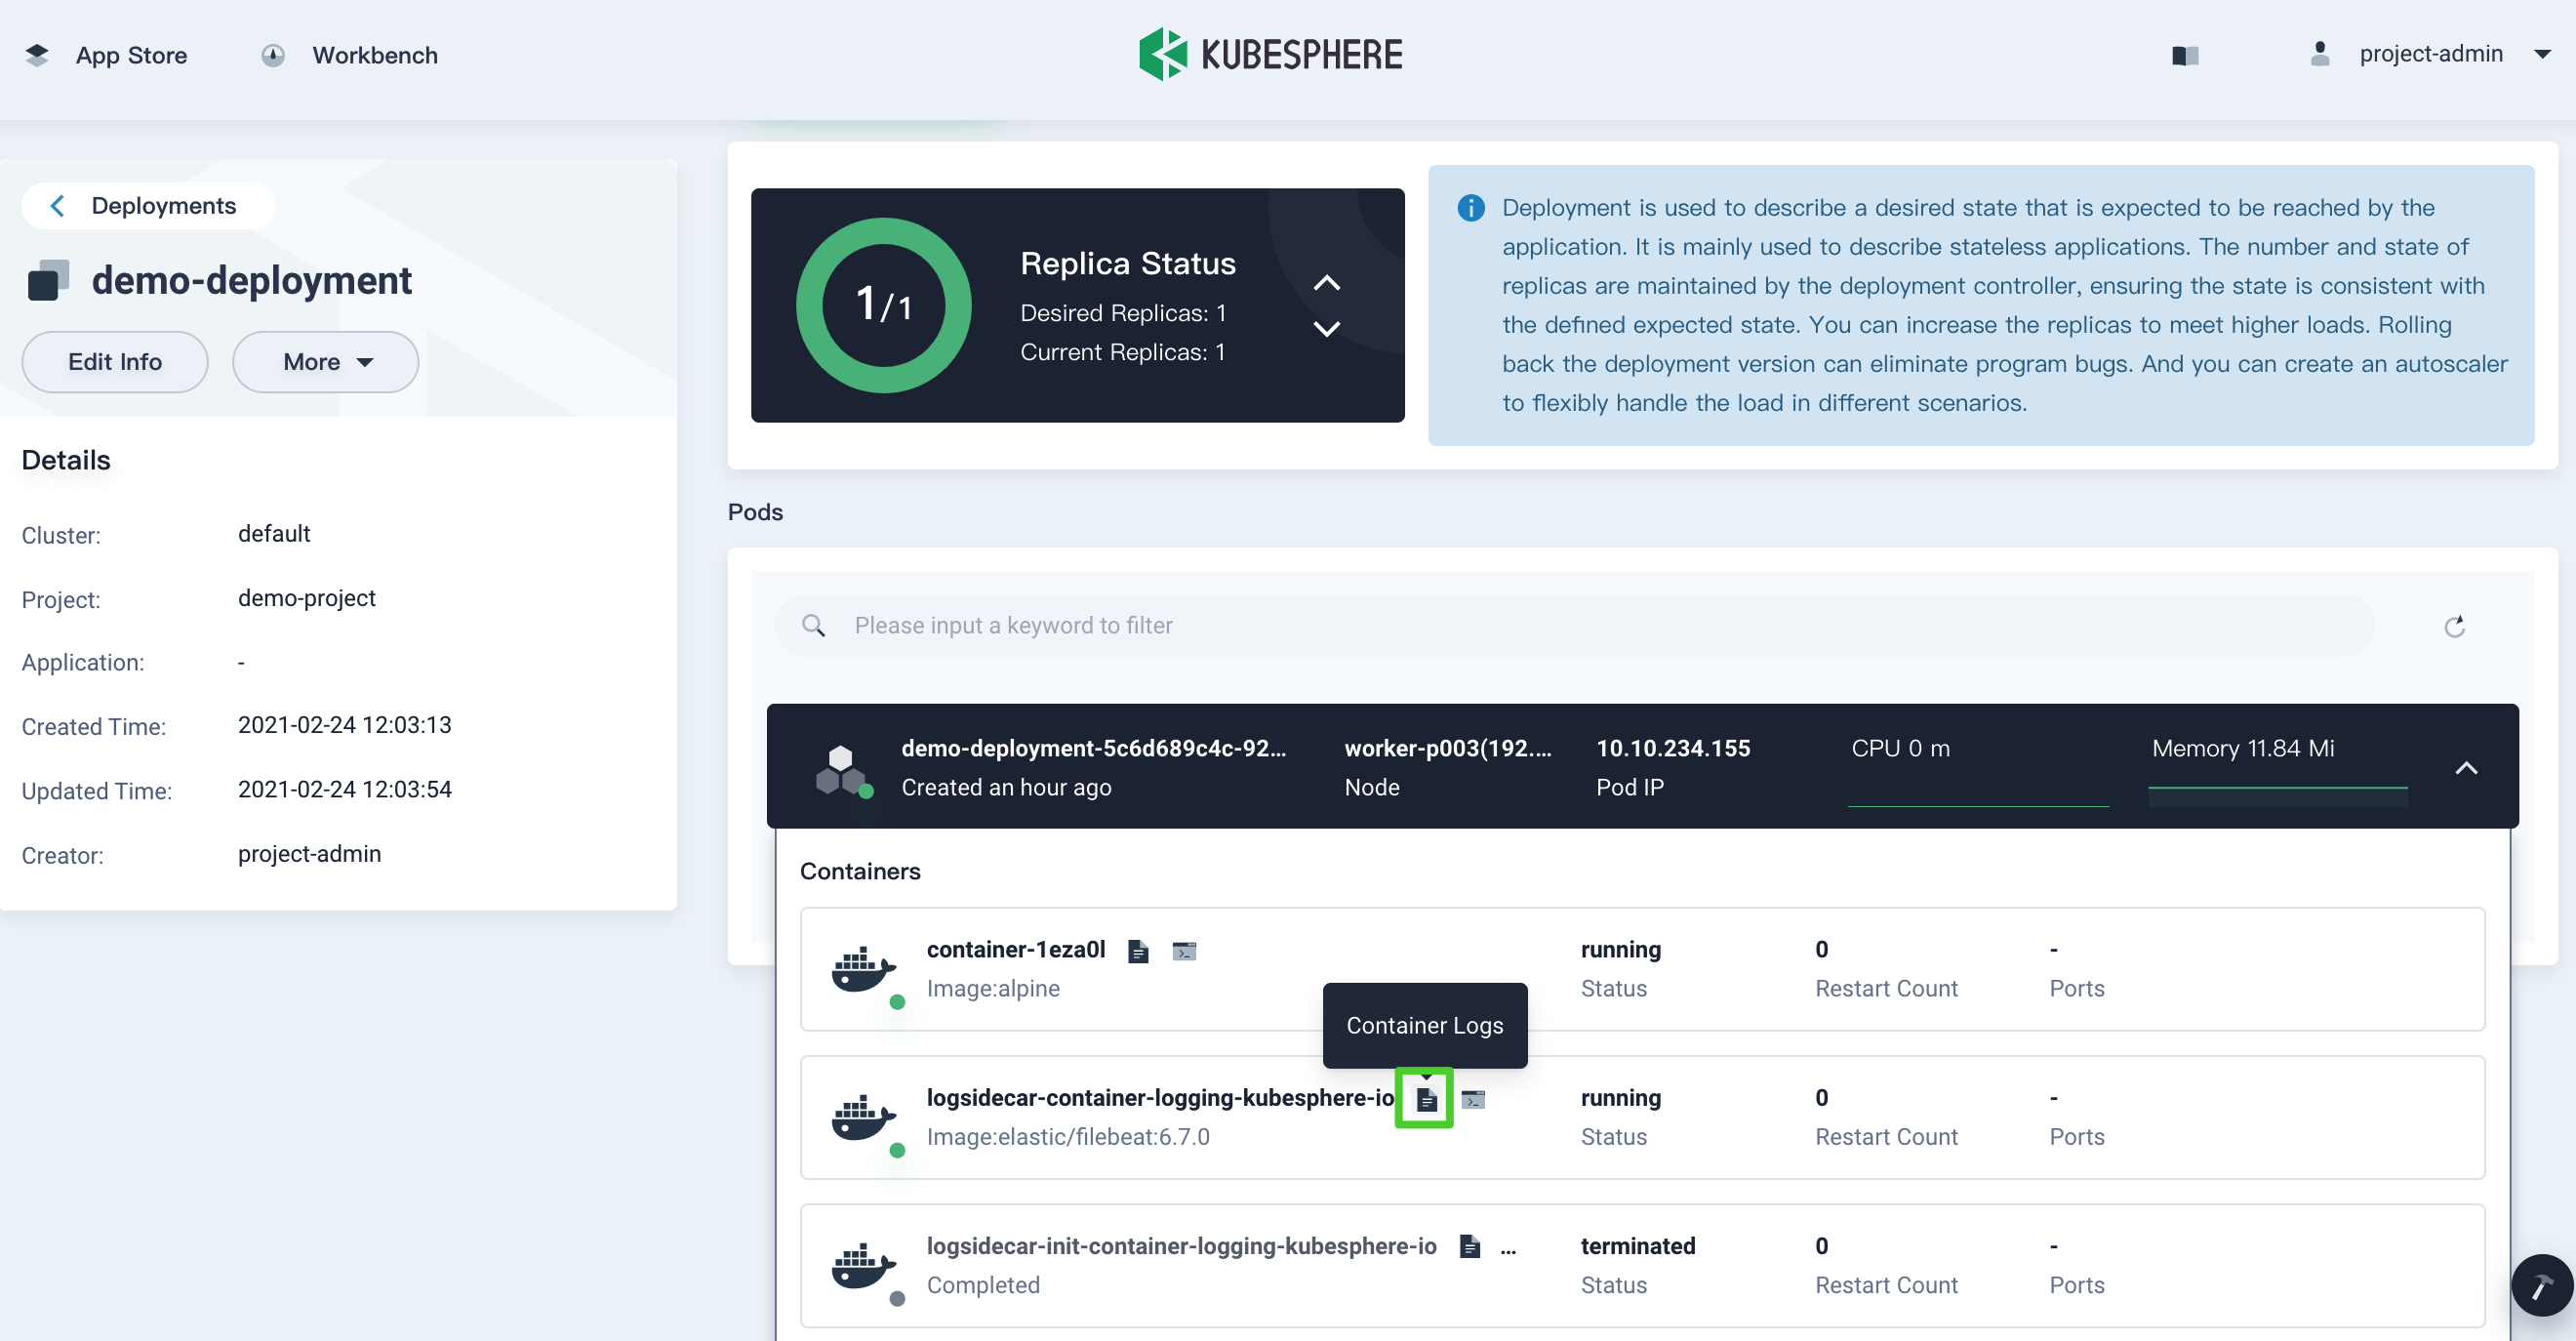
-
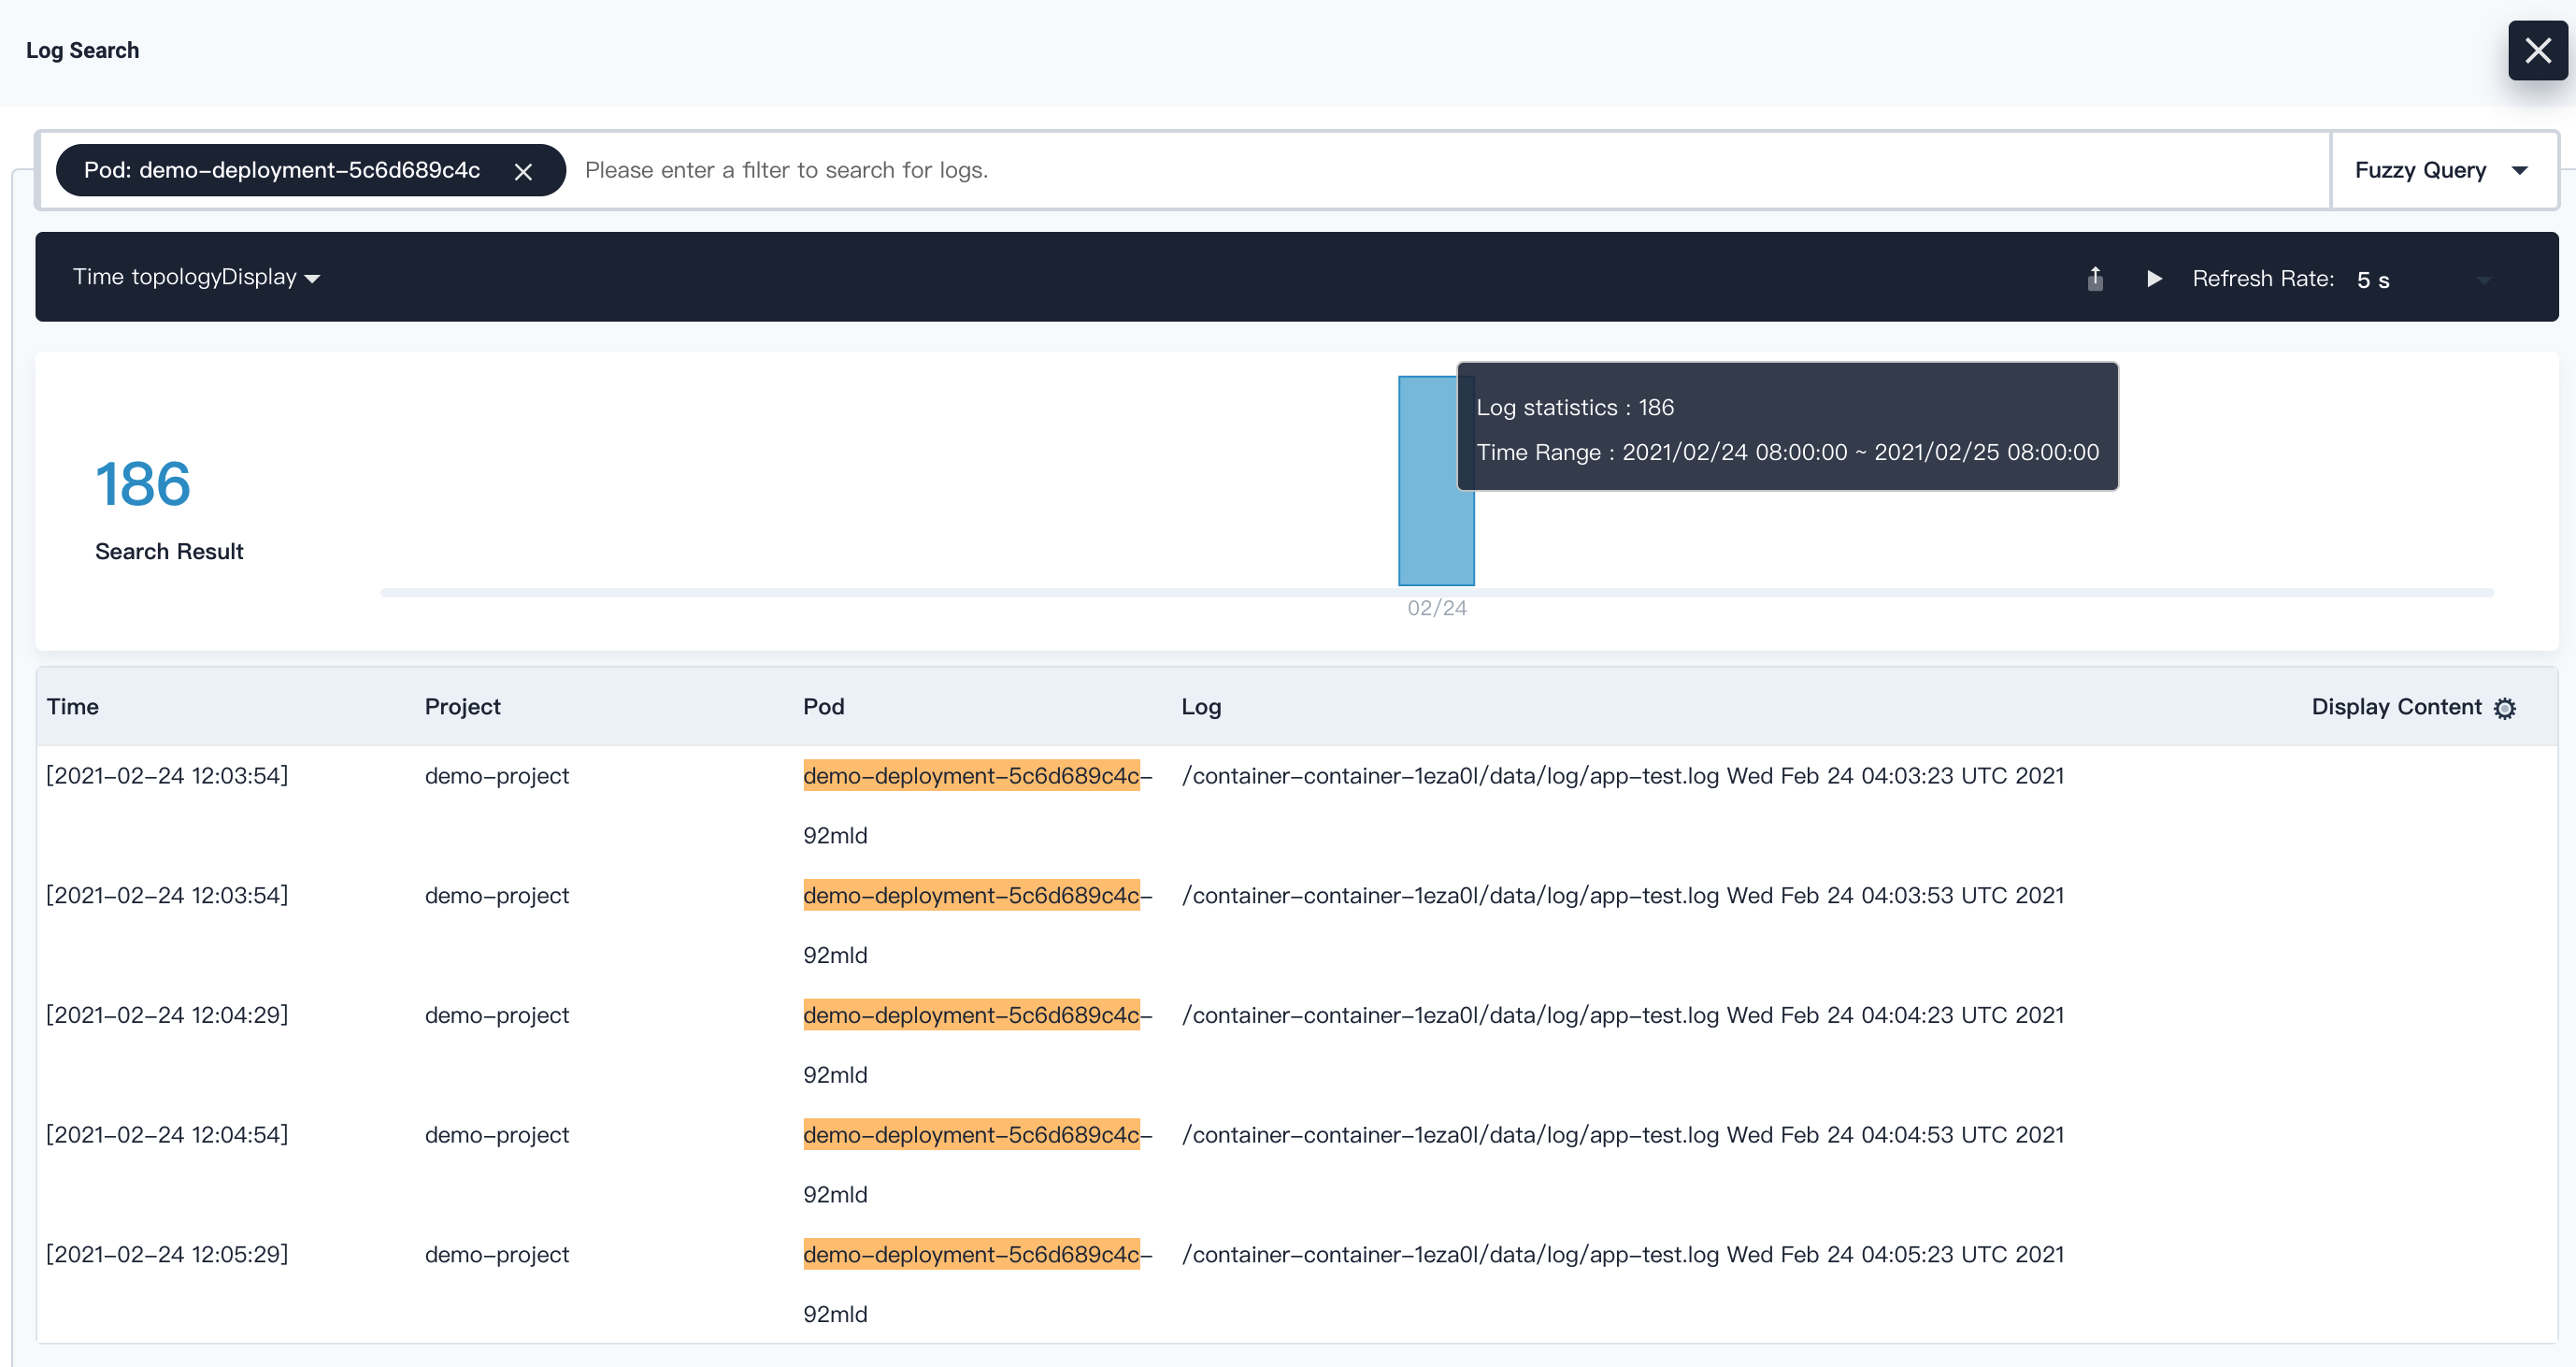
Alternatively, you can also use the Log Search function from Toolbox in the bottom right corner to view stdout logs. For example, use the Pod name of the Deployment for a fuzzy query:


 Previous
