


You are viewing documentation for KubeSphere version:v3.0.0
KubeSphere v3.0.0 documentation is no longer actively maintained. The version you are currently viewing is a static snapshot. For up-to-date documentation, see the latest version.


Project Gateway
A gateway in a KubeSphere project is an NGINX Ingress controller. KubeSphere has a built‑in configuration for HTTP load balancing, called Routes. A Route defines rules for external connections to Services within a cluster. Users who need to provide external access to their Services create a Route resource that defines rules, including the URI path, backing service name, and other information.
In KubeSphere 3.0, a project gateway works independently for itself. In other words, every project has its own Ingress controller. In the next release, KubeSphere will provide a cluster-scope gateway in addition to the project-scope gateway, allowing all projects to share the same gateway.
This tutorial demonstrates how to set a gateway in KubeSphere for the external access to Services and Routes.
Prerequisites
You need to create a workspace, a project and an account (project-admin). The account must be invited to the project with the role of admin at the project level. For more information, see Create Workspaces, Projects, Accounts and Roles.
Set a Gateway
-
Log in to the KubeSphere web console as
project-adminand go to your project. In Project Settings from the navigation bar, select Advanced Settings and click Set Gateway.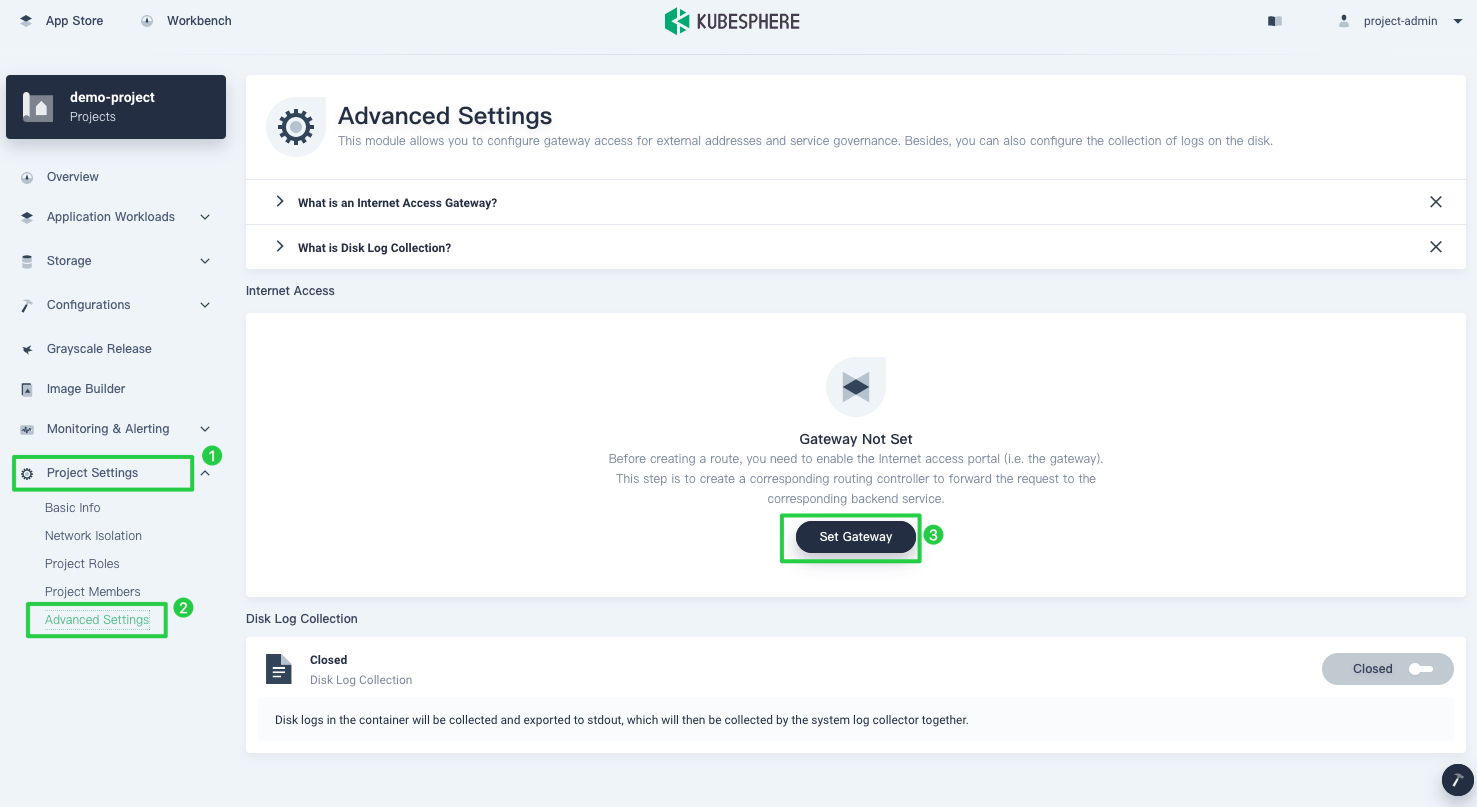
-
In the pop-up window, you can select two access modes for the gateway.
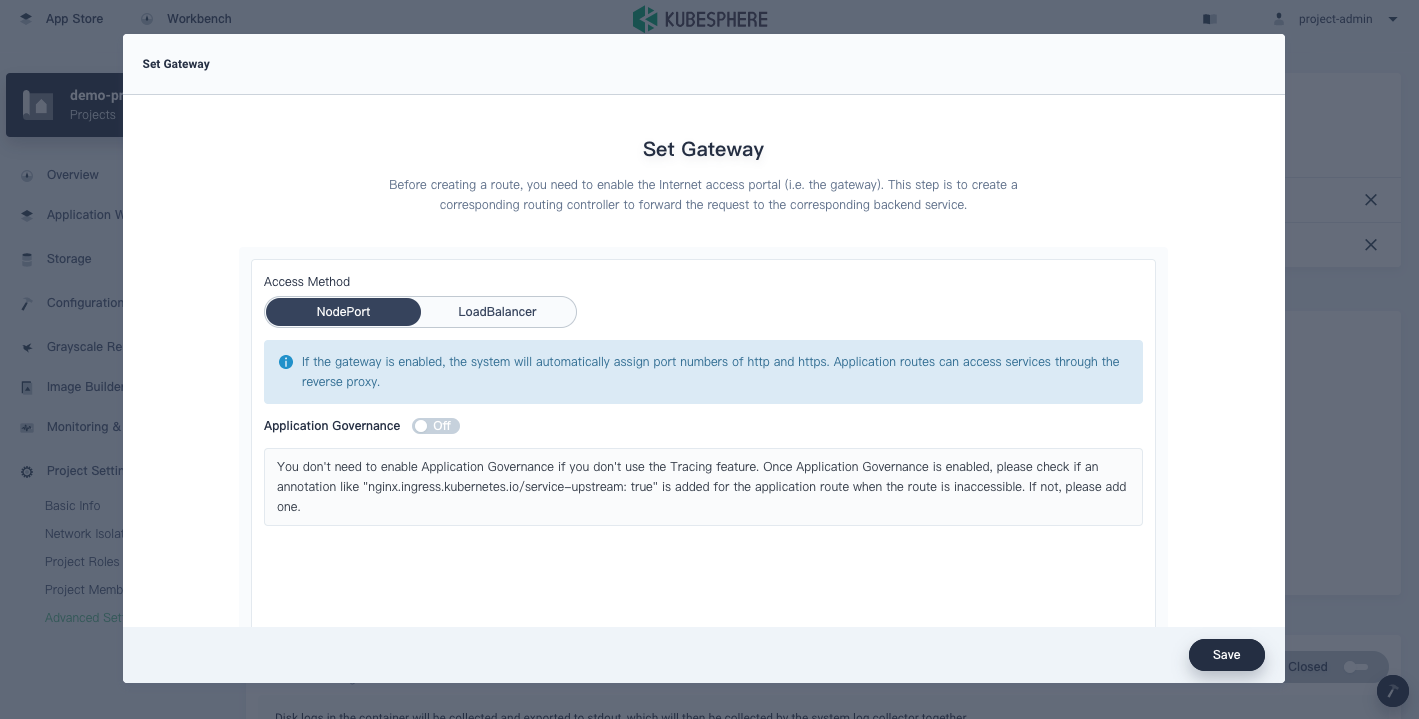
NodePort: You can access Services with corresponding node ports through the gateway.
LoadBalancer: You can access Services with a single IP address through the gateway.
-
You can also enable Application Governance on the Set Gateway page. You need to enable Application Governance so that you can use the Tracing feature and use different grayscale release strategies. Once it is enabled, check whether an annotation (for example,
nginx.ingress.kubernetes.io/service-upstream: true) is added for your route (Ingress) if the route is inaccessible. -
After you select an access method, click Save.
NodePort
If you select NodePort, KubeSphere will set a port for http and https requests respectively. You can access your Service at EIP:NodePort or Hostname:NodePort.
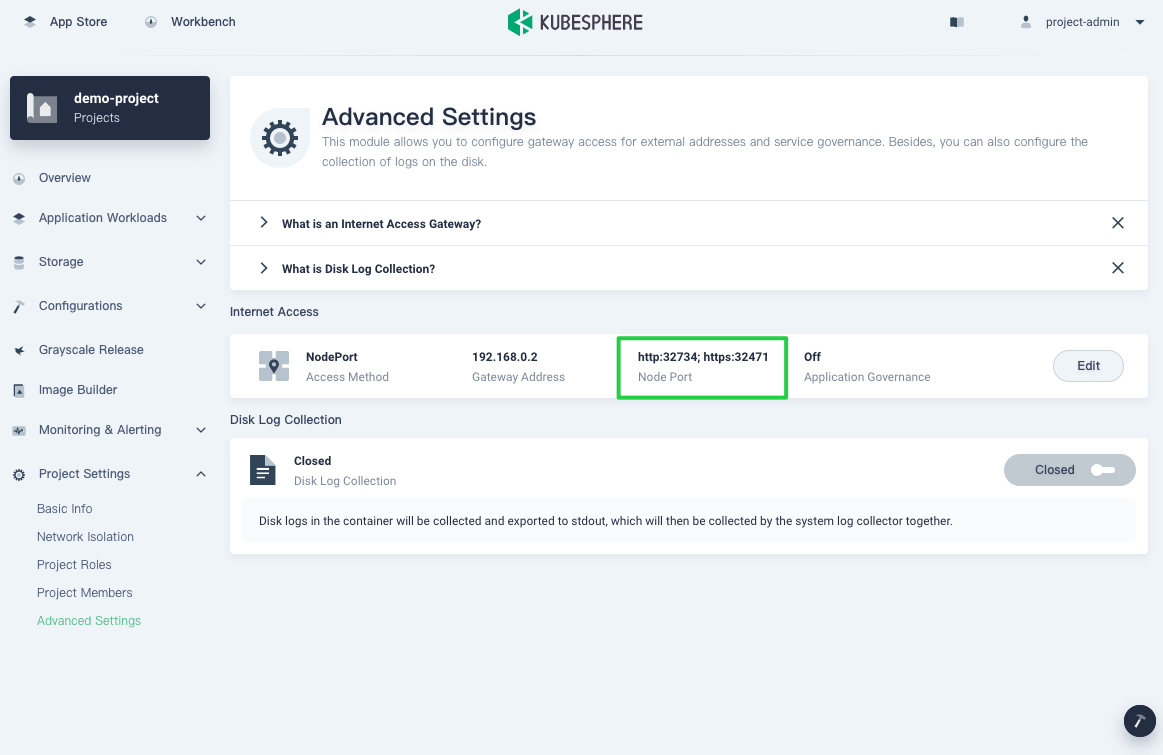
For example, to access your Service with an elastic IP address (EIP), visit:
http://EIP:32734https://EIP:32471
When you create a Route (Ingress), you can customize a host name to access your Service. For example, to access your Service with the host name set in your Route, visit:
http://demo.kubesphere.io:32734https://demo.kubesphere.io:32471
Note
-
You may need to open ports in your security groups and configure relevant port forwarding rules depending on your environment.
-
If you access your Service using the host name, make sure the domain name you set can be resolved to the IP address.
-
NodePort is not recommended for a production environment. You can use LoadBalancer instead.
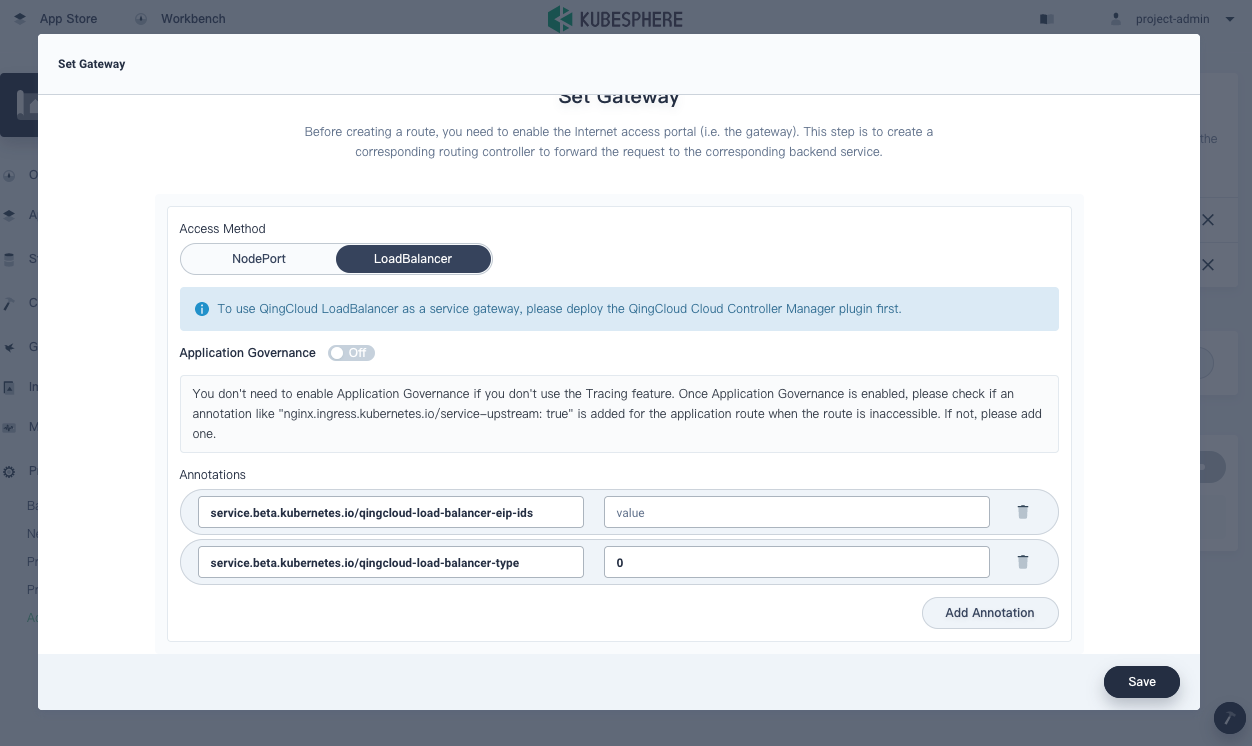
LoadBalancer
You must configure a load balancer in advance before you select LoadBalancer. The IP address of the load balancer will be bound to the gateway to provide access to internal Services and Routes.
Note
Cloud providers often support load balancer plugins. If you install KubeSphere on major Kubernetes engines on their platforms, you may notice a load balancer is already available in the environment for you to use. If you install KubeSphere in a bare metal environment, you can use PorterLB for load balancing.
 Previous

What’s on this Page