


You are viewing documentation for KubeSphere version:v3.0.0
KubeSphere v3.0.0 documentation is no longer actively maintained. The version you are currently viewing is a static snapshot. For up-to-date documentation, see the latest version.


Deploy and Access Bookinfo
Istio, as an open-source service mesh solution, provides powerful features of traffic management for microservices. Here is the introduction of traffic management from the official website of Istio:
Istio’s traffic routing rules let you easily control the flow of traffic and API calls between services. Istio simplifies configuration of service-level properties like circuit breakers, timeouts, and retries, and makes it easy to set up important tasks like A/B testing, canary rollouts, and staged rollouts with percentage-based traffic splits. It also provides out-of-box failure recovery features that help make your application more robust against failures of dependent services or the network.
To provide consistent user experiences of managing microservices, KubeSphere integrates Istio on the container platform. This tutorial demonstrates how to deploy a sample application Bookinfo composed of four separate microservices and access it through a NodePort.
Prerequisites
-
You need to enable KubeSphere Service Mesh.
-
You need to finish all tasks in Create Workspaces, Projects, Accounts and Roles.
-
You need to enable Application Governance. To do so, perform the following steps:
Log in to the console as
project-adminand go to your project. Navigate to Advanced Settings under Project Settings, click Edit, and select Edit Gateway. In the dialog that appears, flip on the toggle switch next to Application Governance.Note
You need to enable Application Governance so that you can use the Tracing feature. Once it is enabled, check whether an annotation (for example,nginx.ingress.kubernetes.io/service-upstream: true) is added for your Route (Ingress) if the Route is inaccessible.
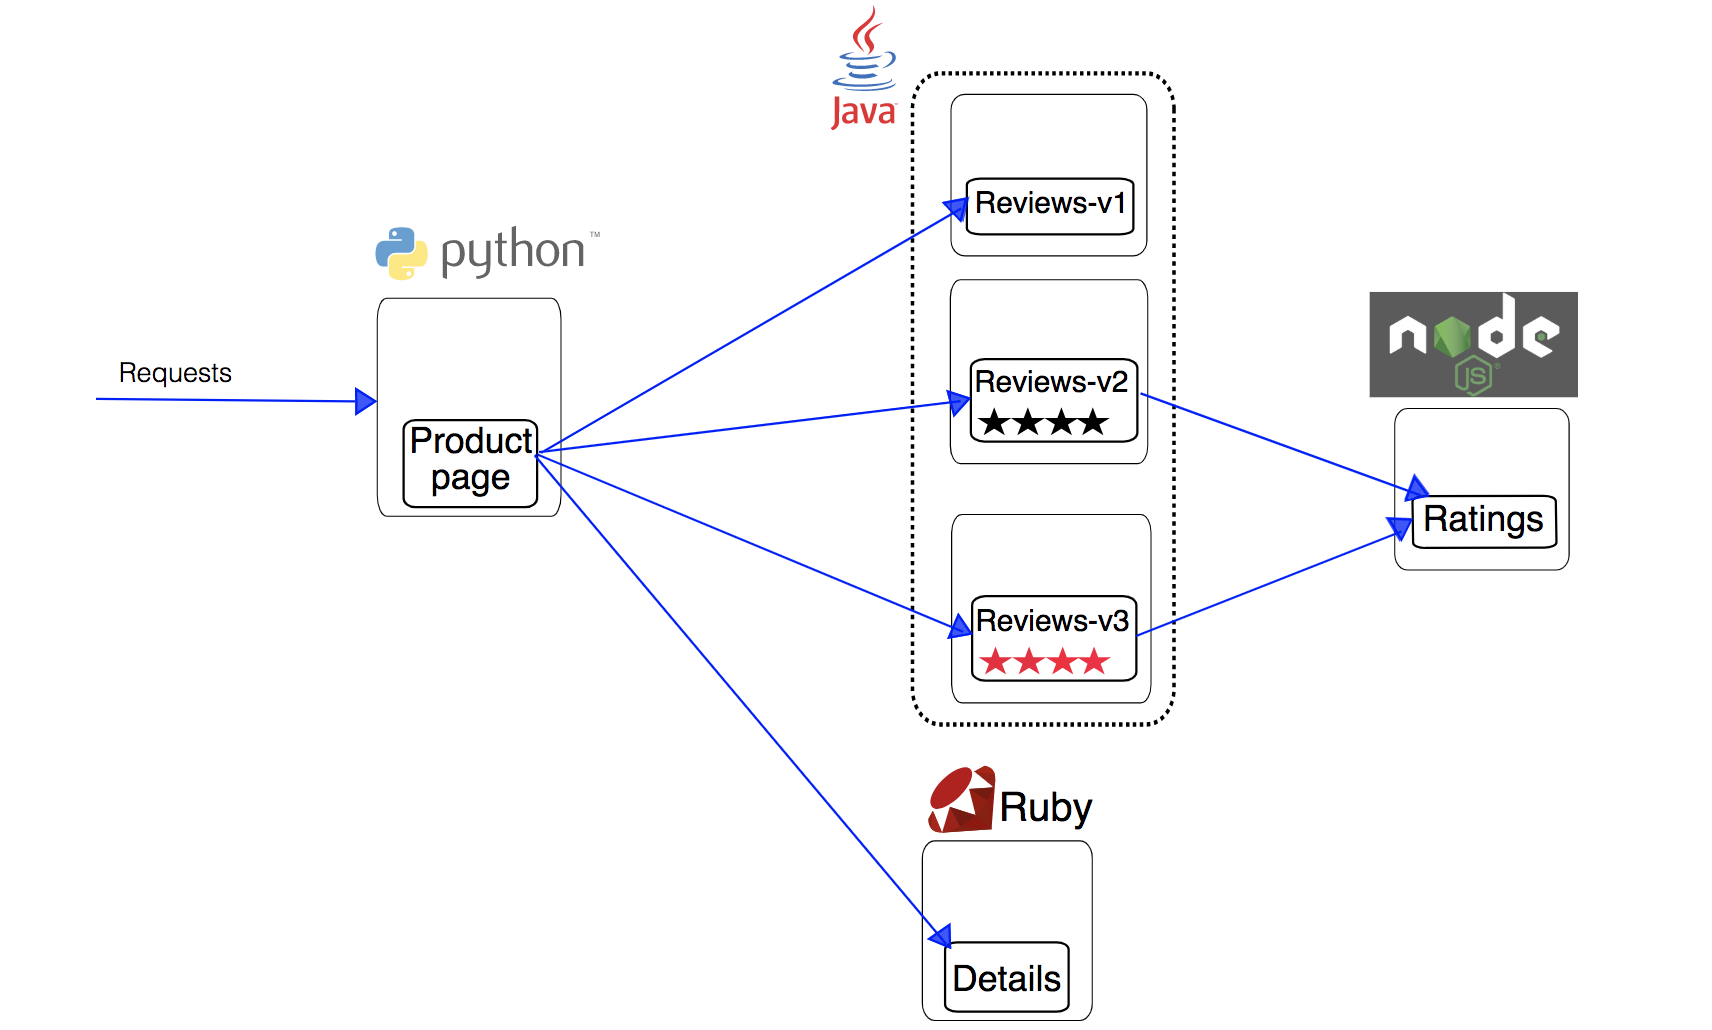
What is Bookinfo
Bookinfo is composed of four separate microservices as shown below. There are three versions of the reviews microservice.
- The productpage microservice calls the details and reviews microservices to populate the page.
- The details microservice contains book information.
- The reviews microservice contains book reviews. It also calls the ratings microservice.
- The ratings microservice contains book ranking information that accompanies a book review.
The end-to-end architecture of the application is shown below. See Bookinfo Application for more details.
Hands-on Lab
Step 1: Deploy Bookinfo
-
Log in to the console as
project-regularand go to your project (demo-project). Navigate to Applications under Application Workloads, and click Deploy Sample Application on the right. -
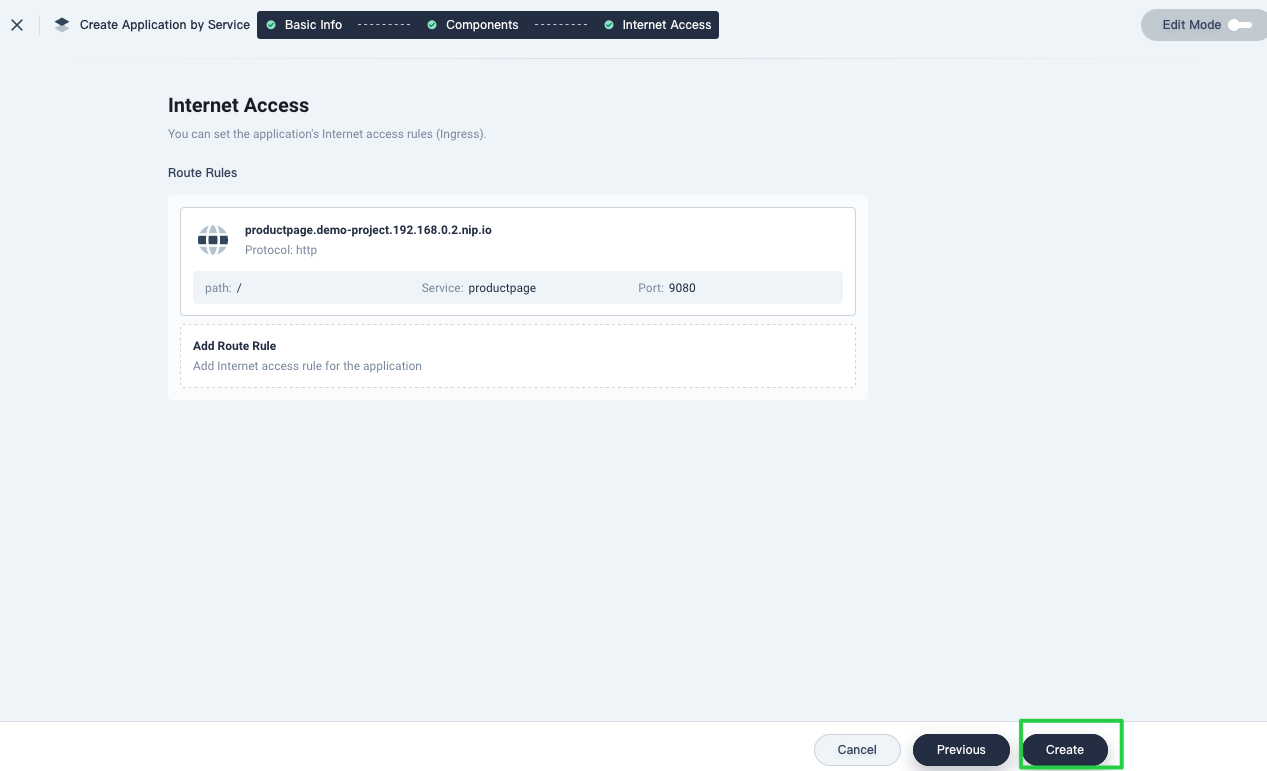
Click Next in the dialog that appears where required fields are pre-populated and relevant components are already set. You do not need to change the settings and just click Create on the final page (Internet Access).
Note
KubeSphere creates the hostname automatically. To change the hostname, hover over the default route rule and click the pencil icon to edit it. For more information, see Create a Microservices-based App. -
In Workloads, verify that the statuses of all four Deployments reach
running, which means the app has been created successfully.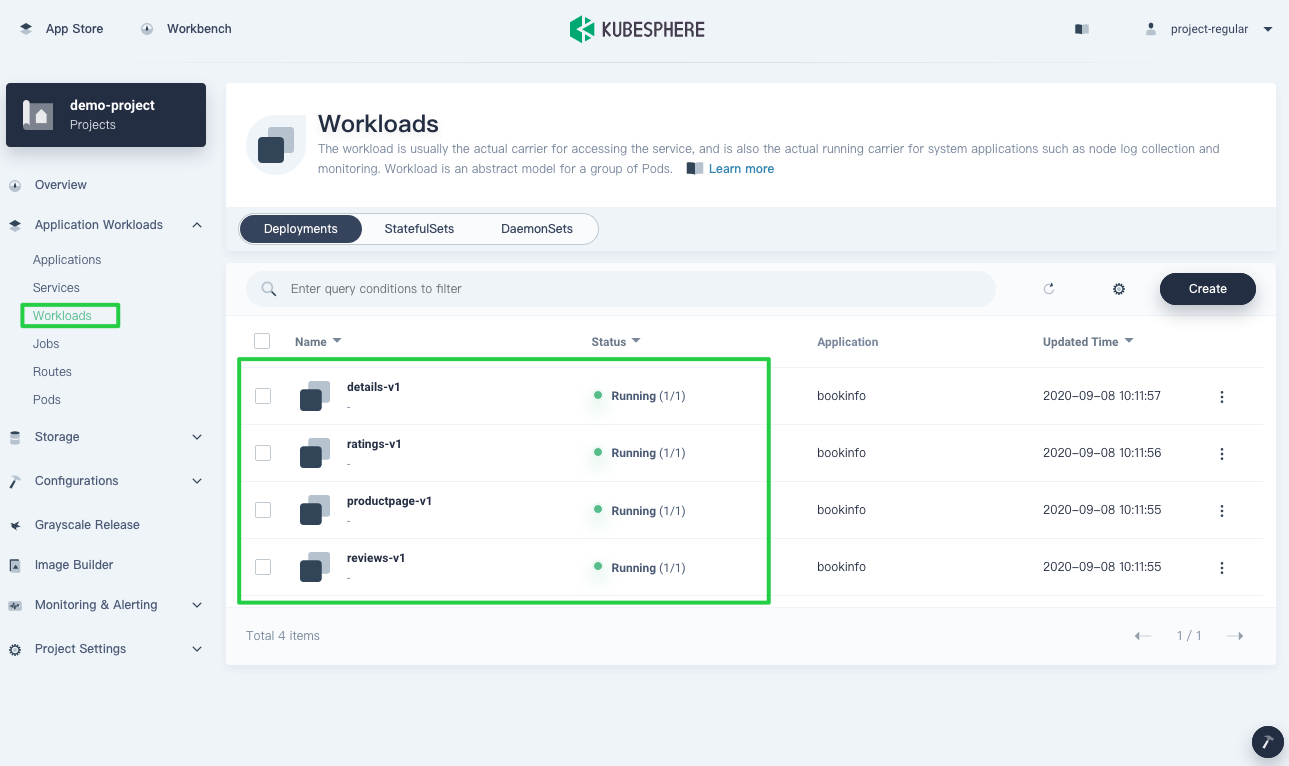
Note
It may take a few minutes before the Deployments are up and running.
Step 2: Access Bookinfo
-
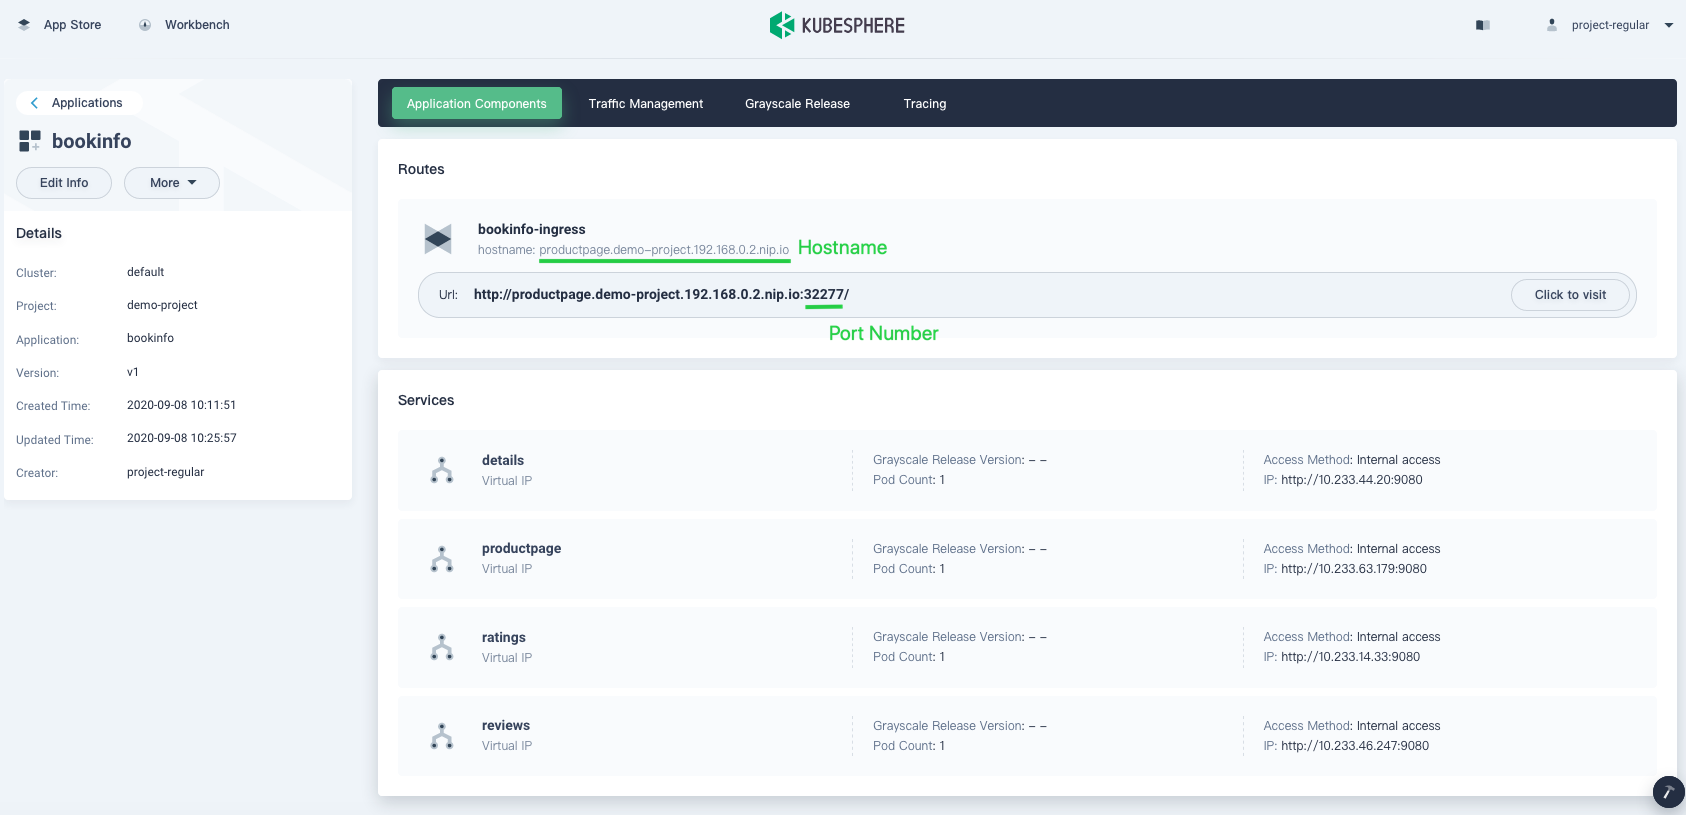
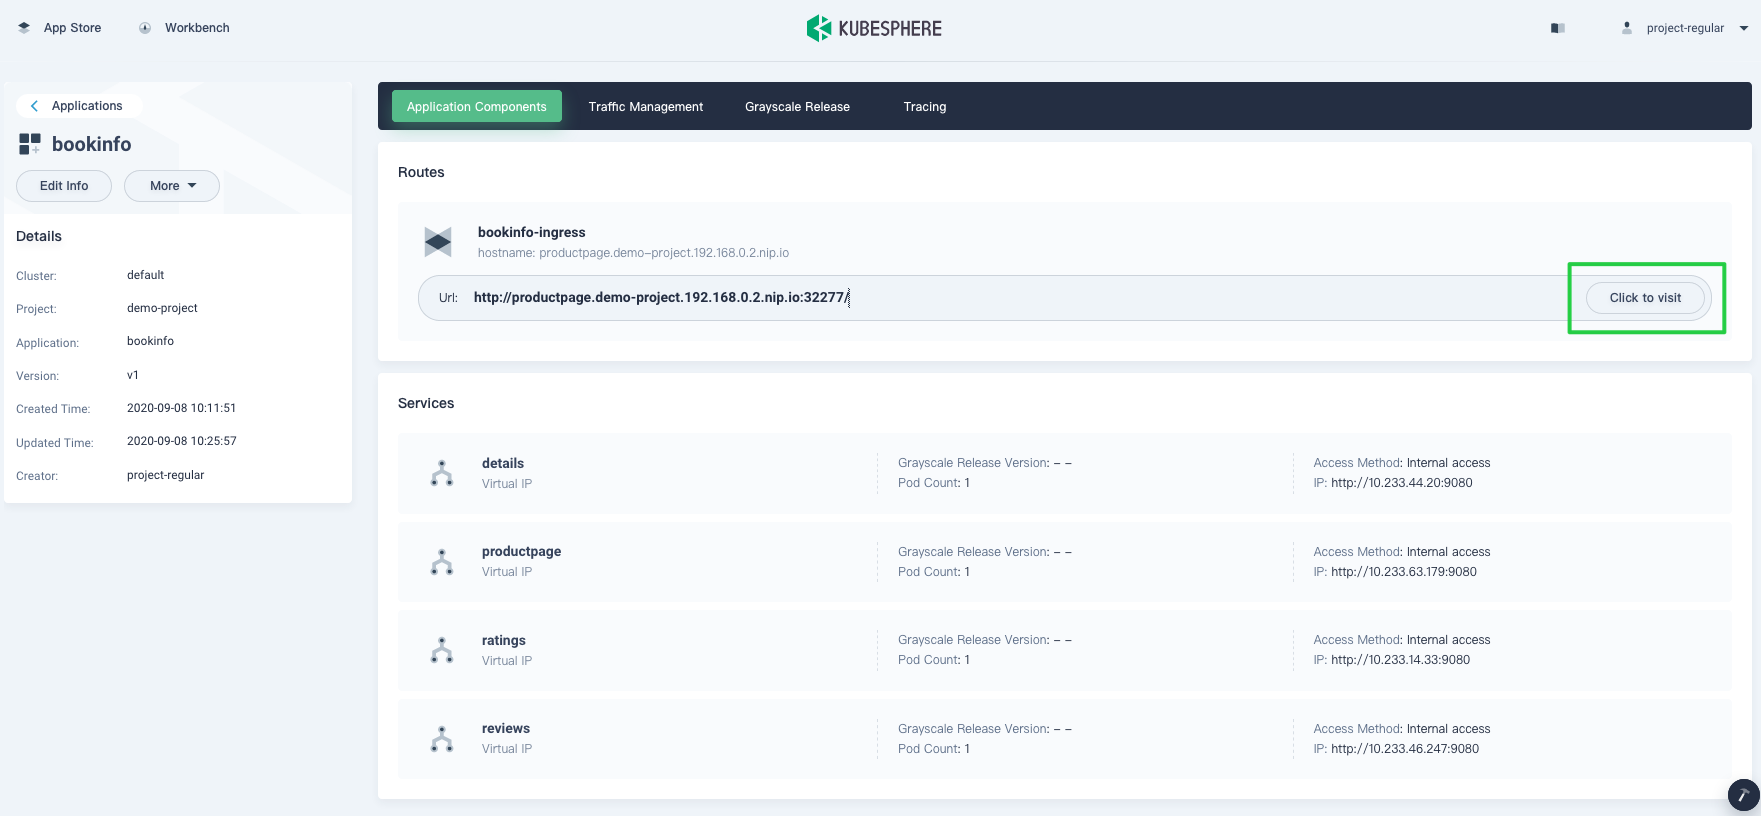
In Applications, go to Composing App and click the app
bookinfoto see its detailed information.
Note
If you do not see the app in the list, refresh your page. -
On the detail page, record the hostname and port number of the app which will be used to access Bookinfo.
-
As the app will be accessed outside the cluster through a NodePort, you need to open the port in the image above (in this case, it is
32277) in your security group for outbound traffic and set any port forwarding rules if necessary. -
Edit your local host file (
/etc/hosts) by adding an entry in it to map the hostname to the IP address. For example:139.198.19.38 productpage.demo-project.192.168.0.2.nip.ioNote
Do not copy the content above directly to your local host file. Replace it with your own IP address and hostname. -
When you finish, click the button Click to visit to access the app.
-
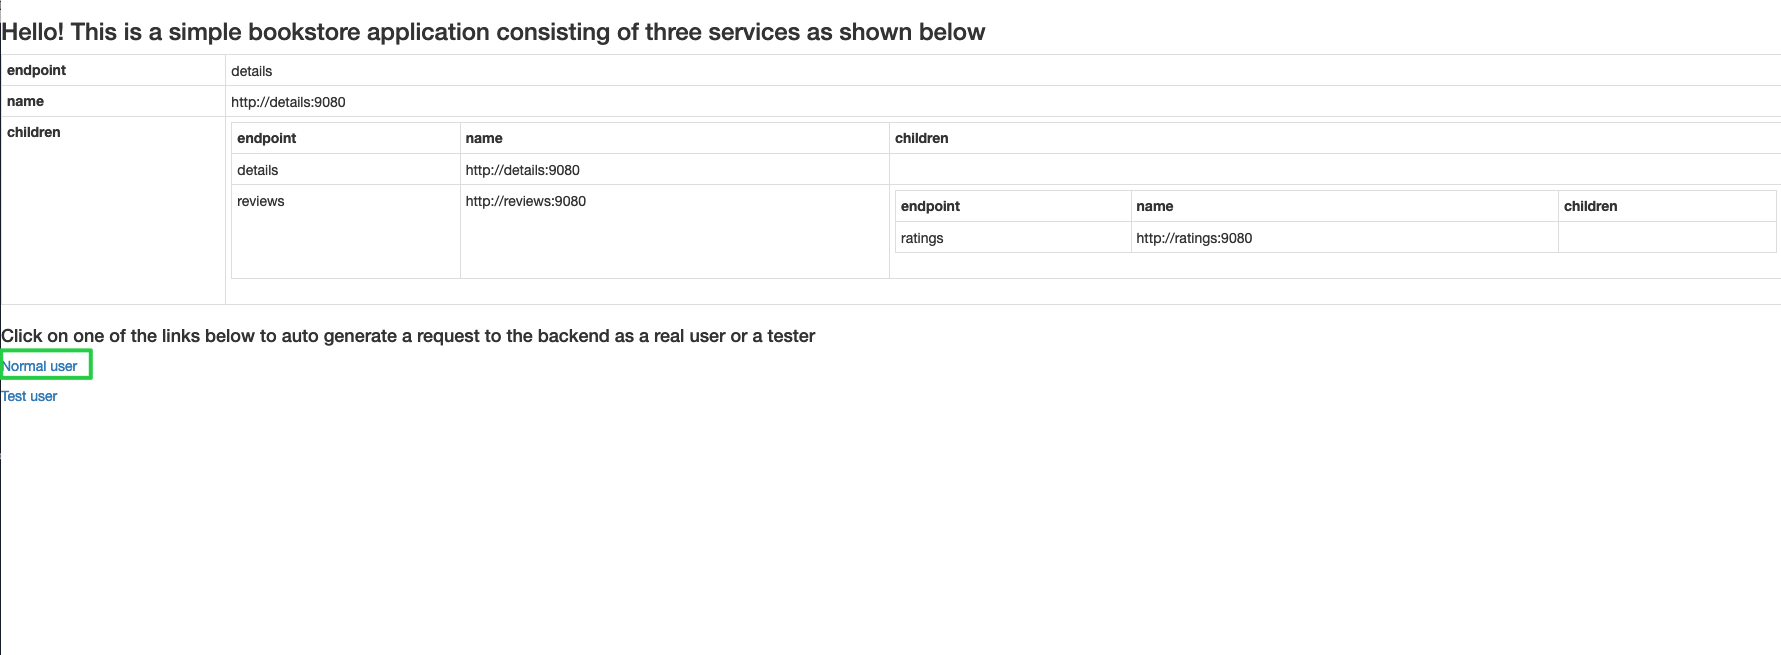
On the app detail page, click Normal user in the bottom-left corner.
-
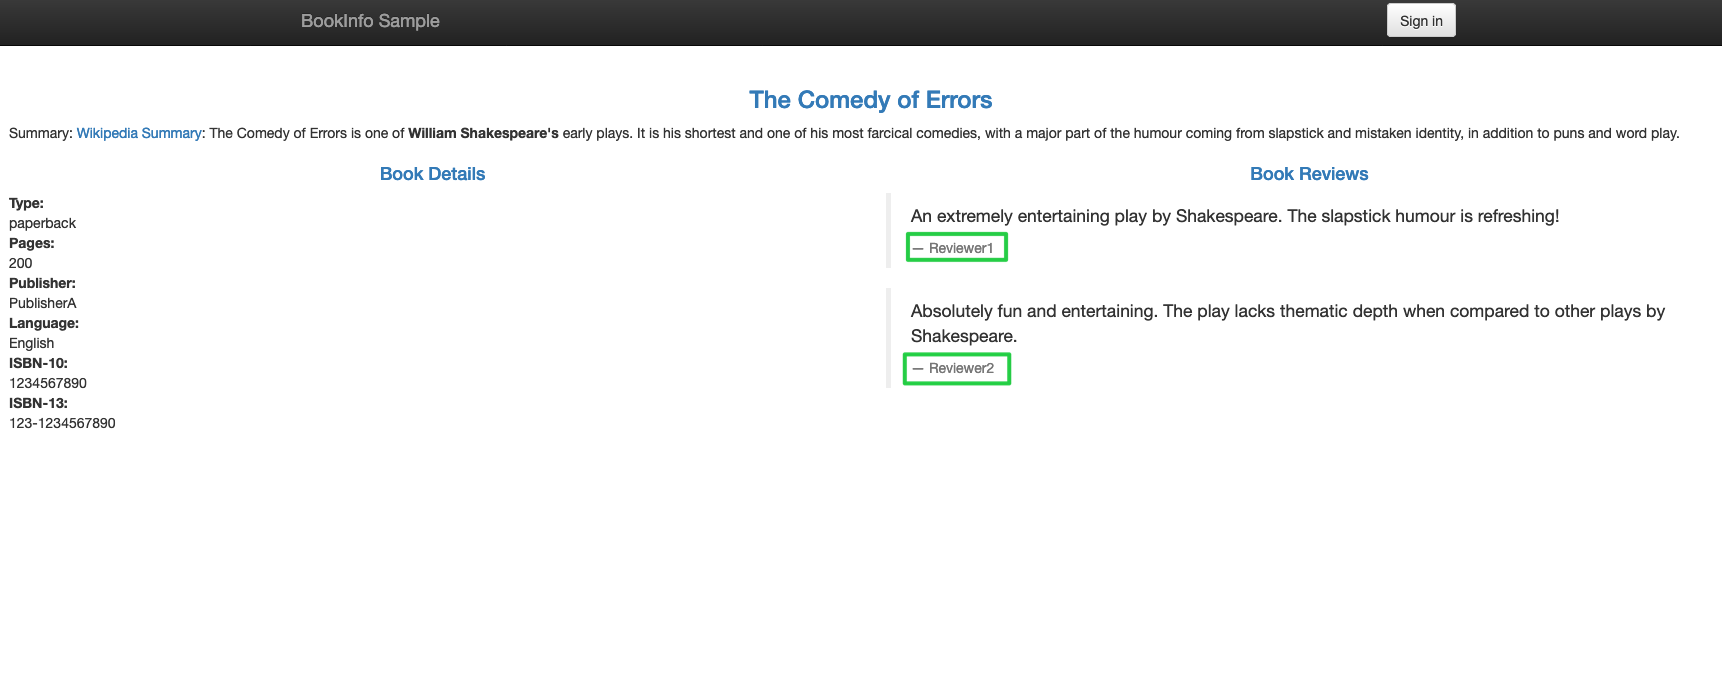
In the image below, you can notice that only Reviewer1 and Reviewer2 are displayed without any stars in the Book Reviews section. This is the status of this app version. To explore more features of traffic management, you can implement a canary release for this app.
Note
KubeSphere provides three kinds of grayscale strategies based on Istio, including blue-green deployment, canary release and traffic mirroring.
 Previous

What’s on this Page