


You are viewing documentation for KubeSphere version:v3.0.0
KubeSphere v3.0.0 documentation is no longer actively maintained. The version you are currently viewing is a static snapshot. For up-to-date documentation, see the latest version.


Project Network Isolation
KubeSphere project network isolation lets project administrators enforce which network traffic is allowed using different rules. This tutorial demonstrates how to enable network isolation among projects and set rules to control network traffic.
Prerequisites
- You have already enabled Network Policies.
- You must have an available project and an account of the
adminrole (project-admin) at the project level. For more information, see Create Workspaces, Projects, Accounts and Roles.
Note
For the implementation of the Network Policy, you can refer to KubeSphere NetworkPolicy.
Enable/Disable Project Network Isolation
-
Log in to KubeSphere as
project-admin. Go to your project and select Network Isolation in Project Settings. By default, project network isolation is disabled.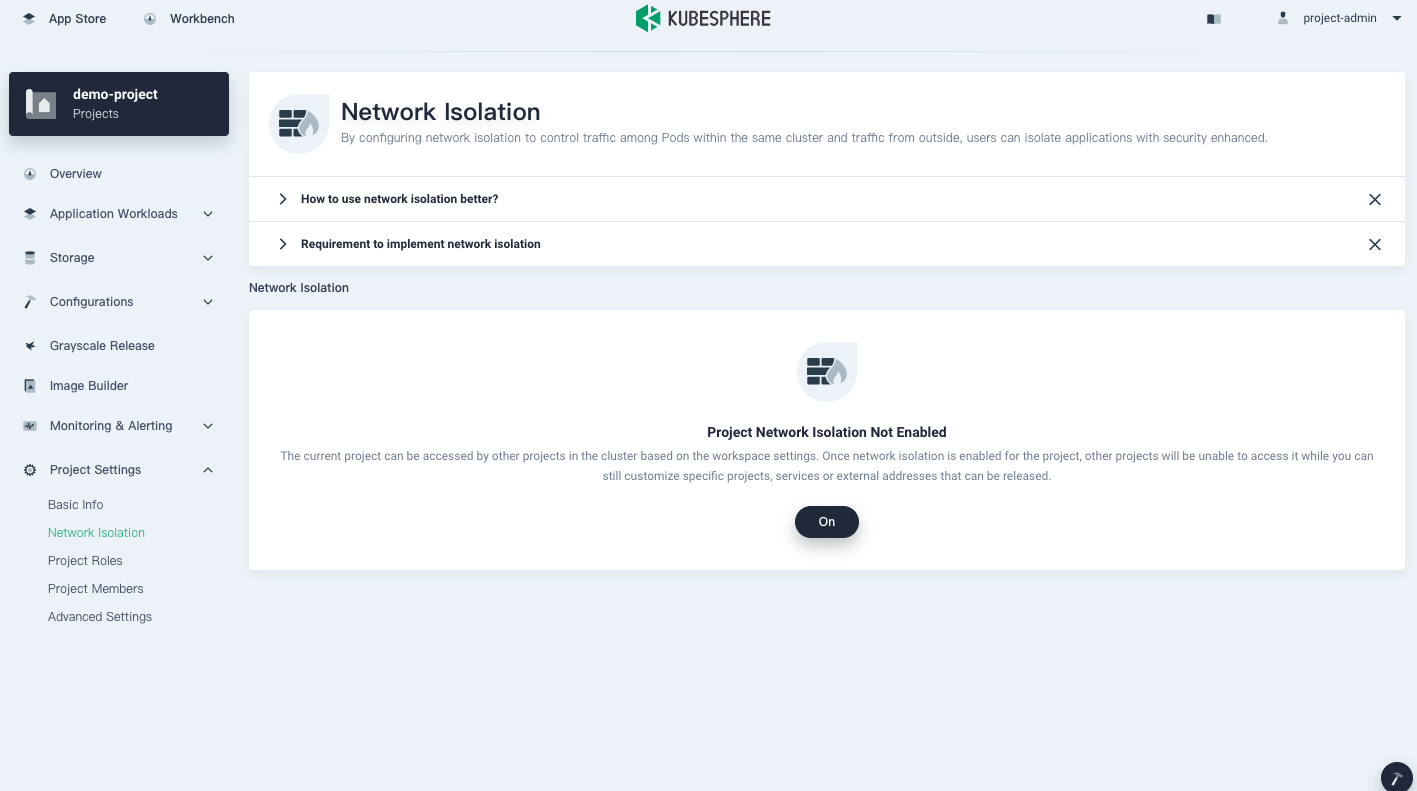
-
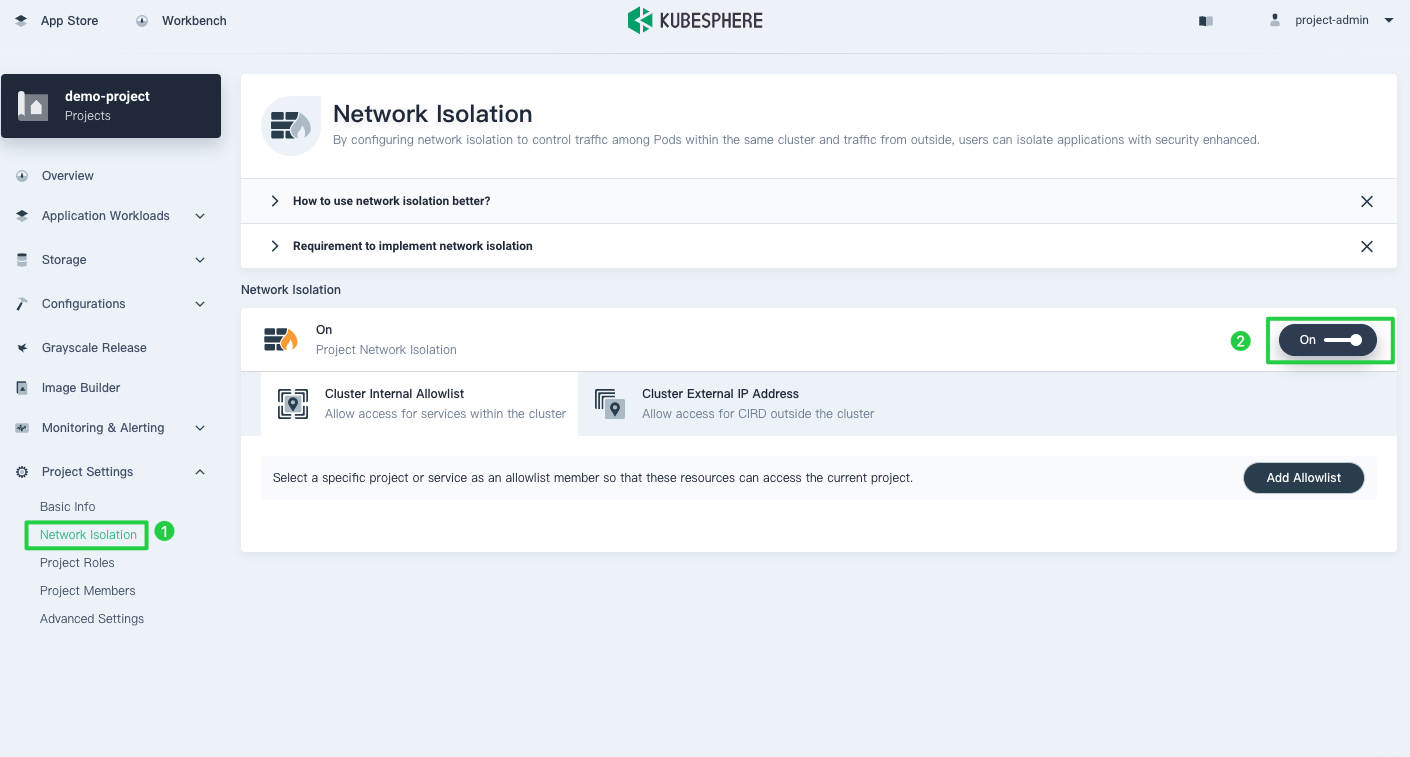
To enable project network isolation, click On.
Note
When network isolation is turned on, egress traffic will be allowed by default, while ingress traffic will be denied for different projects. But when you add an egress network policy, only traffic that matches your policy will be allowed to go out. -
You can also disable network isolation on this page.
Note
When network isolation is turned off, any previously created network policies will be deleted as well.
Set a Network Policy
If the default policy does not meet your needs when network isolation is enabled, you can customize your network policy to meet your needs. Currently, you can add custom network policies in KubeSphere for traffic within the cluster or incoming traffic outside the cluster.
For internal traffic within the cluster
Network policies at the project level within a cluster are used to control whether resources in this project can be accessed by other projects within the same cluster, and which Services you can access.
Assume a NGINX Deployment workload has been created in another project demo-project-2 and is exposed via the Service nginx on the port 80 with TCP. Here is an example of how to set ingress and egress traffic rules.
Note
For more information about how to create workloads, see Deployments and Services respectively.
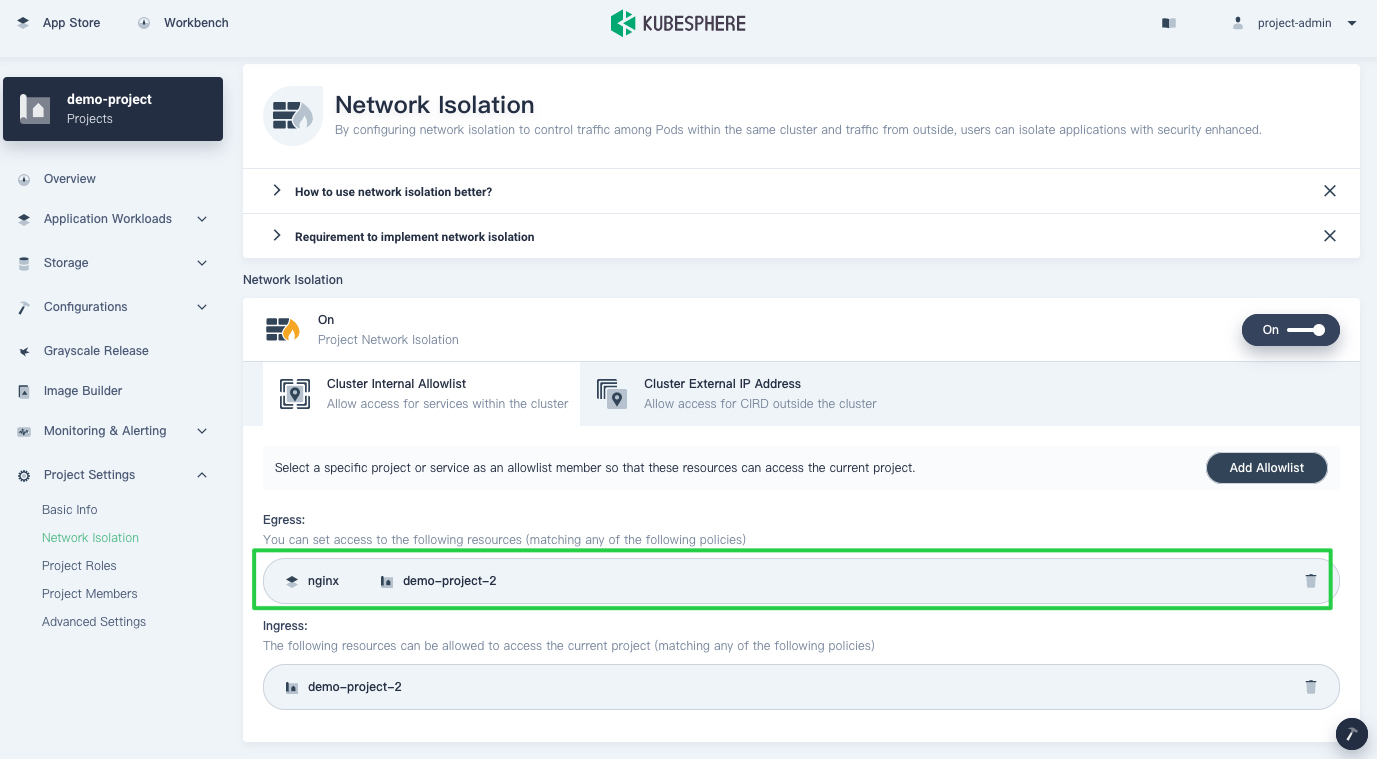
Allow ingress traffic from workloads in a different project
-
On the Network Isolation page of your current project, select Cluster Internal Allowlist.
-
Click Add Allowlist.
-
Select Ingress under Direction.
-
Select the tab Project under Type.
-
Select the project
demo-project-2.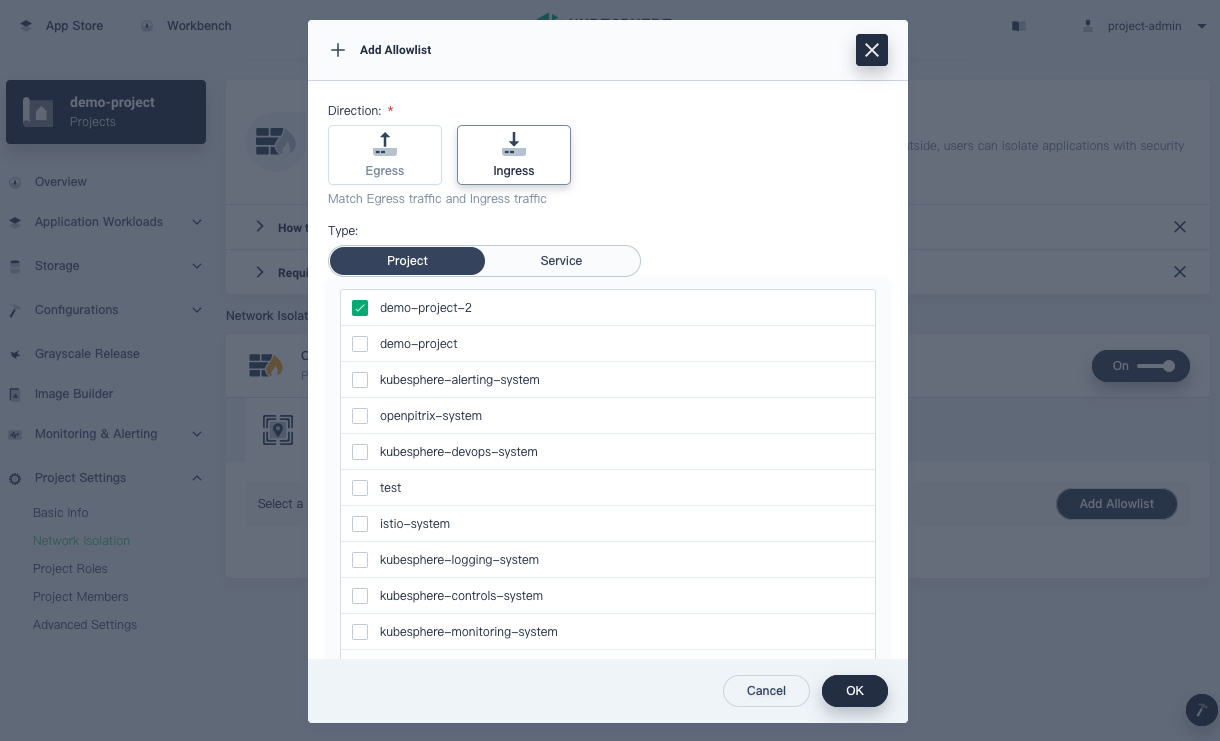
-
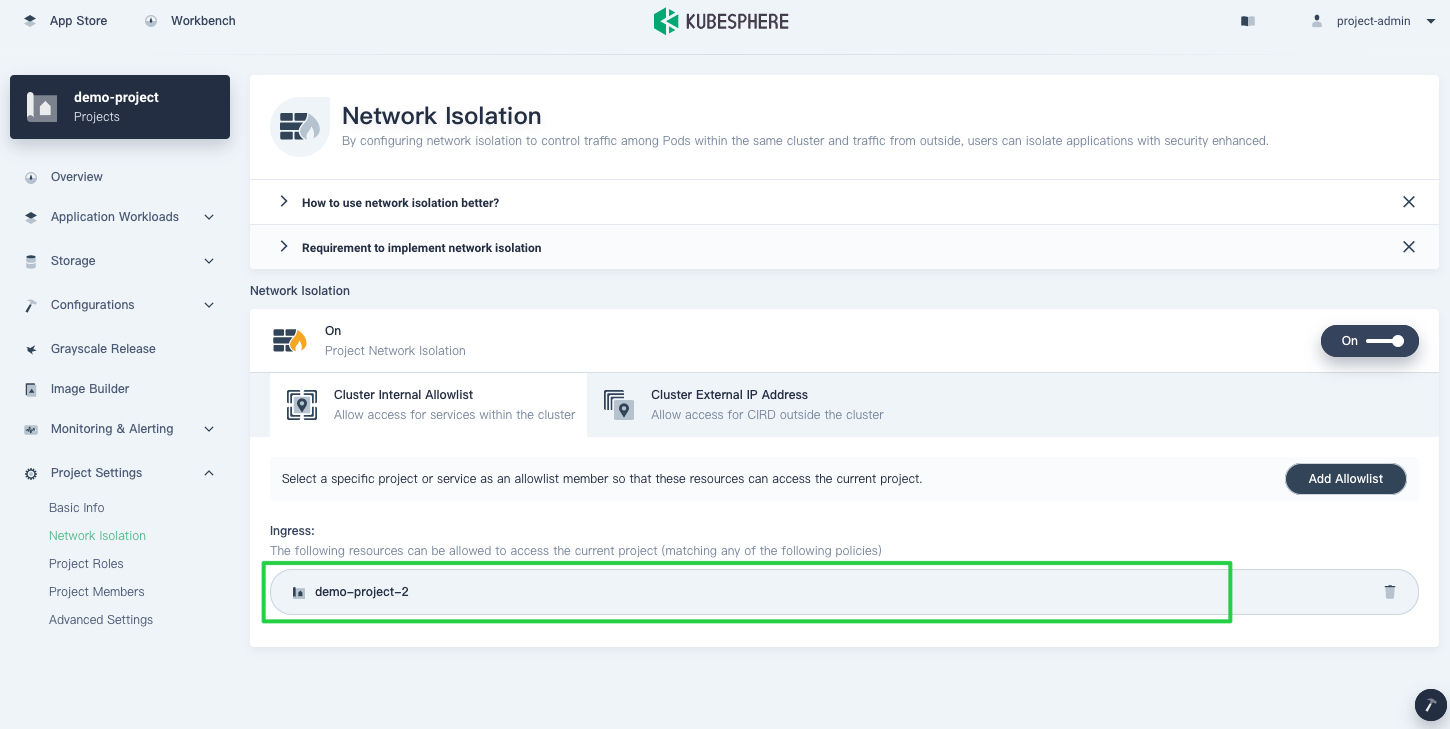
Click OK and you can see that the project is now in the allowlist.
Note
If the network is not accessible after you set the network policy, then you need to check whether the peer project has a corresponding egress rule in it.
Allow egress traffic to Services in a different project
-
On the Network Isolation page of your current project, select Cluster Internal Allowlist.
-
Click Add Allowlist.
-
Select Egress under Direction.
-
Select the tab Service under Type.
-
Select the project
demo-project-2from the drop-down list. -
Select the Service that is allowed to receive egress traffic. In this case, check
nginx.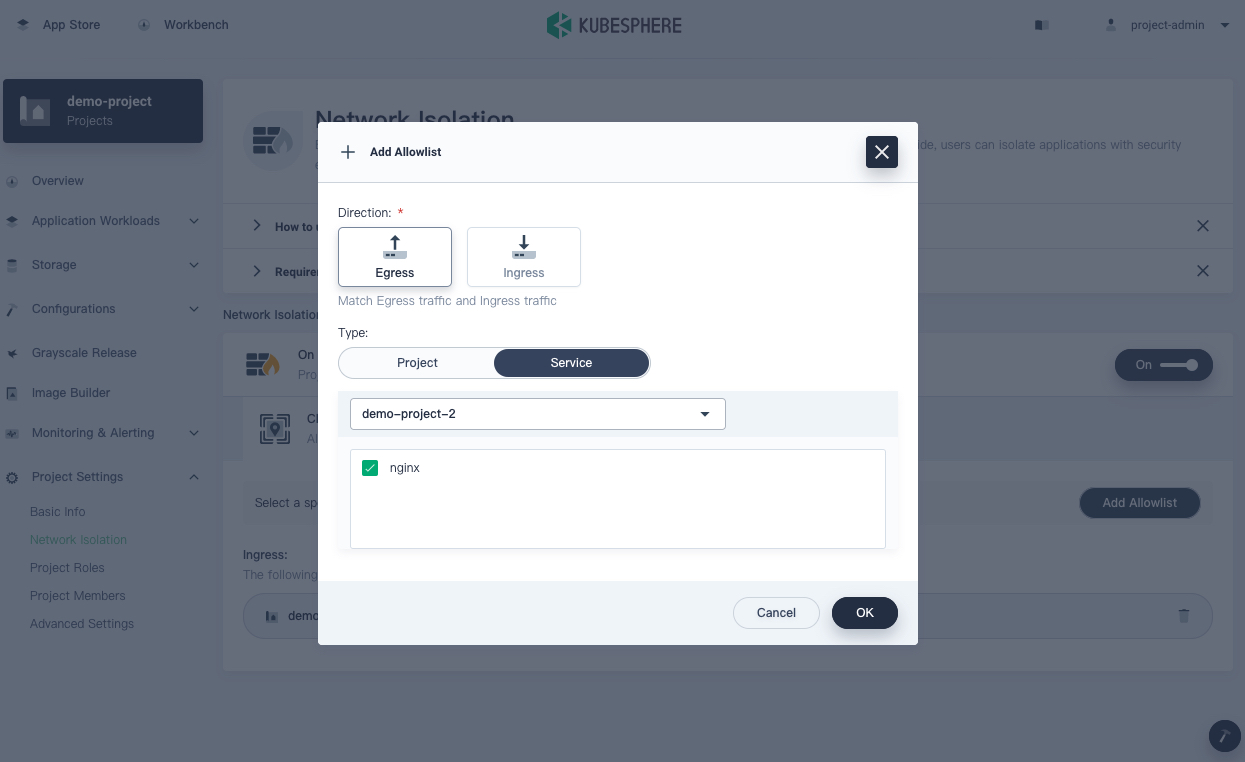
-
Click OK and you can see that the Service is now in the allowlist.
Note
When creating a Service, you must make sure that the selectors of the Service are not empty.
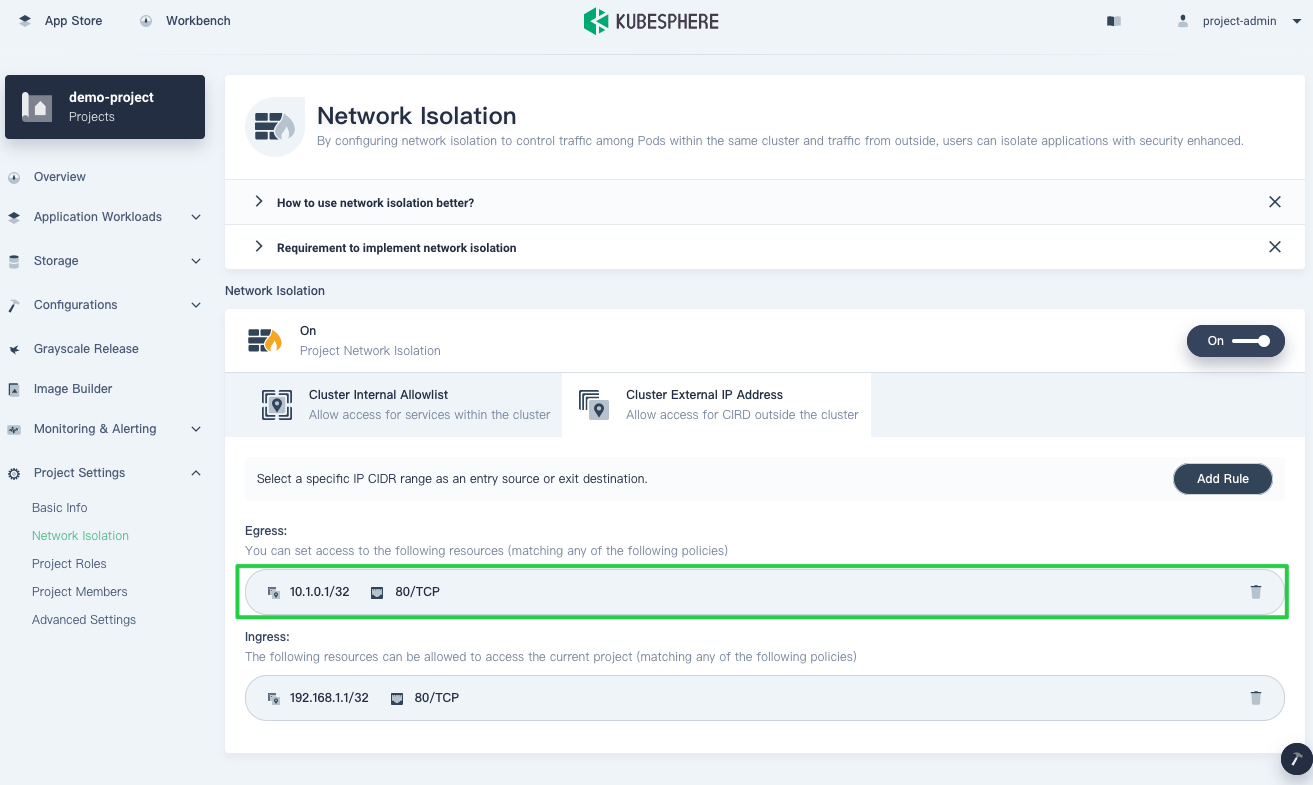
For incoming traffic outside the cluster
KubeSphere uses CIDR to distinguish between peers. Assume a Tomcat Deployment workload has been created in your current project and is exposed via the NodePort Service demo-service on the NodePort 80 with TCP. For an external client with the IP address 192.168.1.1 to access this Service, you need to add a rule for it.
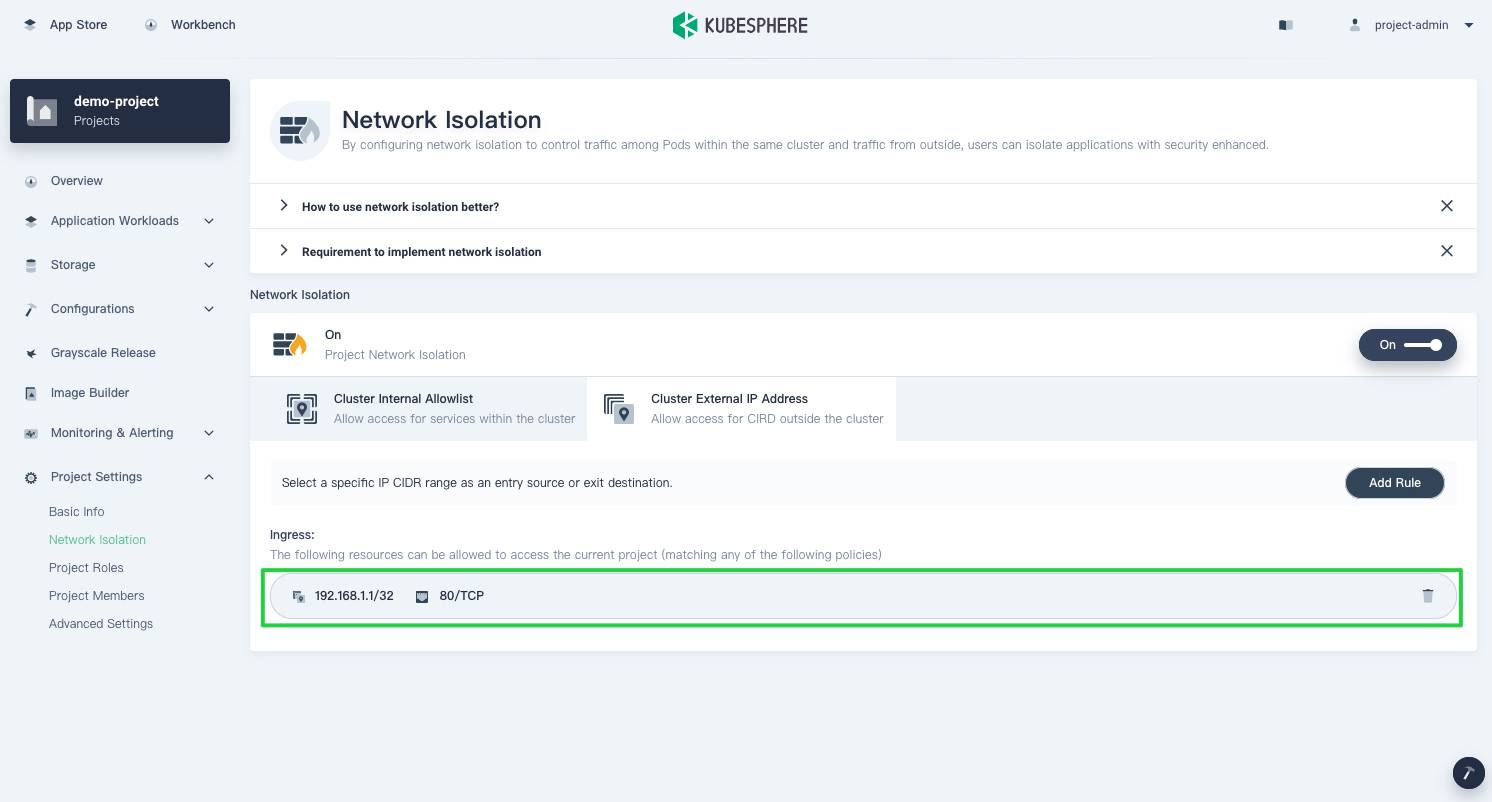
Allow ingress traffic from an client outside the cluster
-
On the Network Isolation page of your current project, select Cluster External IP Address and click Add Rule.
-
Select Ingress under Direction.
-
Enter
192.168.1.1/32for CIDR. -
Select the protocol
TCPand enter80as the port number.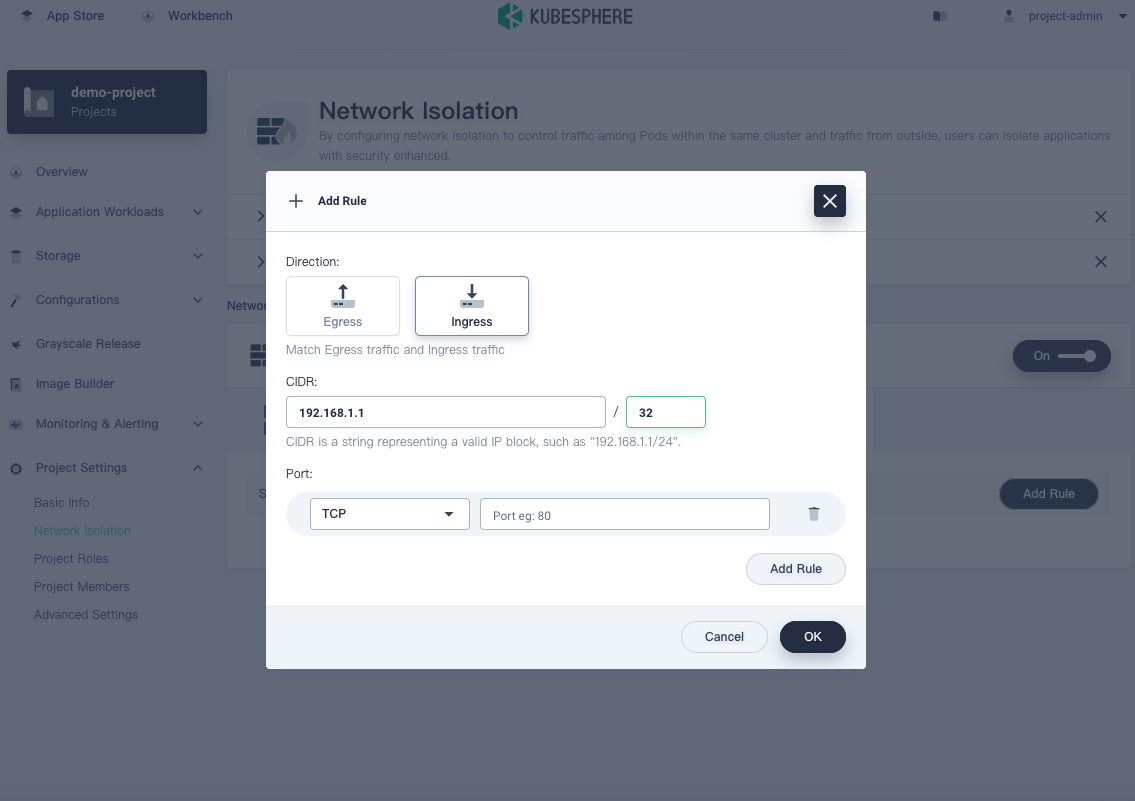
-
Click OK and you can see that the rule has been added.
Note
It is recommended to set
spec.externalTrafficPolicy in the Service configuration to local, so that the source address of the packet will not change. Namely, the source address of the packet is the source address of the client.Assume the IP address of an external client is http://10.1.0.1:80, then you need to set a rule for the egress traffic so that the internal Service can access it.
Allow egress traffic to Services outside the cluster
-
On the Network Isolation page of your current project, select Cluster External IP Address and click Add Rule.
-
Select Egress under Direction.
-
Enter
10.1.0.1/32for CIDR. -
Select the protocol
TCPand enter80as the port number.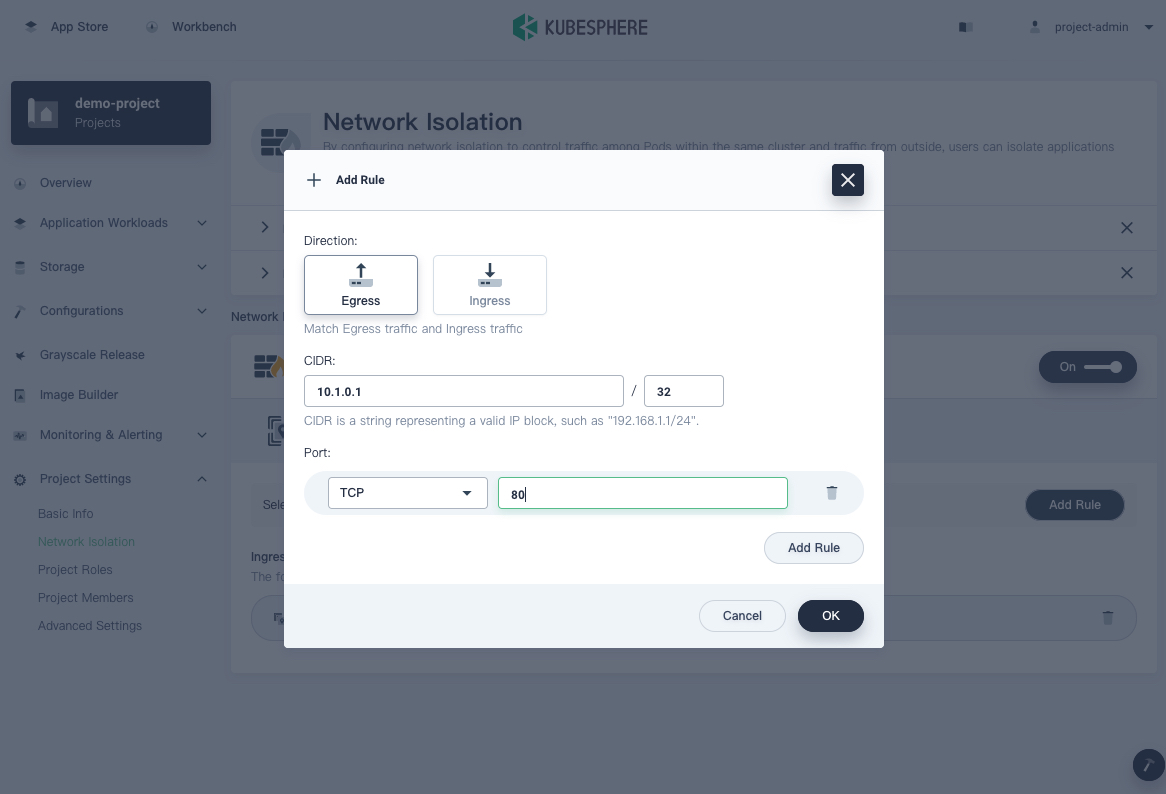
-
Click OK and you can see that the rule has been added.
Note
In step 4, when you select SCTP, you must make sure SCTP is enabled.
Best practices
To ensure that all Pods in a project are secure, a best practice is to enable network isolation. When network isolation is on, the project cannot be accessed by other projects. If your workloads need to be accessed by others, you can follow these steps:
- Set a gateway in Project Settings.
- Expose workloads that need to be accessed to a gateway via a Service.
- Allow ingress traffic from the namespace where your gateway locates.
If egress traffic is controlled, you should have a clear plan of what projects, Services, and IP addresses can be accessed, and then add them one by one. If you are not sure about what you want, it is recommended that you keep your network policy unchanged.
FAQs
Q: Why can’t the custom monitoring system of KubeSphere get data after I enabled network isolation?
A: After you enabled custom monitoring, the KubeSphere monitoring system will access the metrics of the Pod. You need to allow ingress traffic for the KubeSphere monitoring system. Otherwise, it cannot access Pod metrics.
KubeSphere provides a configuration item allowedIngressNamespaces to simplify similar configurations, which allows all projects listed in the configuration.
root@node1:~# kubectl get -n kubesphere-system clusterconfigurations.installer.kubesphere.io  ks-installer -o yaml
apiVersion: installer.kubesphere.io/v1alpha1
kind: ClusterConfiguration
metadata:
  ...
  name: ks-installer
  namespace: kubesphere-system
  ...
spec:
  ...
  networkpolicy:
    enabled: true
    nsnpOptions:
      allowedIngressNamespaces:
        - kubesphere-system
        - kubesphere-monitoring-system
  ...
Q: Why can’t I access a Service even after setting a network policy through the Service?
A: When you add a network policy and access the Service via the cluster IP address, if the network is not
working, check the kube-proxy configuration to see if masqueradeAll is false.
root@node1:~# kubectl get cm -n kube-system kube-proxy -o yaml
apiVersion: v1
data:
  config.conf: |-
    ...
    iptables:
      masqueradeAll: false
    ...
  ...
kind: ConfigMap
metadata:
  ...
  labels:
    app: kube-proxy
  name: kube-proxy
  namespace: kube-system
  ...
Q: How do I determine the CIDR when I set the ingress rule?
A: In Kubernetes, the source IP address of the packet is often handled by NAT, so you need to figure out what the source address of the packet will be before you add the rule. For more information, refer to Source IP.
 Previous

What’s on this Page