


You are viewing documentation for KubeSphere version:v3.0.0
KubeSphere v3.0.0 documentation is no longer actively maintained. The version you are currently viewing is a static snapshot. For up-to-date documentation, see the latest version.


Enable Pluggable Components — Quickstarts
This tutorial demonstrates how to enable pluggable components of KubeSphere both before and after the installation. KubeSphere features ten pluggable components which are listed below.
| Configuration Item | Corresponding Component | Description |
|---|---|---|
| alerting | KubeSphere alerting system | Enable users to customize alerting policies to send messages to receivers in time with different time intervals and alerting levels to choose from. |
| auditing | KubeSphere audit log system | Provide a security-relevant chronological set of records, recording the sequence of activities that happen in the platform, initiated by different tenants. |
| devops | KubeSphere DevOps system | Provide an out-of-box CI/CD system based on Jenkins, and automated workflow tools including Source-to-Image and Binary-to-Image. |
| events | KubeSphere events system | Provide a graphical web console for the exporting, filtering and alerting of Kubernetes events in multi-tenant Kubernetes clusters. |
| logging | KubeSphere logging system | Provide flexible logging functions for log query, collection and management in a unified console. Additional log collectors can be added, such as Elasticsearch, Kafka and Fluentd. |
| metrics_server | HPA | The Horizontal Pod Autoscaler automatically scales the number of Pods based on needs. |
| networkpolicy | Network policy | Allow network isolation within the same cluster, which means firewalls can be set up between certain instances (Pods). |
| notification | KubeSphere notification system | Allow users to receive alerts from Alertmanager and then send notifications to various receivers including Email, Wechat Work and Slack (DingTalk and Webhook are supported in the latest version of Notification Manager). |
| openpitrix | KubeSphere App Store | Provide an app store for Helm-based applications and allow users to manage apps throughout the entire lifecycle. |
| servicemesh | KubeSphere Service Mesh (Istio-based) | Provide fine-grained traffic management, observability and tracing, and visualized traffic topology. |
For more information about each component, see Overview of Enable Pluggable Components.
Note
- If you use KubeKey to install KubeSphere on Linux, by default, the above components are not enabled except
metrics_server. However,metrics_serverremains disabled by default if you install KubeSphere on existing Kubernetes clusters. This is because the component may already be installed in your environment, especially for cloud-hosted Kubernetes clusters. multiclusteris not covered in this tutorial. If you want to enable this feature, you need to set a corresponding value forclusterRole. For more information, see Multi-cluster Management.- Make sure your machine meets the hardware requirements before the installation. Here is the recommendation if you want to enable all pluggable components: CPU ≥ 8 Cores, Memory ≥ 16 G, Disk Space ≥ 100 G.
Enable Pluggable Components before Installation
Installing on Linux
When you implement multi-node installation of KubeSphere on Linux, you need to create a configuration file, which lists all KubeSphere components.
-
In the tutorial of Installing KubeSphere on Linux, you create a default file
config-sample.yaml. Modify the file by executing the following command:vi config-sample.yamlNote
If you adopt All-in-one Installation, you do not need to create aconfig-sample.yamlfile as you can create a cluster directly. Generally, the all-in-one mode is for users who are new to KubeSphere and look to get familiar with the system. If you want to enable pluggable components in this mode (for example, for testing purpose), refer to the following section to see how pluggable components can be installed after installation. -
In this file, enable the pluggable components you want to install by changing
falsetotrueforenabled. Here is the complete file for your reference. Save the file after you finish. -
Create a cluster using the configuration file:
./kk create cluster -f config-sample.yaml
Installing on Kubernetes
When you install KubeSphere on Kubernetes, you need to use ks-installer by applying two yaml files as below.
-
First download the file cluster-configuration.yaml and open it for editing.
vi cluster-configuration.yaml -
To enable the pluggable component you want to install, change
falsetotrueforenabledunder the component in this file. -
Save this local file and execute the following commands to start installation.
kubectl apply -f https://github.com/kubesphere/ks-installer/releases/download/v3.0.0/kubesphere-installer.yaml

kubectl apply -f cluster-configuration.yaml
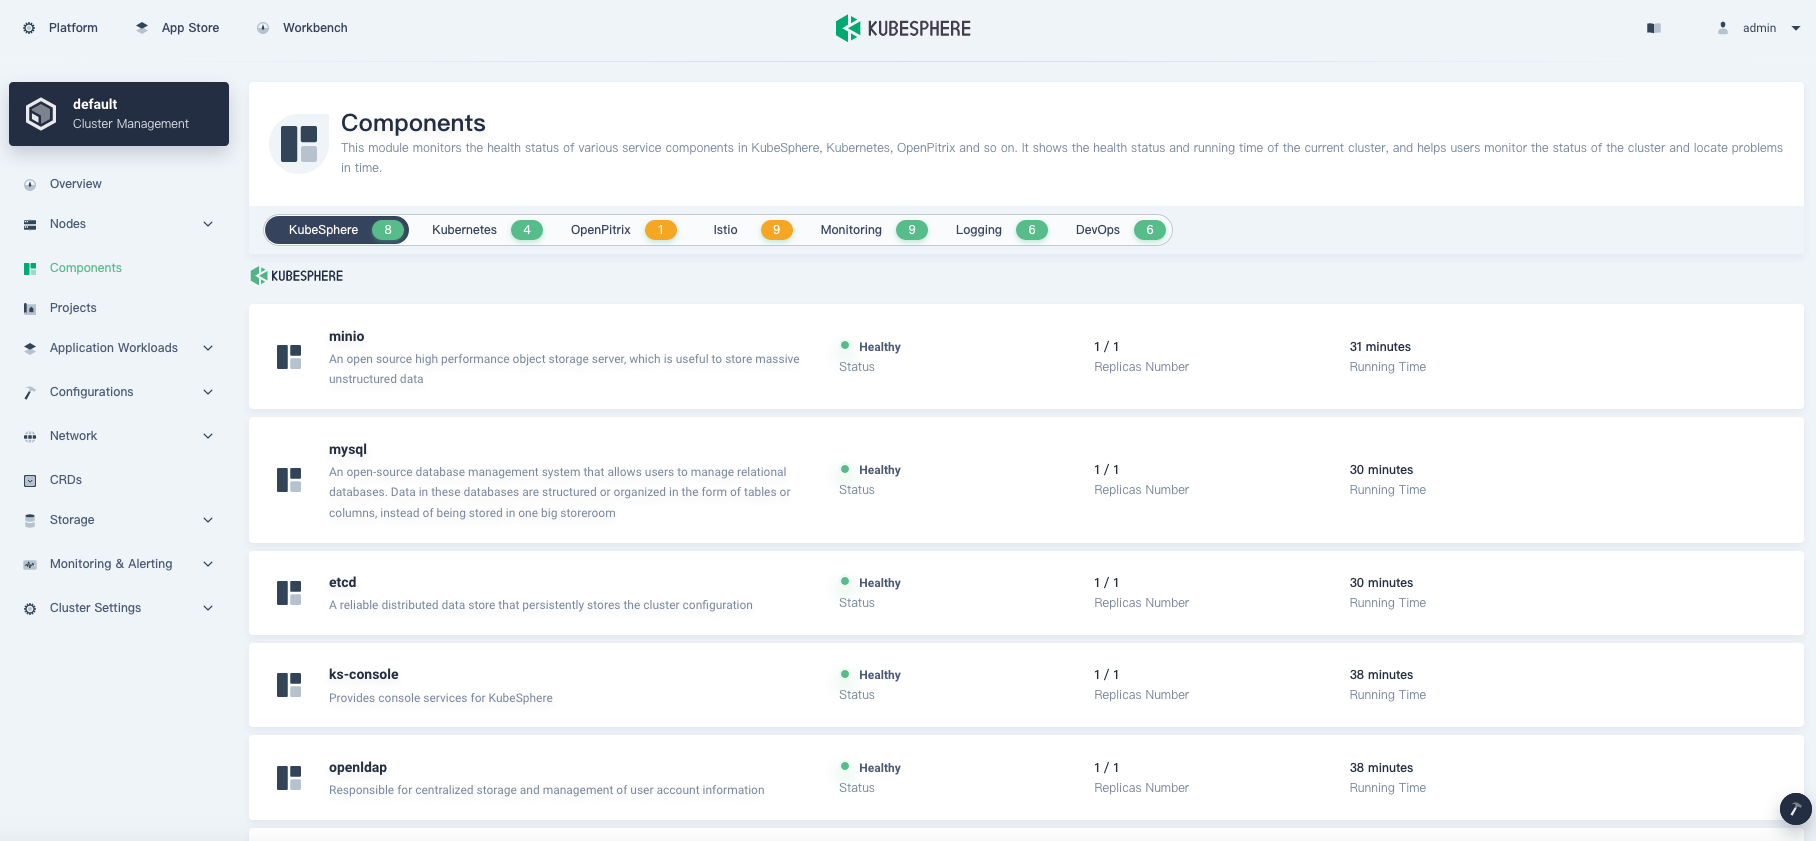
Whether you install KubeSphere on Linux or on Kubernetes, you can check the status of the components you have enabled in the web console of KubeSphere after installation. Go to Components, and you can see an image below:
Enable Pluggable Components after Installation
The KubeSphere web console provides a convenient way for users to view and operate on different resources. To enable pluggable components after installation, you only need to make few adjustments on the console directly. For those who are accustomed to the Kubernetes command-line tool, kubectl, they will have no difficulty in using KubeSphere as the tool is integrated into the console.
-
Log in to the console as
admin. Click Platform in the top-left corner and select Clusters Management.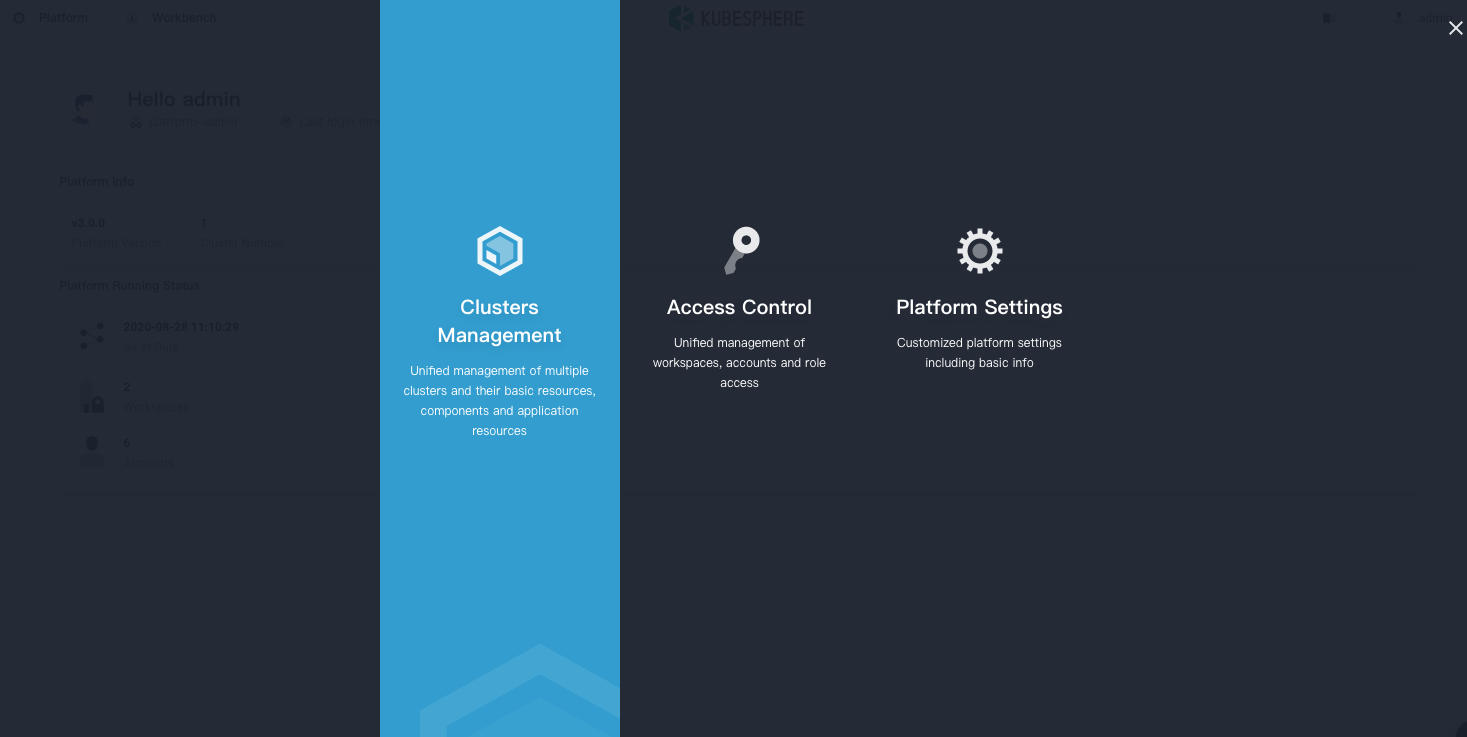
-
Click CRDs and enter
clusterconfigurationin the search bar. Click the result to view its detail page.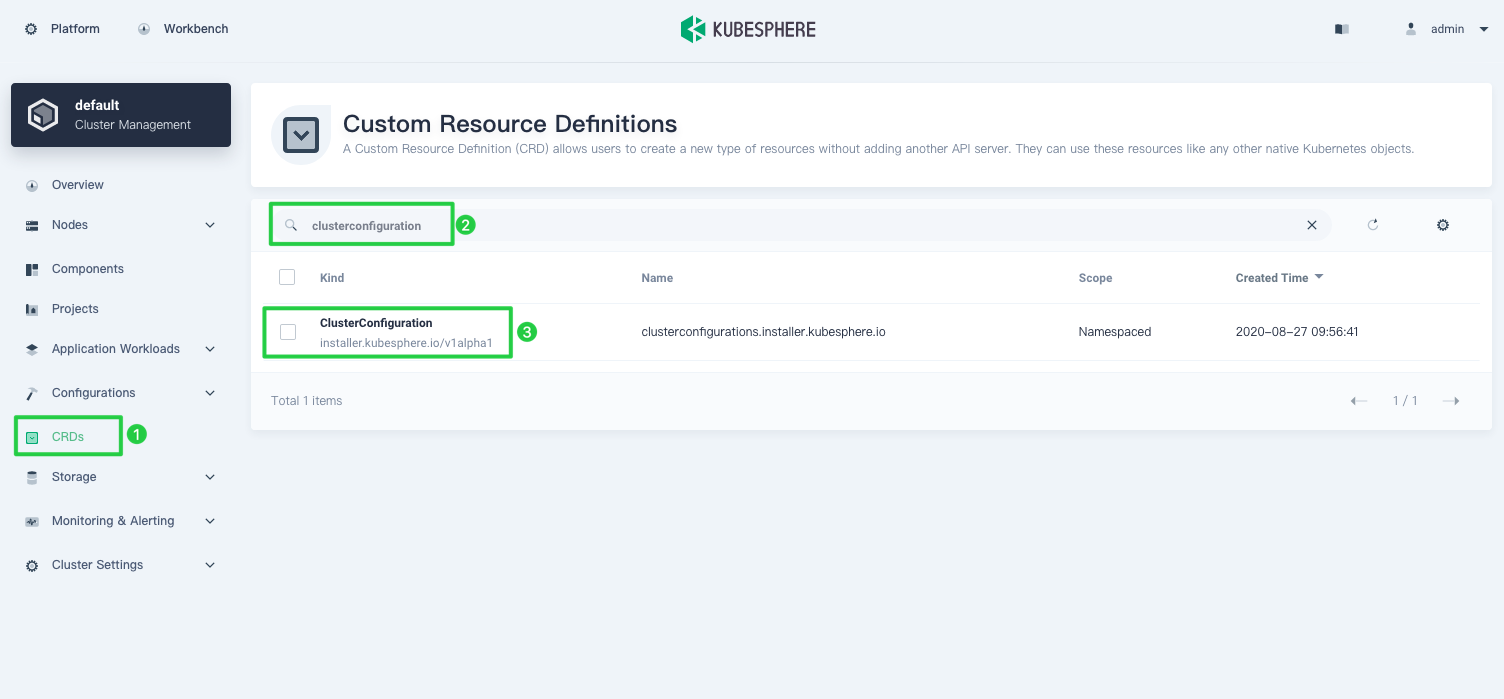
Info
A Custom Resource Definition (CRD) allows users to create a new type of resources without adding another API server. They can use these resources like any other native Kubernetes objects. -
In Resource List, click the three dots on the right of
ks-installerand select Edit YAML.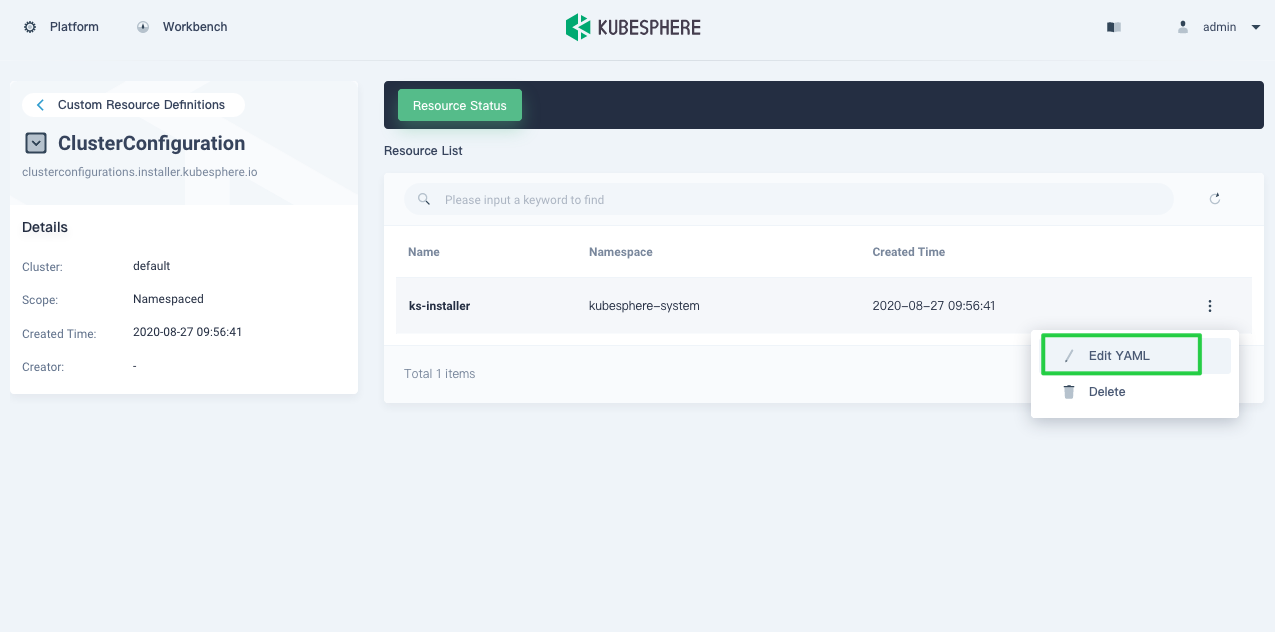
-
In this yaml file, enable the pluggable components you want to install by changing
falsetotrueforenabled. After you finish, click Update to save the configuration.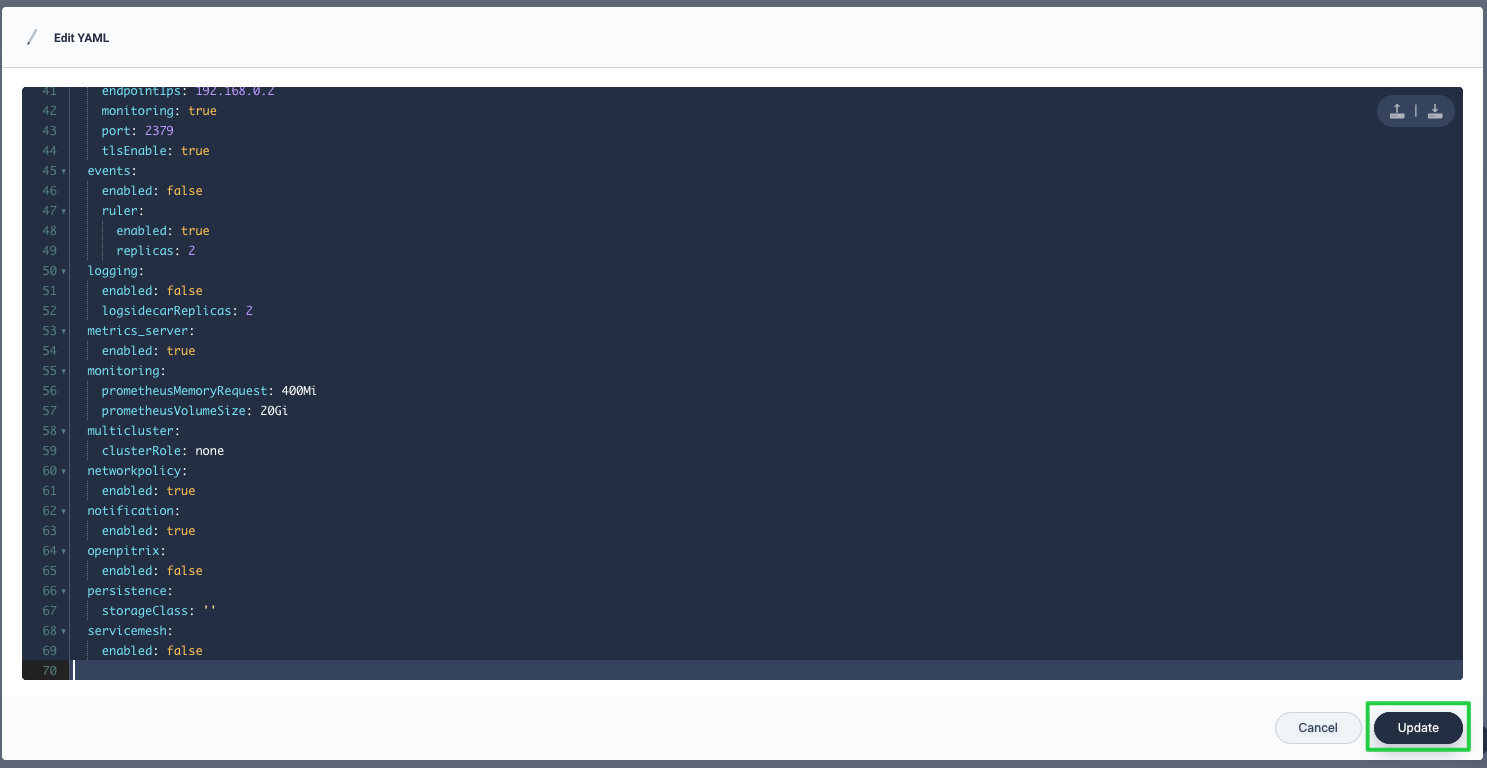
-
You can use the web kubectl to check the installation process by executing the following command:
kubectl logs -n kubesphere-system $(kubectl get pod -n kubesphere-system -l app=ks-install -o jsonpath='{.items[0].metadata.name}') -fTip
You can find the web kubectl tool by clicking the hammer icon in the bottom-right corner of the console. -
The output will display a message as below if the component is successfully installed.
##################################################### ### Welcome to KubeSphere! ### ##################################################### Console: http://192.168.0.2:30880 Account: admin Password: P@88w0rd NOTES: 1. After logging into the console, please check the monitoring status of service components in the "Cluster Management". If any service is not ready, please wait patiently until all components are ready. 2. Please modify the default password after login. ##################################################### https://kubesphere.io 20xx-xx-xx xx:xx:xx ##################################################### -
In Components, you can see the status of different components.
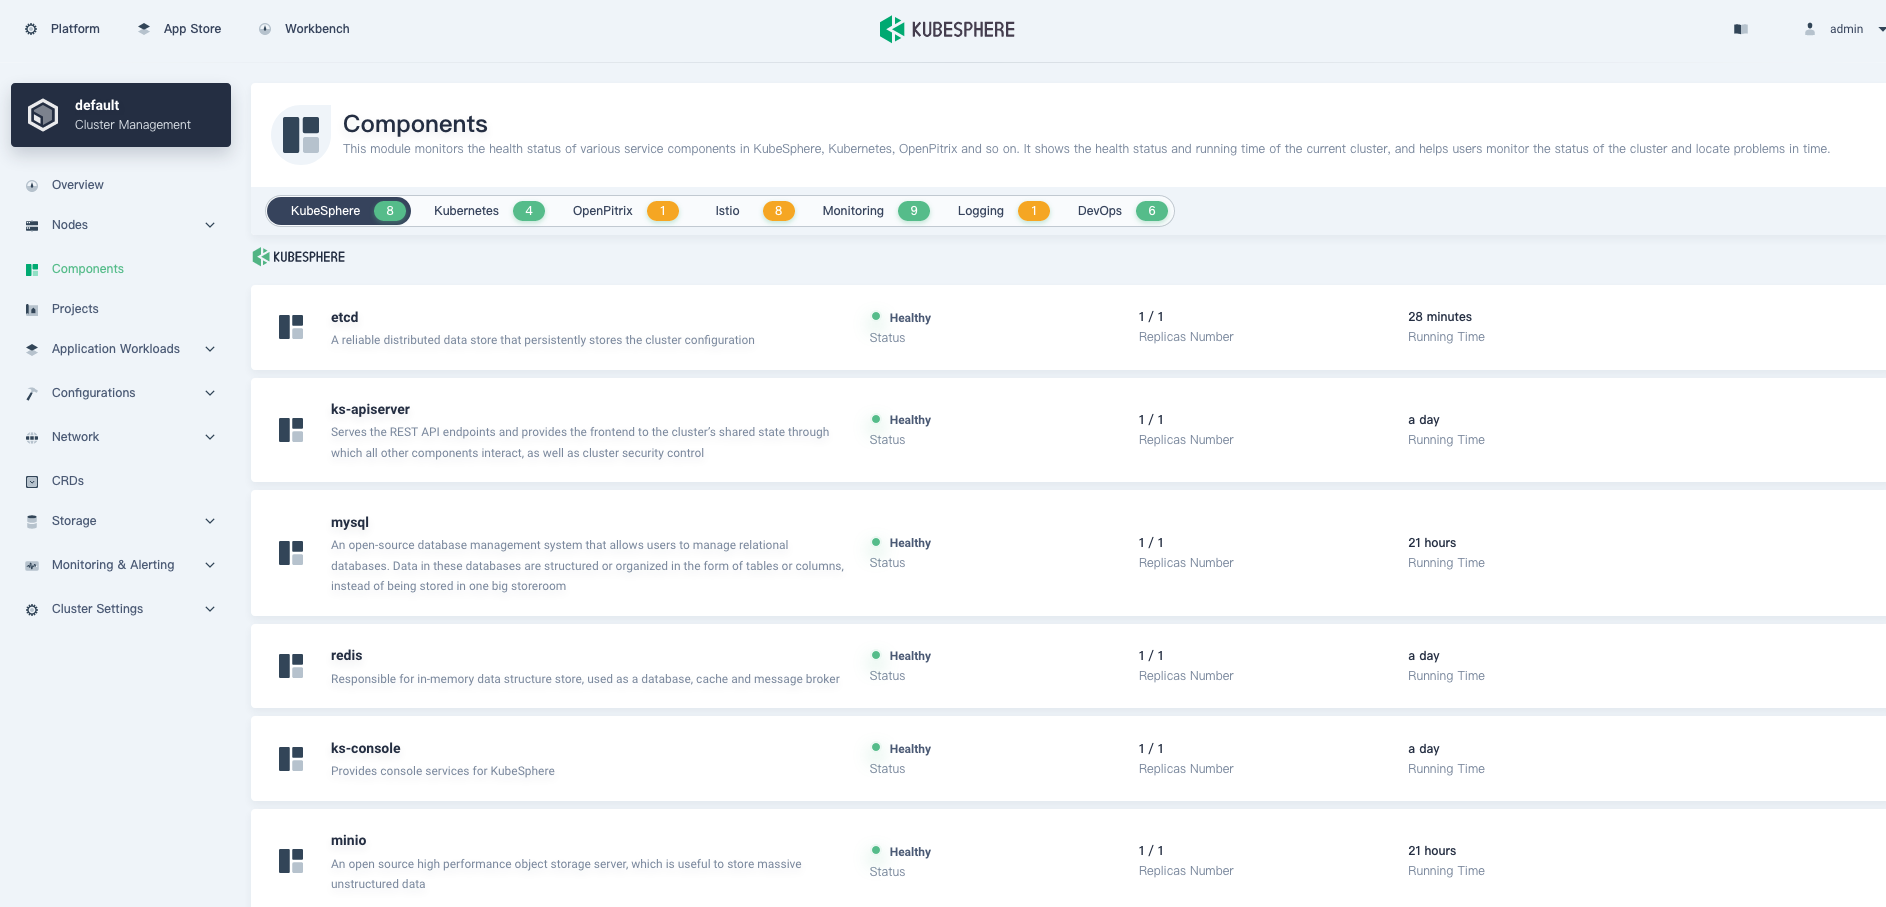
Tip
If you do not see relevant components in the above image, some Pods may not be ready yet. You can executekubectl get pod --all-namespacesthrough kubectl to see the status of Pods.
 Previous

What’s on this Page