


You are viewing documentation for KubeSphere version:v3.0.0
KubeSphere v3.0.0 documentation is no longer actively maintained. The version you are currently viewing is a static snapshot. For up-to-date documentation, see the latest version.


Project Quotas
KubeSphere uses Kubernetes requests and limits to control resource (for example, CPU and memory) usage in a project, also known as ResourceQuotas in Kubernetes. Requests make sure a project can get the resources it needs as they are specifically guaranteed and reserved. On the contrary, limits ensure that a project can never use resources above a certain value.
Besides CPU and memory, you can also set resource quotas for other objects separately such as Pods, Deployments, Jobs, Services and ConfigMaps in a project.
This tutorial demonstrates how to configure quotas for a project.
Prerequisites
You have an available workspace, a project and an account (ws-admin). The account must have the admin role at the workspace level. For more information, see Create Workspaces, Projects, Accounts and Roles.
Note
If you use the account
project-admin (an account of the admin role at the project level), you can set project quotas as well for a new project (i.e. its quotas remain unset). However, project-admin cannot change project quotas once they are set. Generally, it is the responsibility of ws-admin to set limits and requests for a project. project-admin is responsible for setting limit ranges for containers in a project.Set Project Quotas
-
Log in to the console as
ws-adminand go to a project. On the Overview page, you can see project quotas remain unset if the project is newly created. Click Set to configure quotas.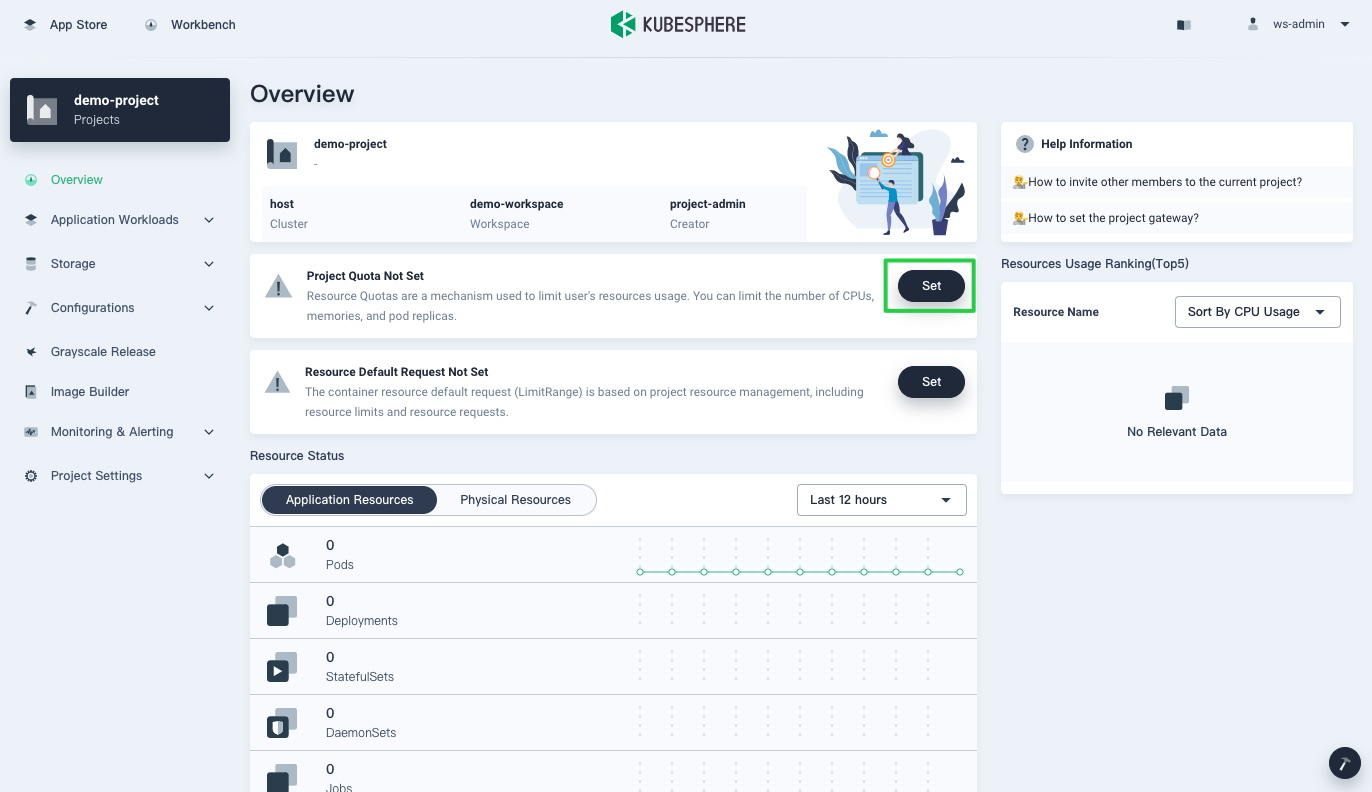
-
In the dialog that appears, you can see that KubeSphere does not set any requests or limits for a project by default. To set requests and limits to control CPU and memory resources, use the slider to move to a desired value or input numbers directly. Leaving a field blank means you do not set any requests or limits.
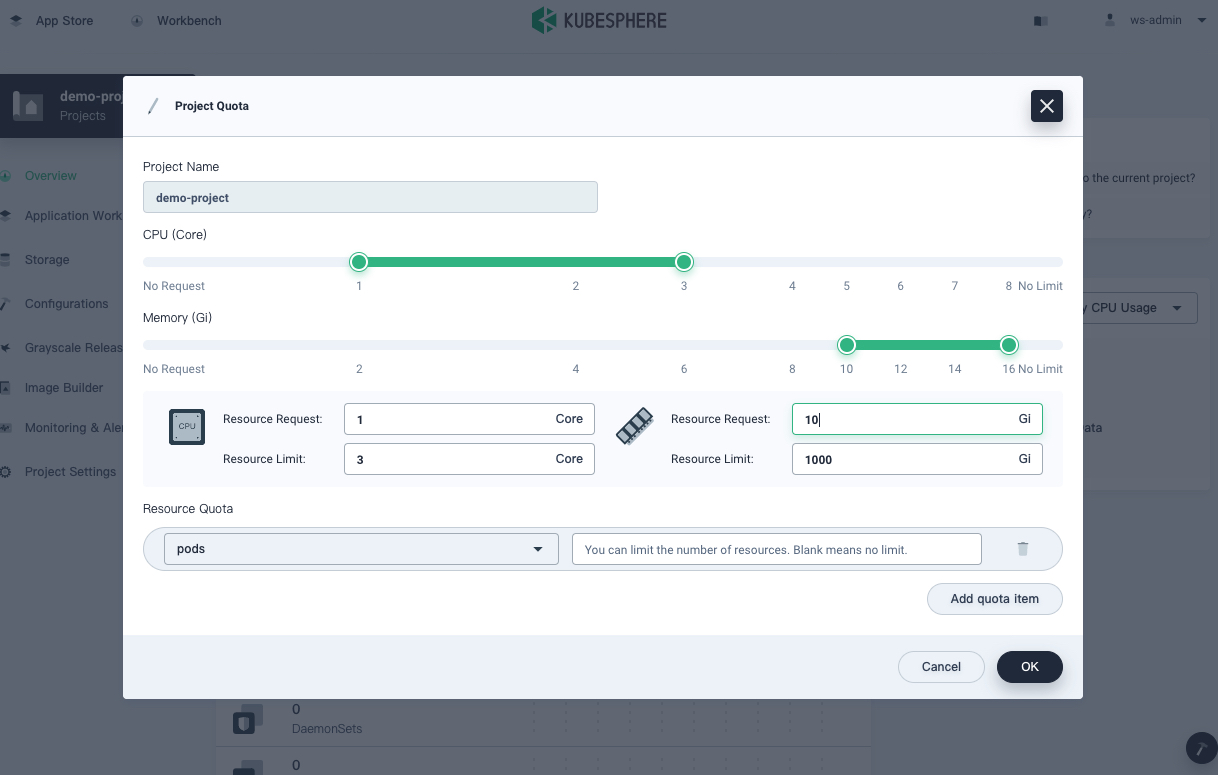
Note
The limit can never be lower than the request. -
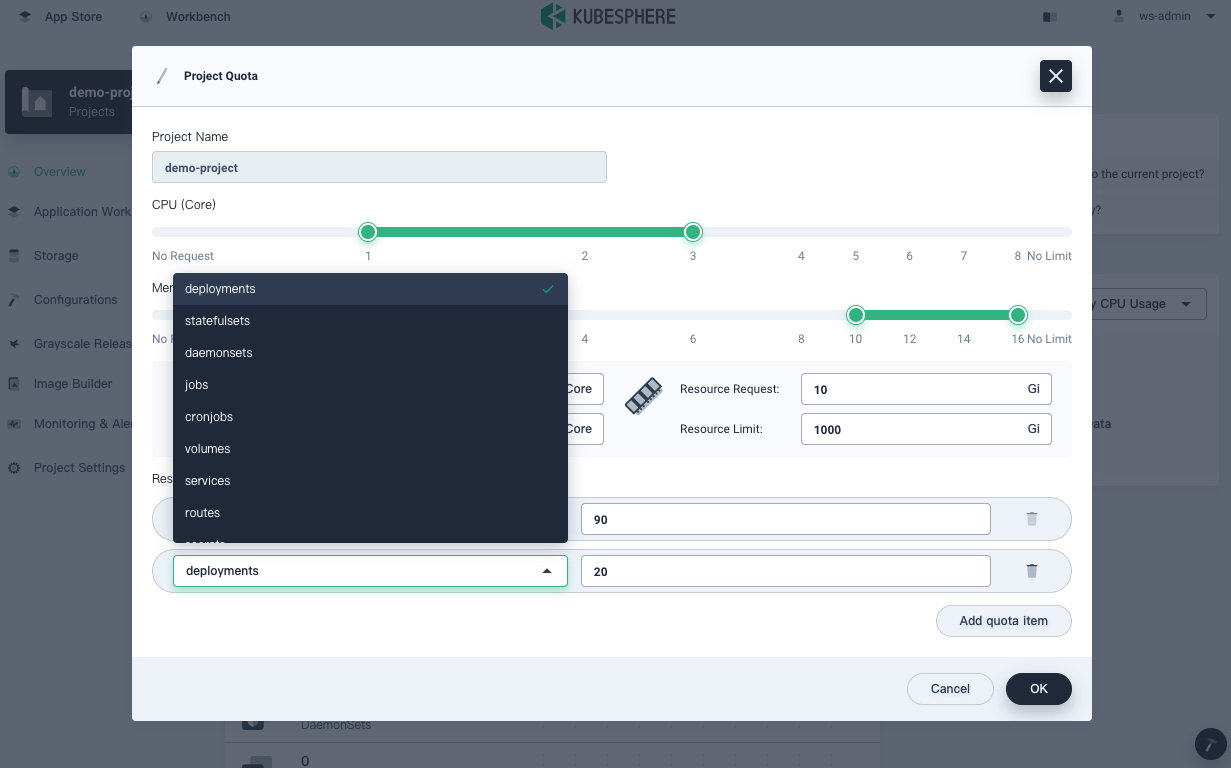
To set quotas for other resources, click Add quota item and select an object from the list.
-
Click OK to finish setting quotas.
-
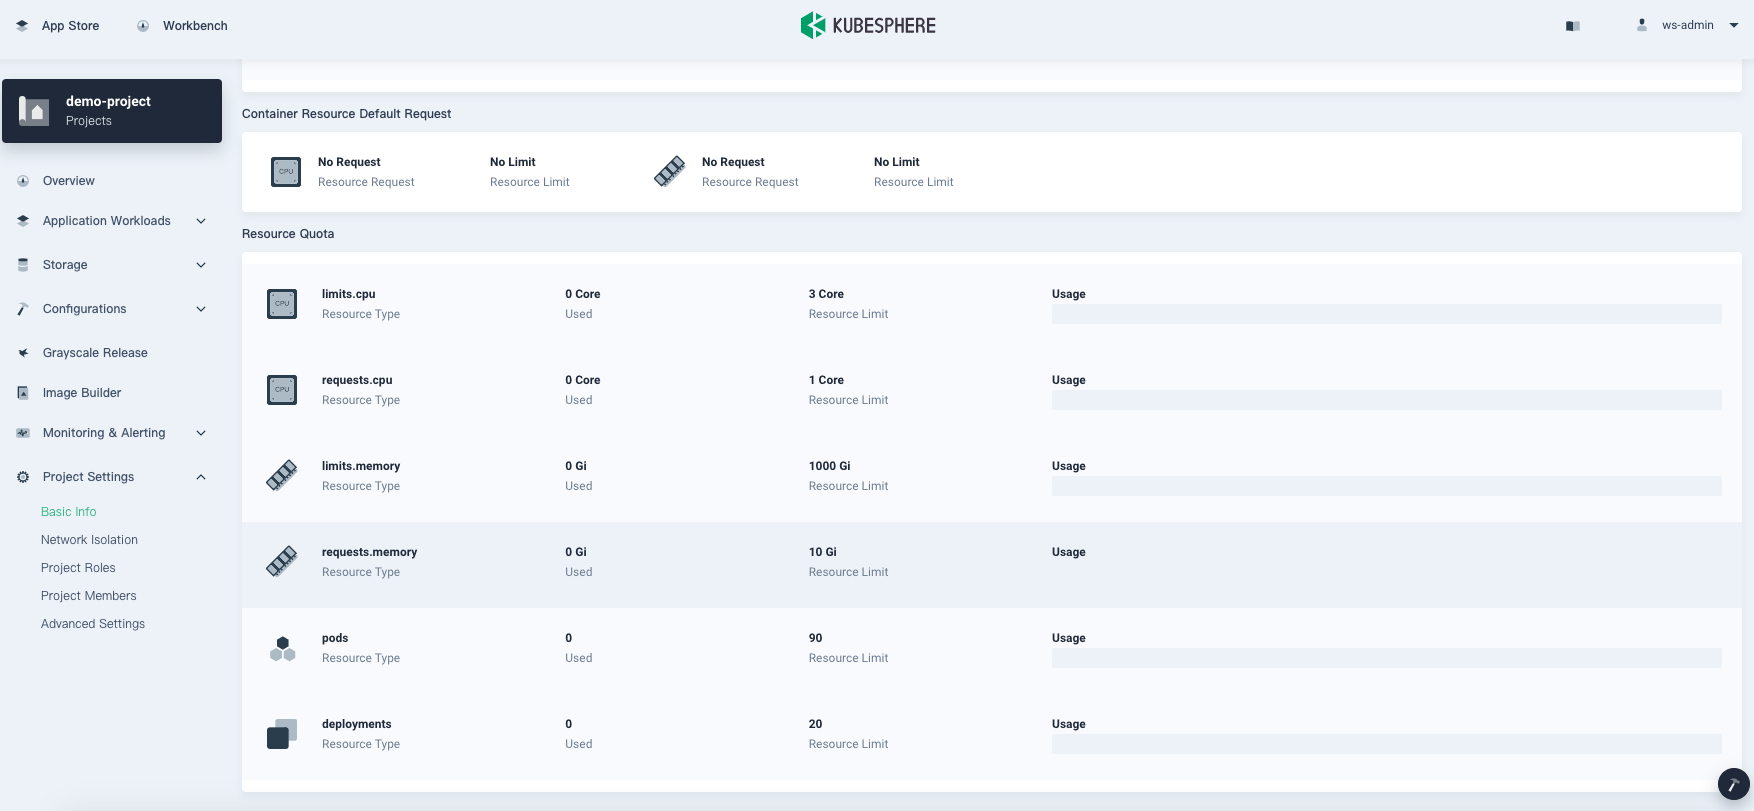
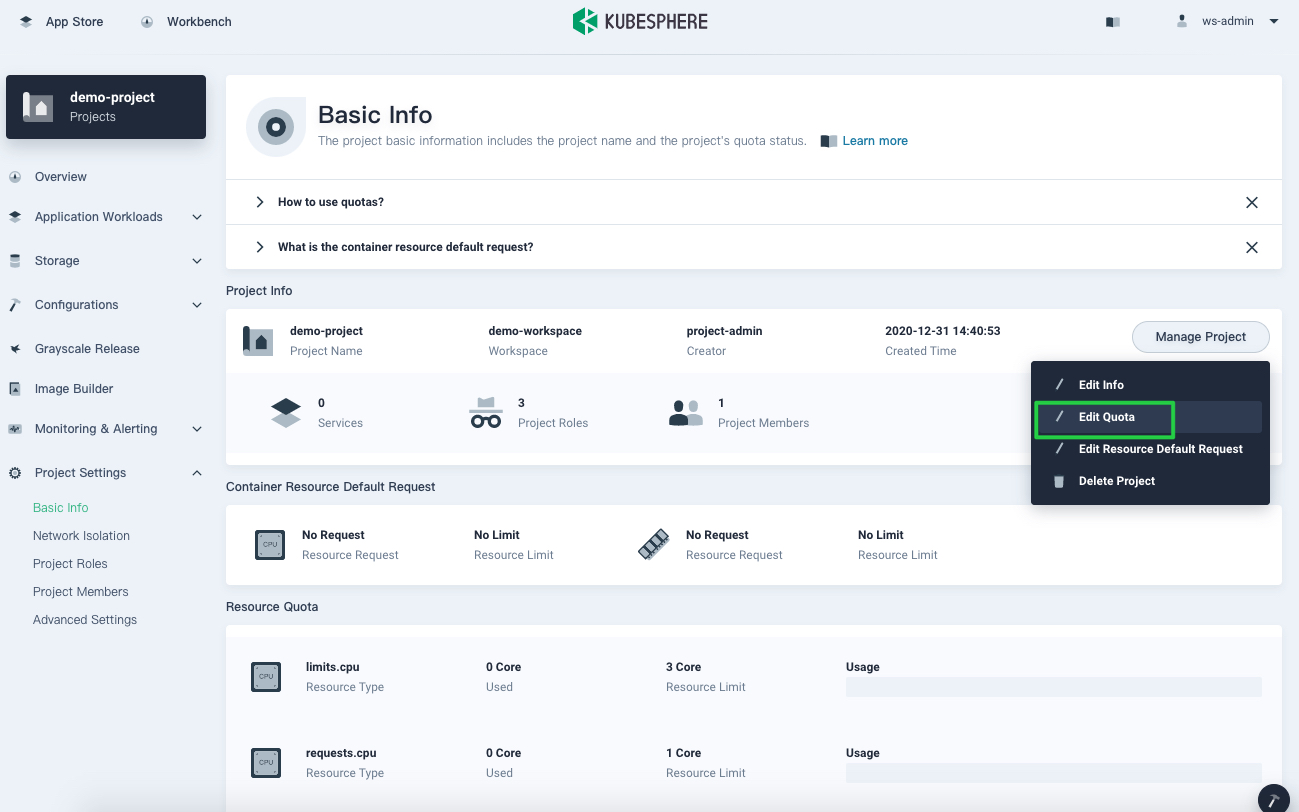
Go to Basic Info in Project Settings, and you can see all resource quotas for the project.
-
To change project quotas, click Manage Project on the Basic Info page and select Edit Quota.
-
Change project quotas directly on the Project Quota page and click OK.
See Also
 Previous

What’s on this Page