


You are viewing documentation for KubeSphere version:v3.0.0
KubeSphere v3.0.0 documentation is no longer actively maintained. The version you are currently viewing is a static snapshot. For up-to-date documentation, see the latest version.


Role and Member Management In Your Project
This guide demonstrates how to manage roles and members in your project. For more information about KubeSphere roles, see Overview of Role Management.
In project scope, you can grant the following resources’ permissions to a role:
- Application Workloads
- Storage
- Configurations
- Monitoring & Alerting
- Project Settings
- Access Control
Prerequisites
At least one project has been created, such as demo-project. Besides, you need an account of the admin role (for example, project-admin) at the project level. See Create Workspaces, Projects, Accounts and Roles if it is not ready yet.
Built-in Roles
In Project Roles, there are three available built-in roles as shown below. Built-in roles are created automatically by KubeSphere when a project is created and they cannot be edited or deleted. You can only view permissions and authorized user list.
| Built-in Roles | Description |
|---|---|
| viewer | The viewer who can view all resources in the project. |
| operator | The maintainer of the project who can manage resources other than users and roles in the project. |
| admin | The administrator in the project who can perform any action on any resource. It gives full control over all resources in the project. |
-
In Project Roles, click
adminand you can see the role detail as shown below.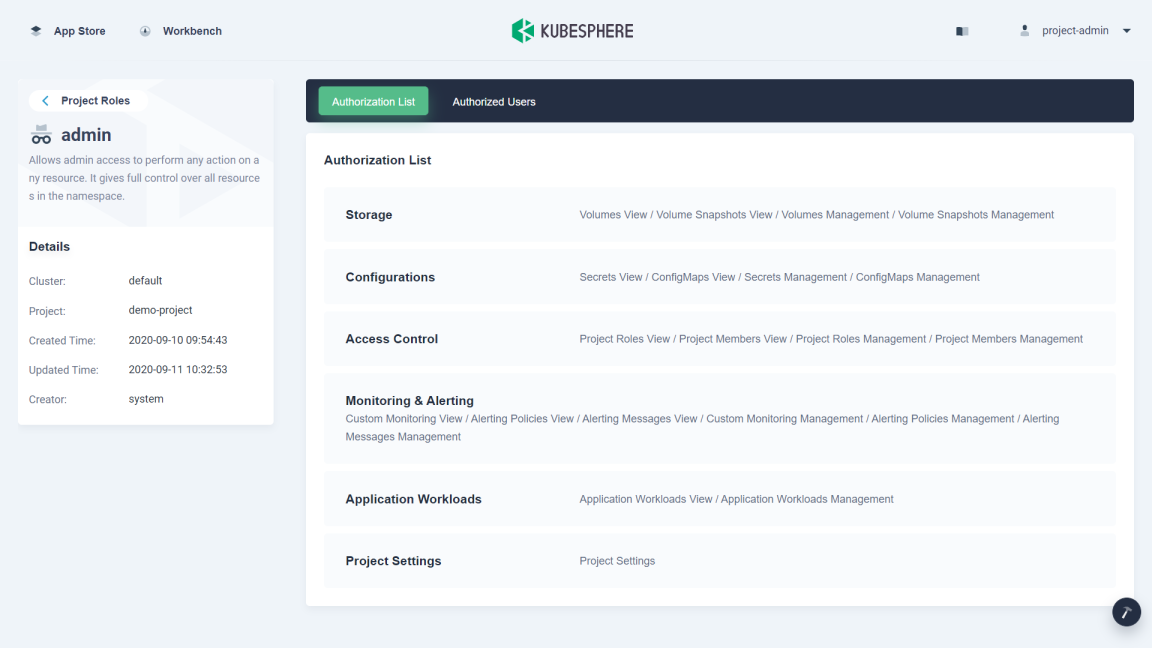
-
You can switch to Authorized Users tab to see all the users that are granted an
adminrole.
Create a Project Role
-
Log in to the console as
project-adminand select a project (for example,demo-project) under Projects list.Note
The accountproject-adminis used as an example. As long as the account you are using is granted a role including the authorization of Project Members View, Project Roles Management and Project Roles View in Access Control at project level, it can create a project role. -
Go to Project Roles in Project Settings, click Create and set a Role Identifier. In this example, a role named
project-monitorwill be created. Click Edit Authorization to continue.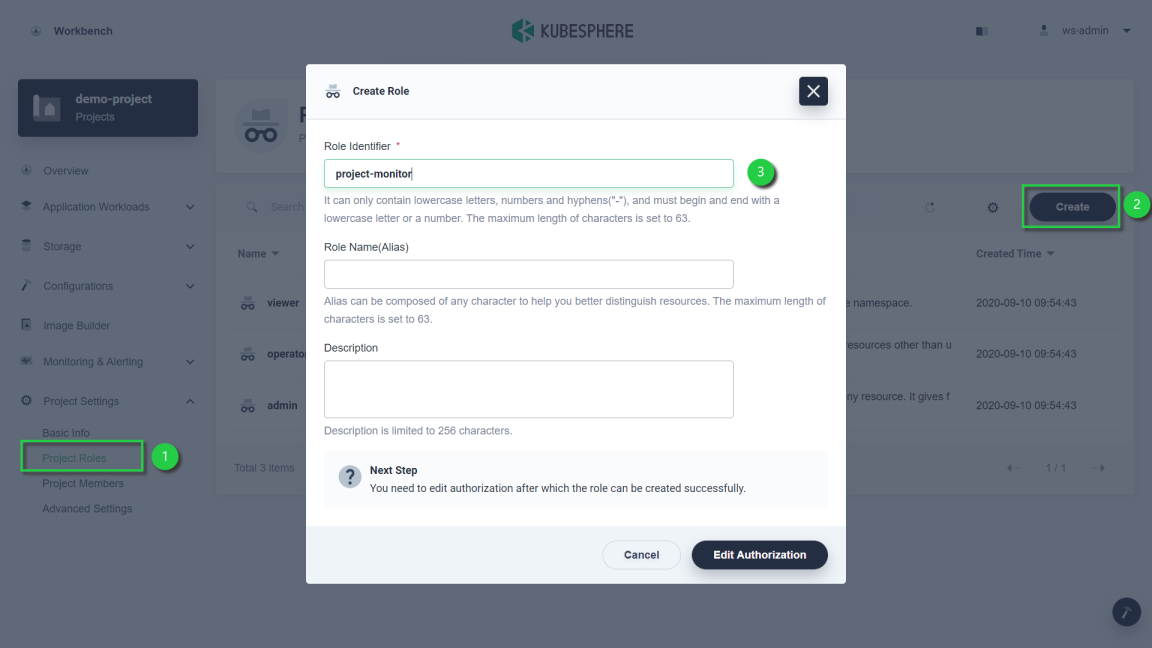
-
Select the authorization that you want this role to contain. For example, Application Workloads View in Application Workloads, and Alerting Messages View and Alerting Policies View in Monitoring & Alerting are selected for this role. Click OK to finish.

Note
Depend on means the major authorization (the one listed after Depend on) needs to be selected first so that the affiliated authorization can be assigned. -
Newly-created roles will be listed in Project Roles. You can click the three dots on the right to edit it.
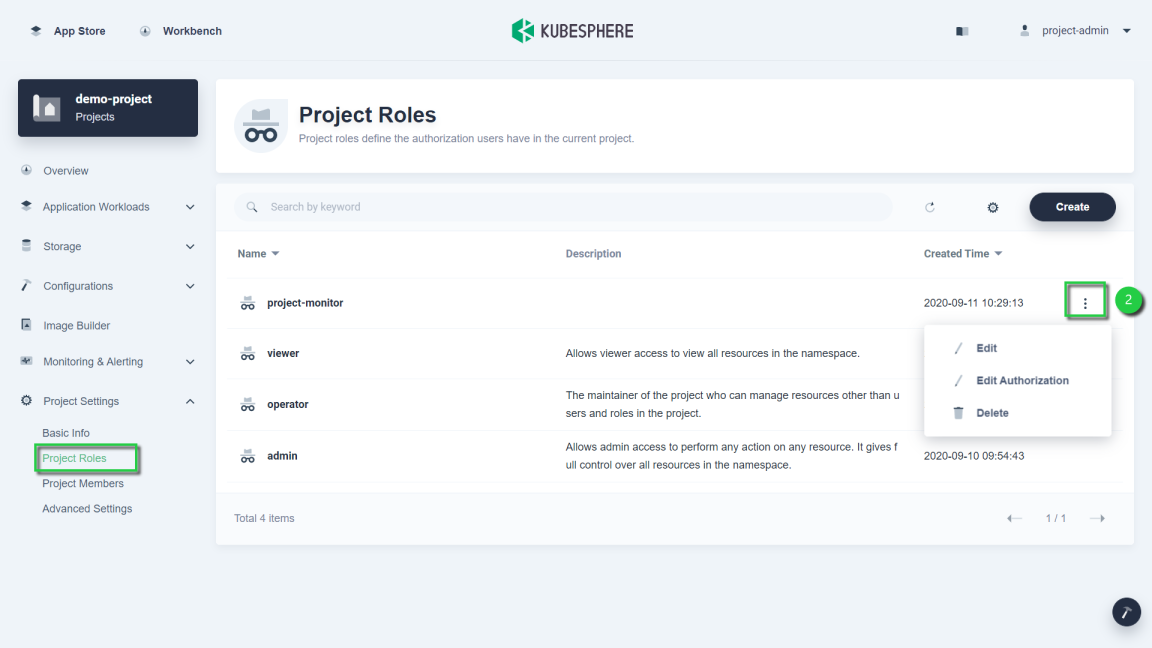
Note
The role ofproject-monitoris only granted limited permissions in Monitoring & Alerting, which may not satisfy your need. This example is only for demonstration purpose. You can create customized roles based on your needs.
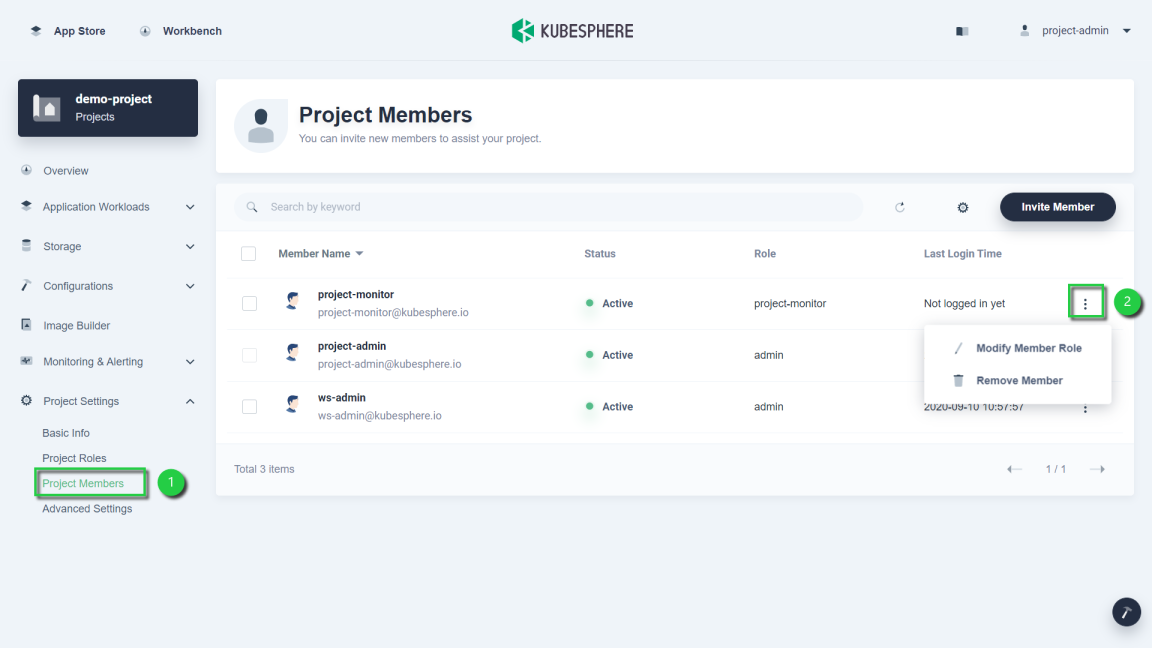
Invite a New Member
-
In Project Settings, select Project Members and click Invite Member.
-
Invite a user to the project. Grant the role of
project-monitorto the user.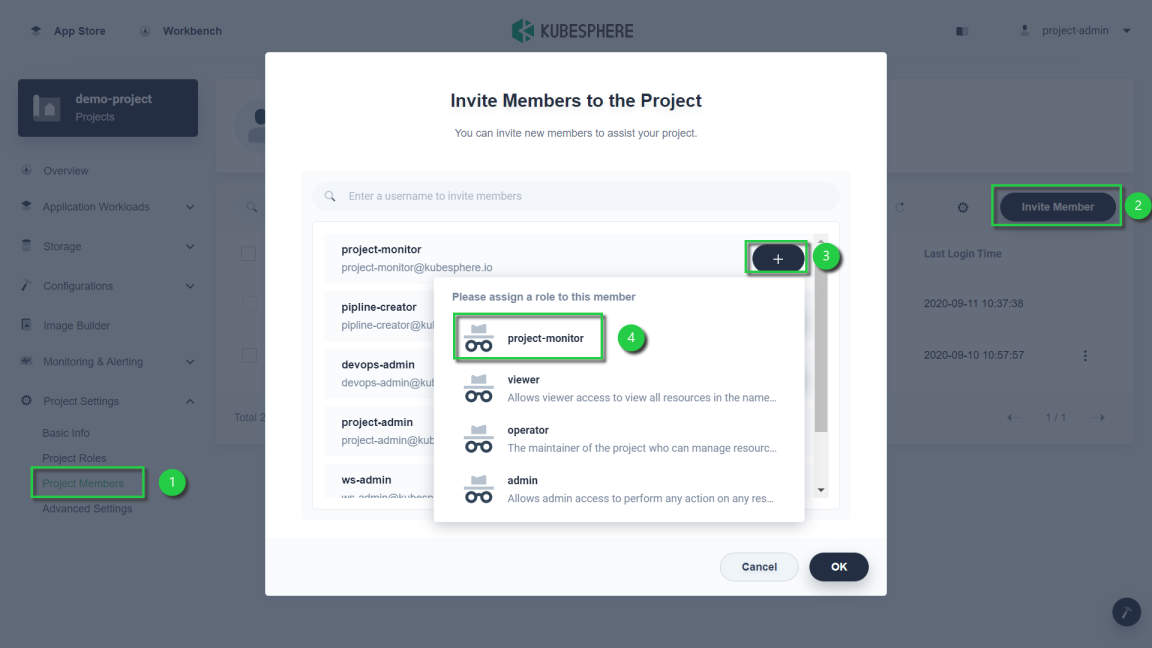
Note
The user must be invited to the project’s workspace first. -
After you add a user to the project, click OK. In Project Members, you can see the newly invited member listed.
-
You can also change the role of an existing member by editing it or remove it from the project.
 Previous

What’s on this Page