
You are viewing documentation for KubeSphere version:v3.0.0
KubeSphere v3.0.0 documentation is no longer actively maintained. The version you are currently viewing is a static snapshot. For up-to-date documentation, see the latest version.
Deploy KubeSphere on DigitalOcean Kubernetes

This guide walks you through the steps of deploying KubeSphere on DigitalOcean Kubernetes.
Prepare a DOKS Cluster
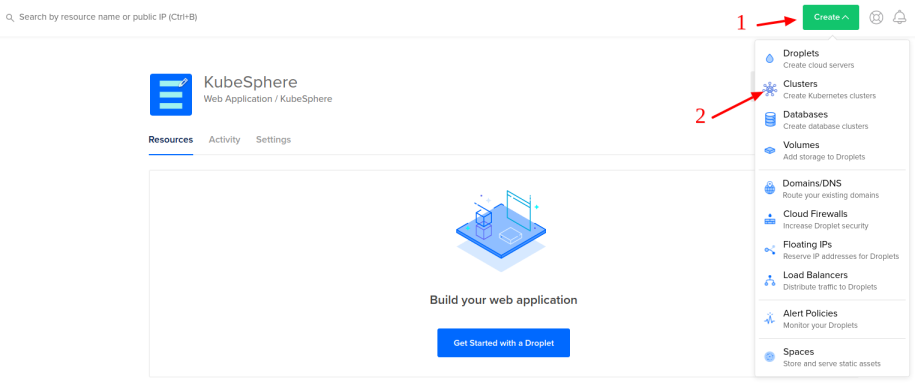
A Kubernetes cluster in DO is a prerequisite for installing KubeSphere. Go to your DO account and refer to the image below to create a cluster from the navigation menu.
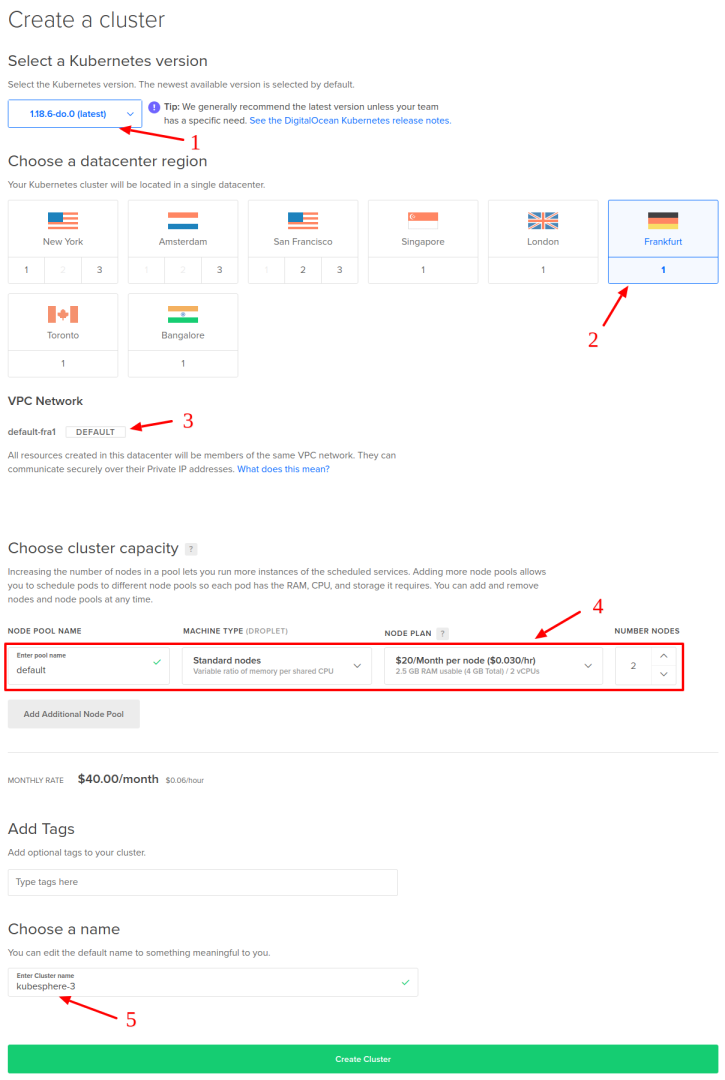
You need to select:
- Kubernetes version (for example, 1.18.6-do.0)
- Datacenter region (for example, Frankfurt)
- VPC network (for example, default-fra1)
- Cluster capacity (for example, 2 standard nodes with 2 vCPUs and 4GB of RAM each)
- A name for the cluster (for example, kubesphere-3)
Note
- Supported Kubernetes versions for KubeSphere 3.0.0: 1.15.x, 1.16.x, 1.17.x, 1.18.x.
- 2 nodes are included in this example. You can add more nodes based on your own needs especially in a production environment.
- The machine type Standard / 4 GB / 2 vCPUs is for minimal installation. If you plan to enable several pluggable components or use the cluster for production, you can upgrade your nodes to a more powerfull type (such as CPU-Optimized / 8 GB / 4 vCPUs). It seems that DigitalOcean provisions the master nodes based on the type of the worker nodes, and for Standard ones the API server can become unresponsive quite soon.
When the cluster is ready, you can download the config file for kubectl.

Install KubeSphere on DOKS
Now that the cluster is ready, you can install KubeSphere following the steps below:
-
Install KubeSphere using kubectl. The following commands are only for the default minimal installation.
kubectl apply -f https://github.com/kubesphere/ks-installer/releases/download/v3.0.0/kubesphere-installer.yaml kubectl apply -f https://github.com/kubesphere/ks-installer/releases/download/v3.0.0/cluster-configuration.yaml -
Inspect the logs of installation:
kubectl logs -n kubesphere-system $(kubectl get pod -n kubesphere-system -l app=ks-install -o jsonpath='{.items[0].metadata.name}') -f
When the installation finishes, you can see the following message:
#####################################################
###              Welcome to KubeSphere!           ###
#####################################################
Console: http://10.XXX.XXX.XXX:30880
Account: admin
Password: P@88w0rd
NOTES:
  1. After logging into the console, please check the
     monitoring status of service components in
     the "Cluster Management". If any service is not
     ready, please wait patiently until all components
     are ready.
  2. Please modify the default password after login.
#####################################################
https://kubesphere.io             2020-xx-xx xx:xx:xx
Access KubeSphere Console
Now that KubeSphere is installed, you can access the web console of KubeSphere by following the steps below.
-
Go to the Kubernetes Dashboard provided by DigitalOcean.

-
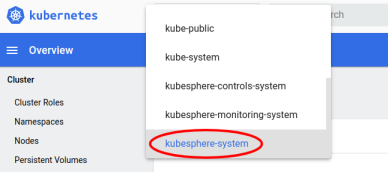
Select the kubesphere-system namespace.
-
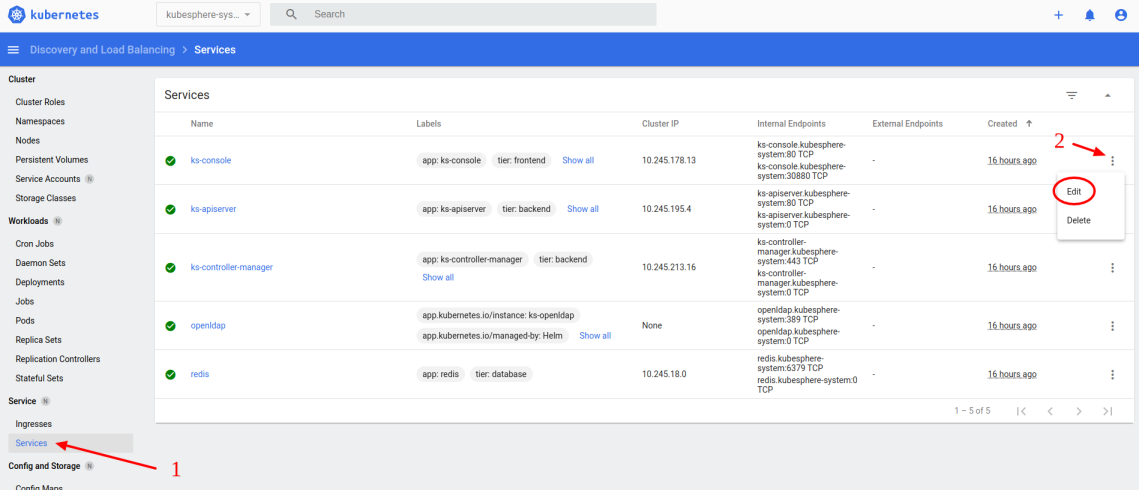
In Services under Service, edit the service ks-console.
-
Change the type from
NodePorttoLoadBalancer. Save the file when you finish.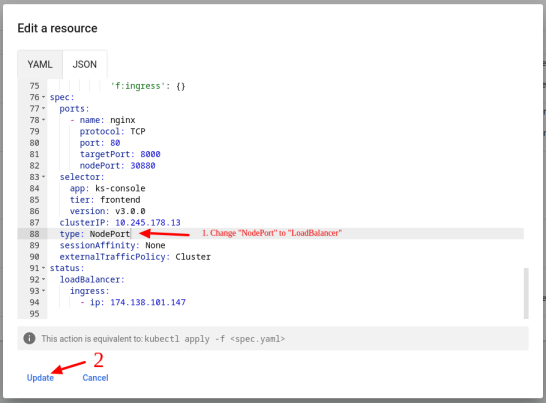
-
Access the KubeSphere’s web console using the endpoint generated by DO.

Tip
Instead of changing the service type toLoadBalancer, you can also access KubeSphere console viaNodeIP:NodePort(service type set toNodePort). You need to get the public IP of one of your nodes. -
Log in to the console with the default account and password (
admin/P@88w0rd). In the cluster overview page, you can see the dashboard as shown in the following image.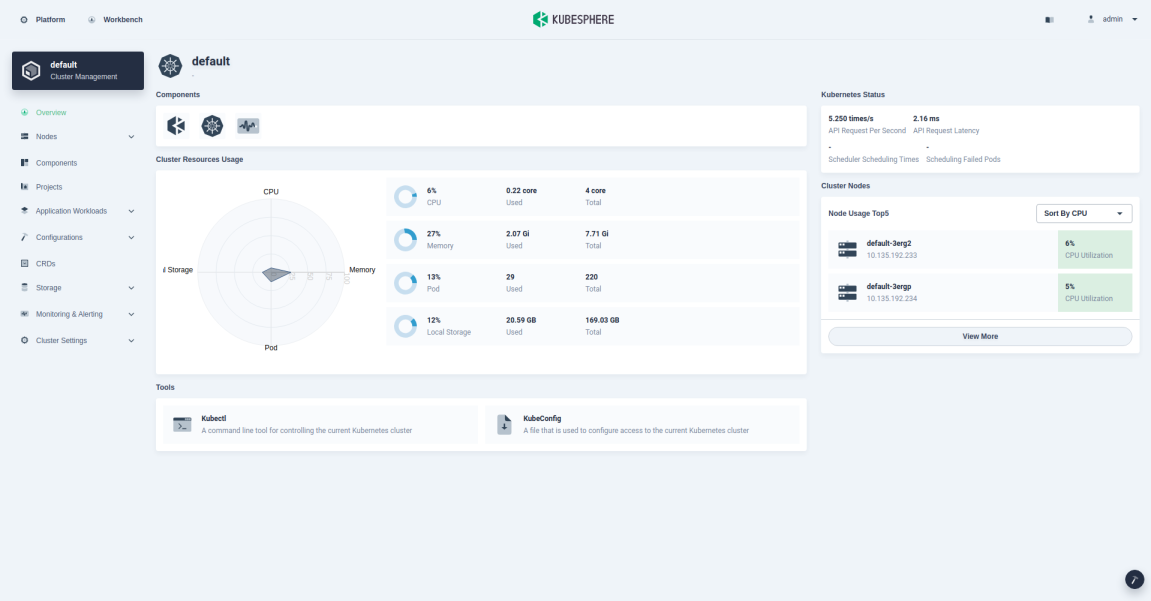
Enable Pluggable Components (Optional)
The example above demonstrates the process of a default minimal installation. To enable other components in KubeSphere, see Enable Pluggable Components for more details.


 Previous
