


You are viewing documentation for KubeSphere version:v3.0.0
KubeSphere v3.0.0 documentation is no longer actively maintained. The version you are currently viewing is a static snapshot. For up-to-date documentation, see the latest version.


Add existing Kubernetes namespaces to a KubeSphere Workspace
A Kubernetes namespace is a KubeSphere project. If you create a namespace object not from the KubeSphere console, the namespace does not appear directly in a certain workspace. But cluster administrators can still see the namespace on the Cluster Management page. At the same time, you can also place the namespace into a workspace.
This tutorial demonstrates how to add an existing Kubernetes namespace to a KubeSphere workspace.
Prerequisites
-
You need an account granted a role including the authorization of Clusters Management. For example, you can log in to the console as
admindirectly or create a new role with the authorization and assign it to an account. -
You have an available workspace so that the namespace can be assigned to it. For more information, see Create Workspaces, Projects, Accounts and Roles.
Create a Kubernetes Namespace
Create an example Kubernetes namespace first so that you can add it to a workspace later.
-
Execute the following command to create a file named
demo-namespace.vi demo-namespace.json -
Input the following content in the file and save it.
{ "apiVersion": "v1", "kind": "Namespace", "metadata": { "name": "demo-namespace", "labels": { "name": "demo-namespace" } } } -
Create the namespace.
kubectl create -f demo-namespace.jsonFor more information about creating a Kubernetes namespace, see Namespaces Walkthrough.
Add the Namespace to a KubeSphere Workspace
-
Log in to the KubeSphere console as
adminand go to the Cluster Management page. Click Projects, and you can see all your projects (i.e. namespaces) running on the current cluster, including the one just created.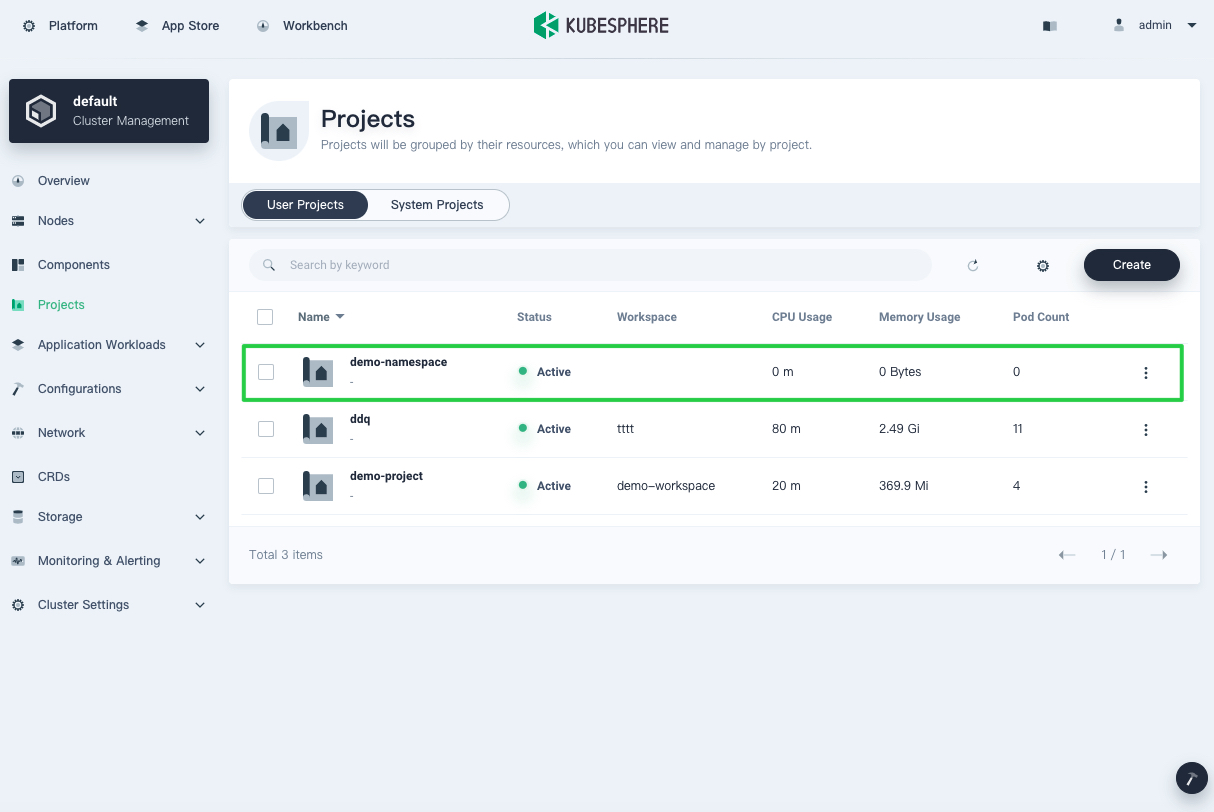
-
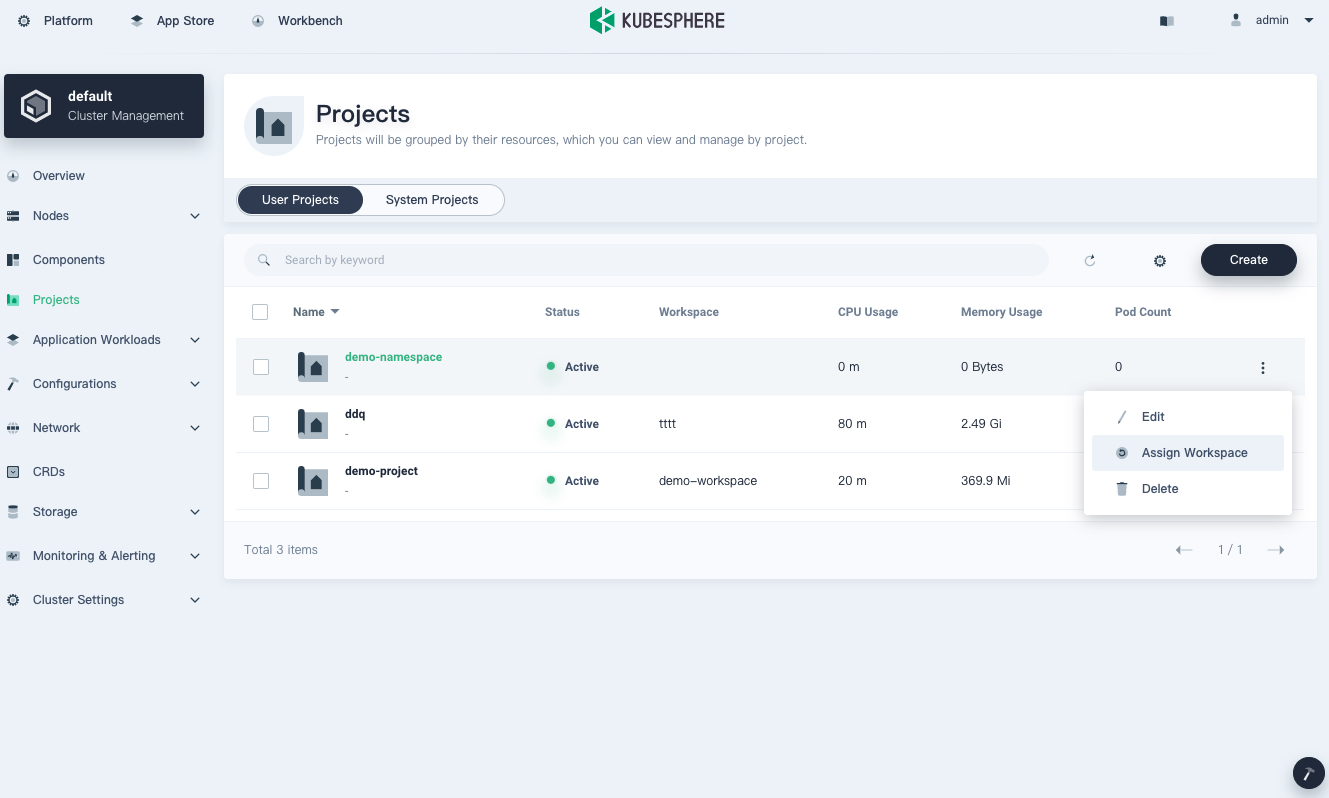
The namespace created through kubectl does not belong to any workspace. Click the three dots on the right and select Assign Workspace.
-
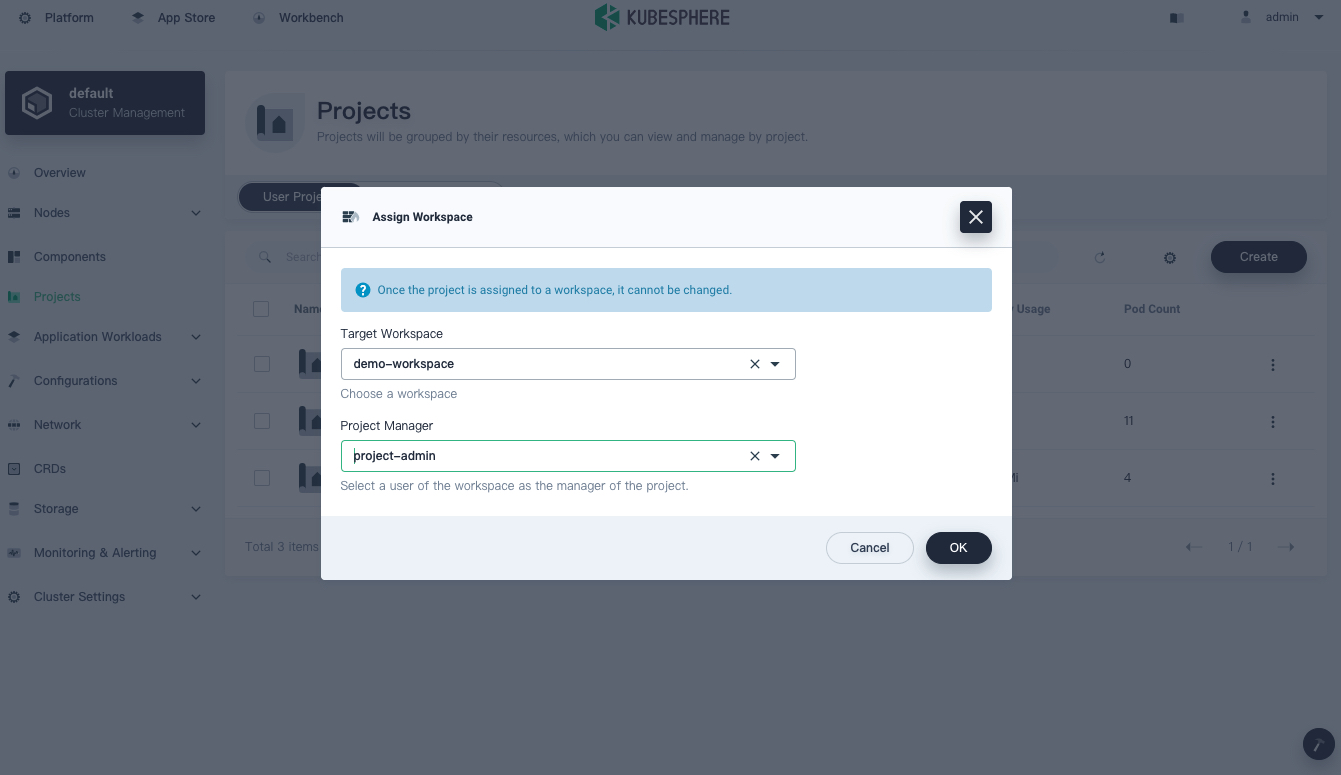
In the dialog that appears, select a workspace and a project manager for the project and click OK.
-
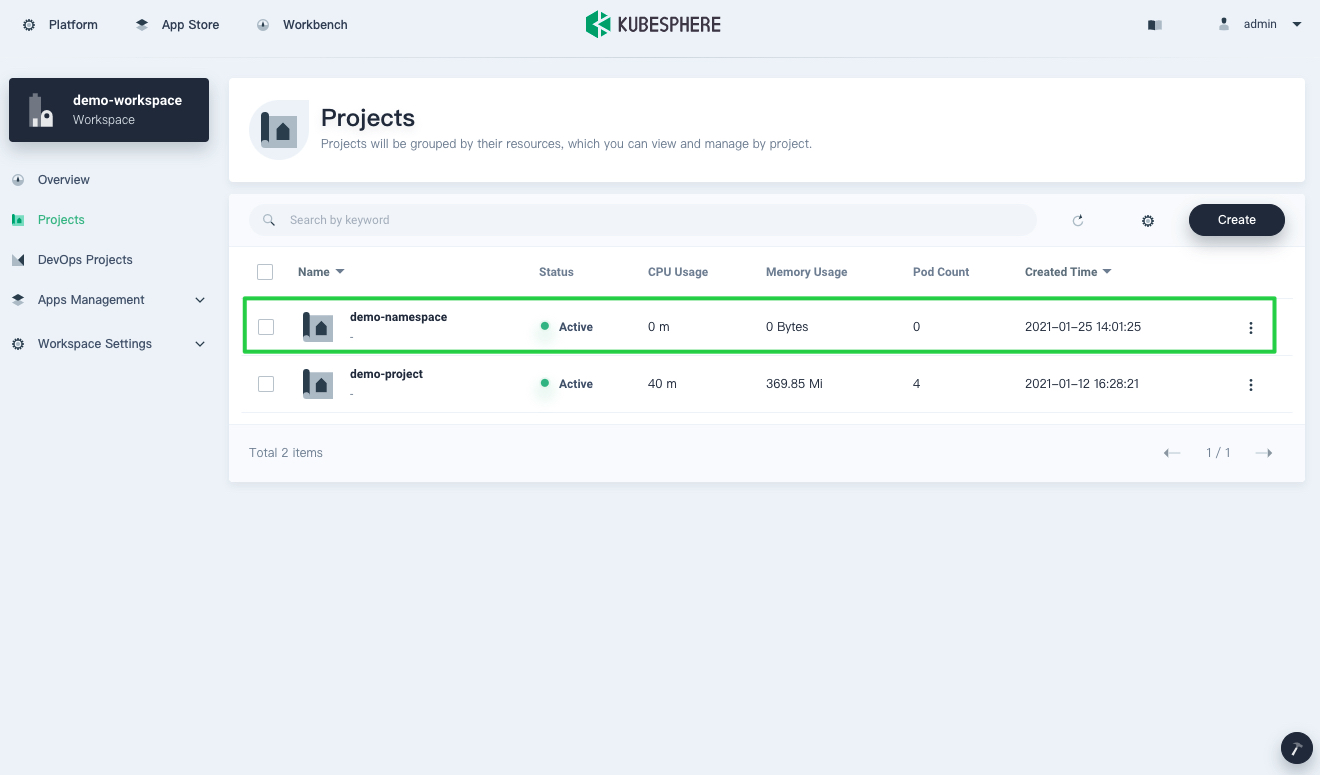
Go to your workspace and you can see the project appear on the Projects page.
 Previous

What’s on this Page