
You are viewing documentation for KubeSphere version:v3.0.0
KubeSphere v3.0.0 documentation is no longer actively maintained. The version you are currently viewing is a static snapshot. For up-to-date documentation, see the latest version.
Source to Image: Publish an App without a Dockerfile
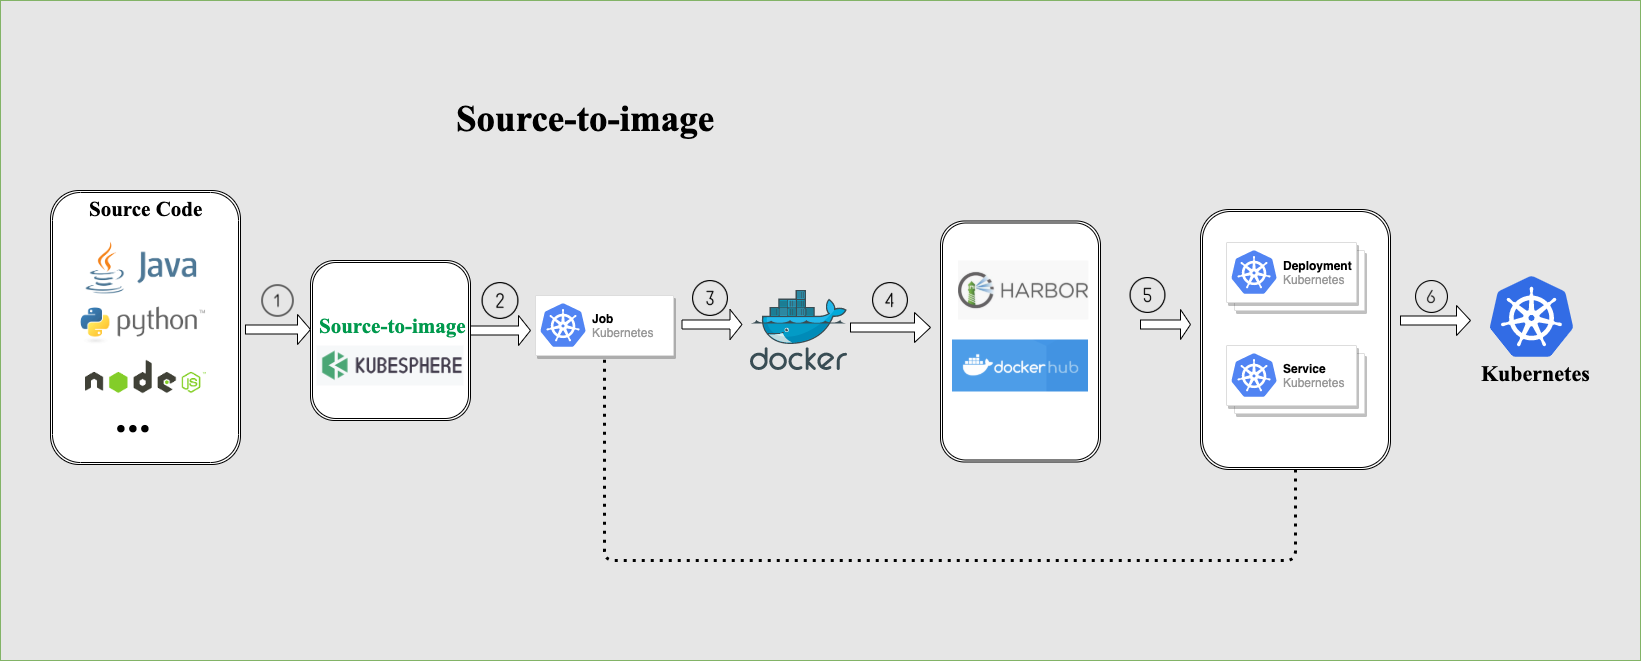
Source-to-Image (S2I) is a toolkit and workflow for building reproducible container images from source code. S2I produces ready-to-run images by injecting source code into a container image and letting the container prepare that source code for execution. KubeSphere integrates S2I to automatically build images and publish them to Kubernetes without any Dockerfile.
This tutorial demonstrates how to use S2I to import source code of a Java sample project into KubeSphere by creating a Service. Based on the source code, the KubeSphere Image Builder will create a Docker image, push it to a target repository and publish it to Kubernetes.
Prerequisites
- You need to enable the KubeSphere DevOps System as S2I is integrated into it.
- You need to create a GitHub account and a Docker Hub account. GitLab and Harbor are also supported. This tutorial uses a GitHub repository to provide the source code for building and pushes an image to Docker Hub.
- You need to create a workspace, a project and an account (
project-regular). The account must be invited to the project with the role ofoperator. For more information, see Create Workspaces, Projects, Accounts and Roles. - Set a CI dedicated node for building images. This is not mandatory but recommended for the development and production environment as it caches dependencies and reduces build time. For more information, see Set a CI Node for Dependency Caching.
Use Source-to-Image (S2I)
Step 1: Fork the example repository
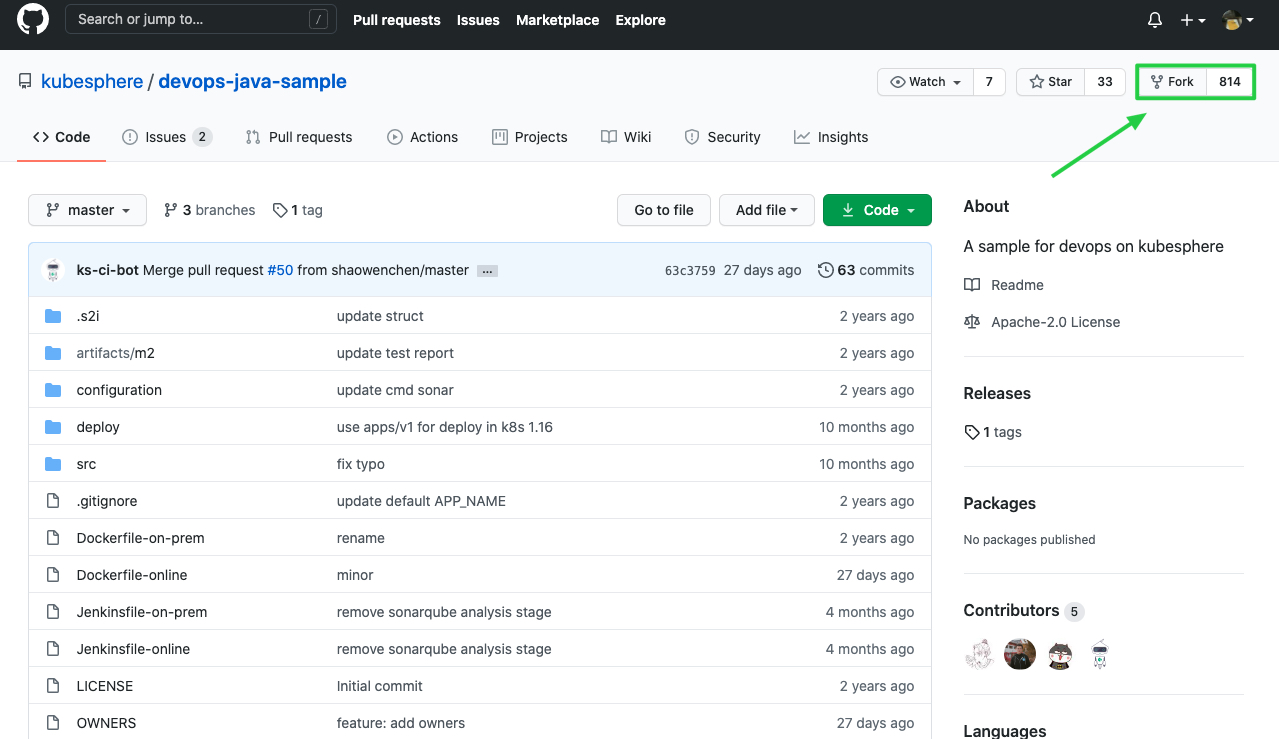
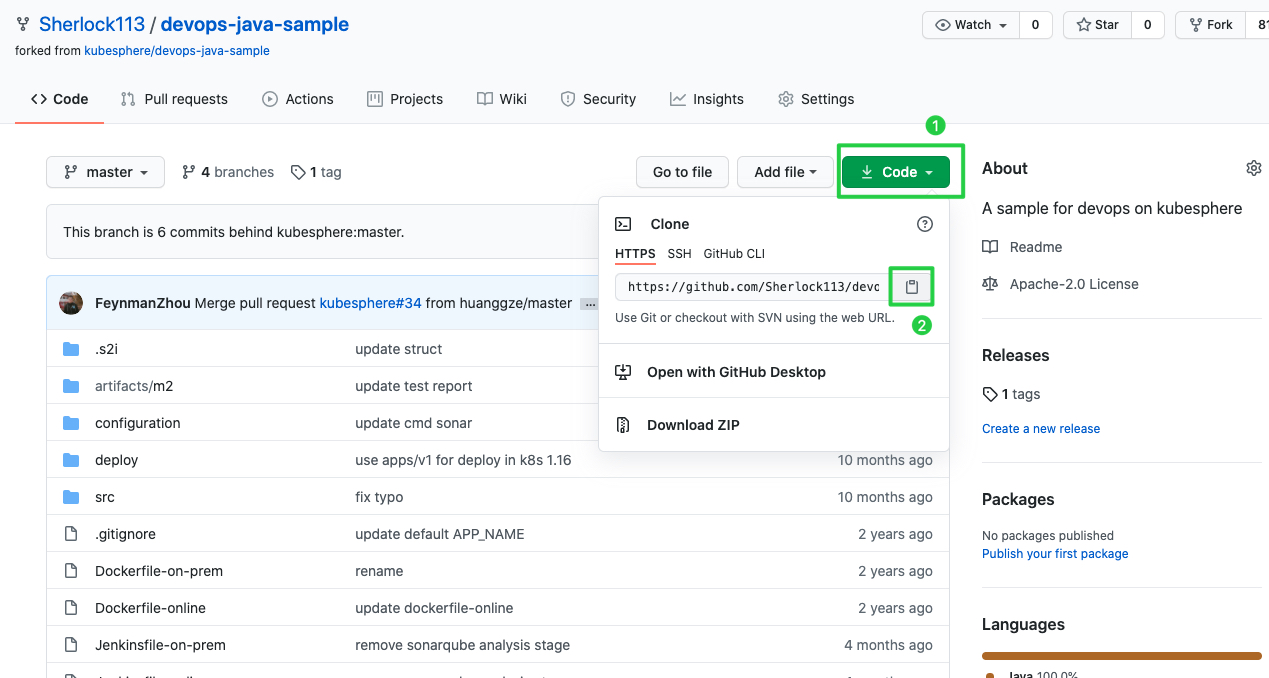
Log in to GitHub and fork the GitHub repository devops-java-sample to your personal GitHub account.
Step 2: Create Secrets
Log in to KubeSphere as project-regular. Go to your project and create a Secret for Docker Hub and GitHub respectively. For more information, see Create the Most Common Secrets.
Note
Step 3: Create a Service
-
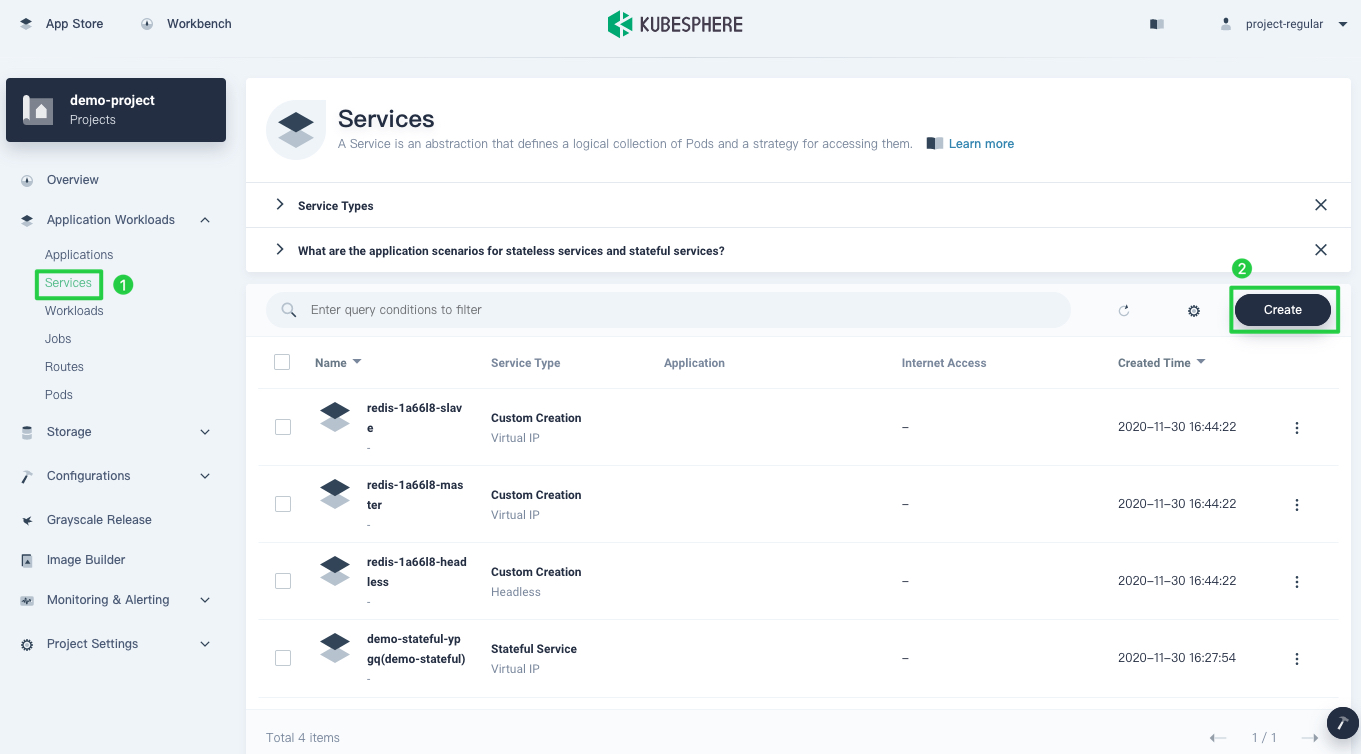
In the same project, navigate to Services under Application Workloads and click Create.
-
Choose Java under Build a New Service from Source Code Repository, name it
s2i-demoand click Next.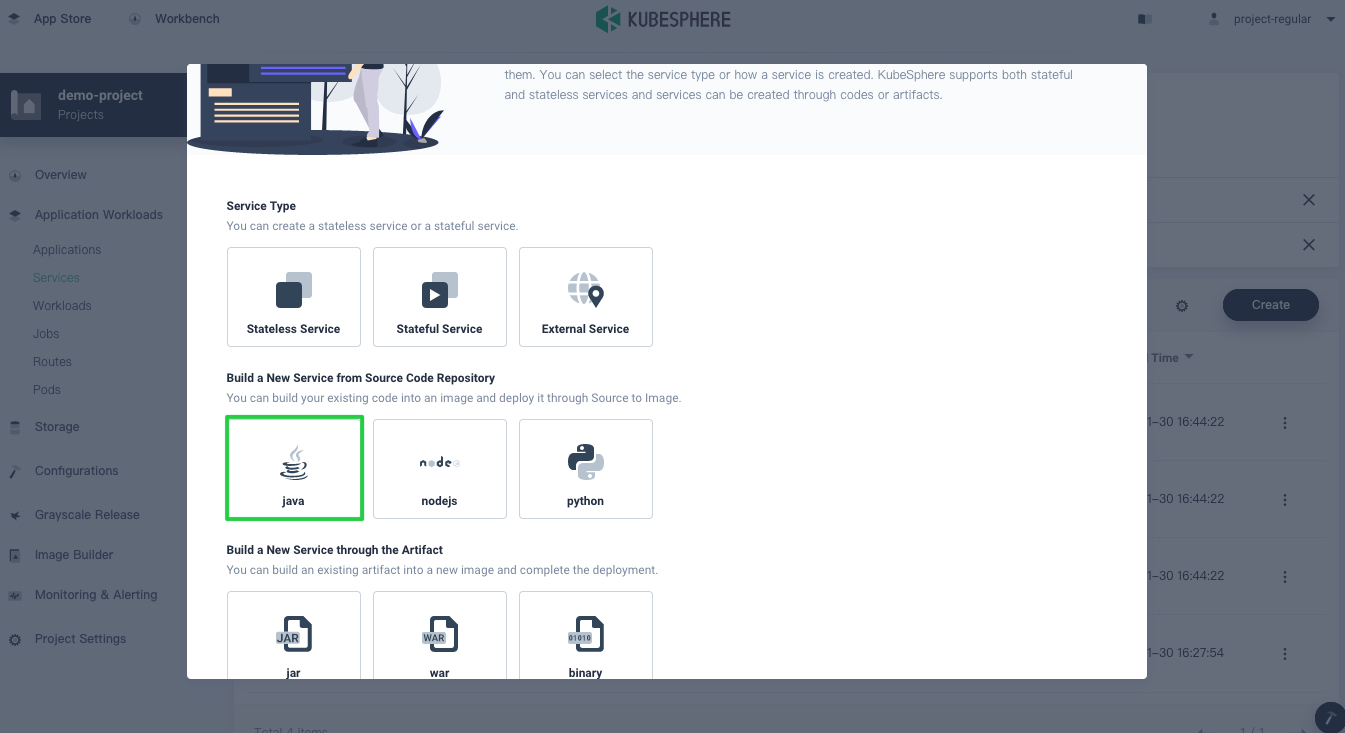
Note
KubeSphere has integrated common S2I templates such as Java, Node.js and Python. If you want to use other languages or customize your S2I templates, see Customize S2I Templates. -
On the Build Settings page, provide the following information accordingly and click Next.
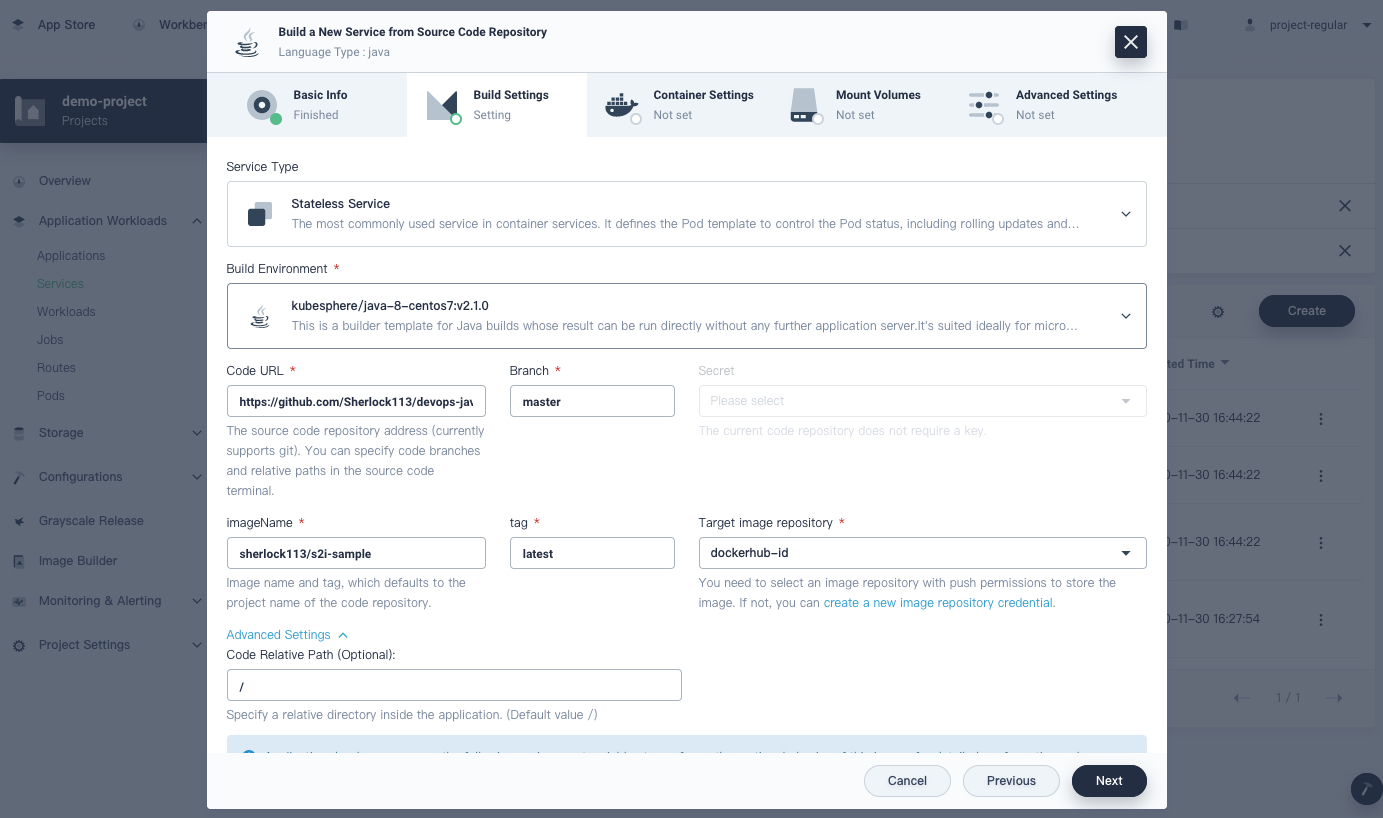
Service Type: Select Stateless Service for this example. For more information about different Services, see Service Type.
Build Environment: Select kubesphere/java-8-centos7:v2.1.0.
Code URL: The source code repository address (currently support Git). You can specify the code branch and the relative path in the source code terminal. The URL supports HTTP and HTTPS. Paste the forked repository URL (your own repository address) into this field.
Branch: The branch that is used for image building. Enter
masterfor this tutorial. You can enterdependencyfor a cache test.Secret: You do not need to provide any Secret for a public repository. Select the GitHub Secret if you want to use a private repository.
imageName: Customize an image name. As this tutorial will push an image to Docker Hub, enter
dockerhub_username/s2i-sample.dockerhub_usernameis your Docker ID and make sure it has the permission to push and pull images.tag: The image tag. Enter
latest.Target image repository: Select the Docker Hub Secret as the image is pushed to Docker Hub.
Advanced Settings: You can define the code relative path. Use the default
/for this field. -
On the Container Settings page, scroll down to Service Settings to set the access policy for the container. Select HTTP for Protocol, customize the name (for example,
http-1), and input8080for both Container Port and Service Port.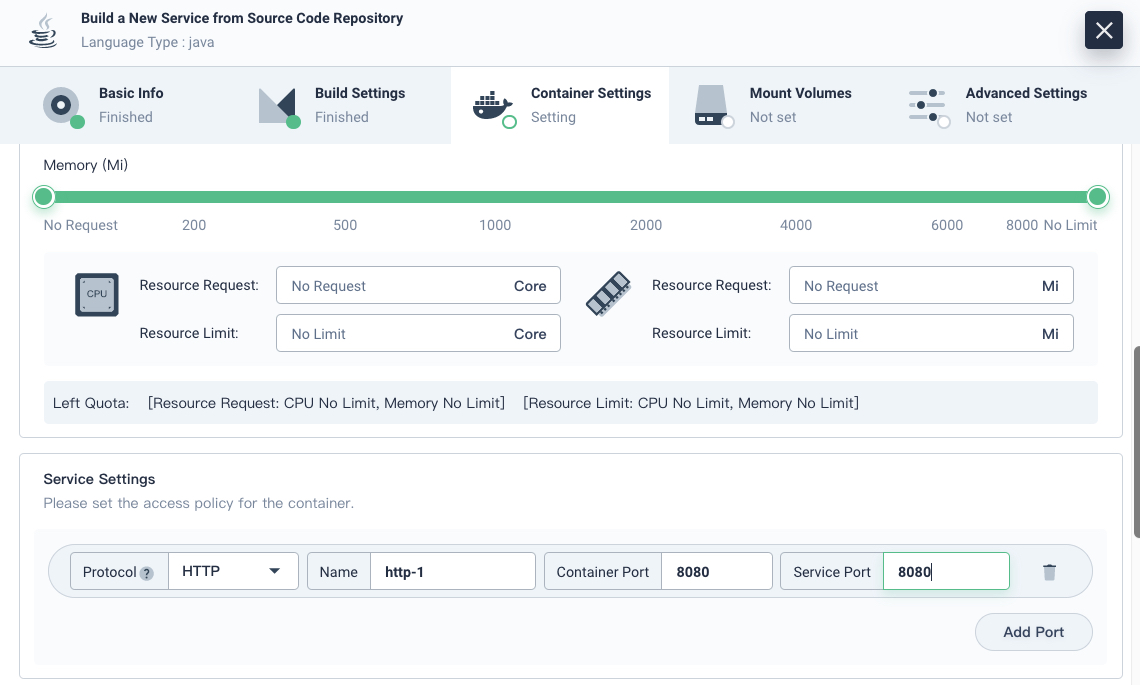
-
Scroll down to Health Checker and check it. Set a readiness probe by filling out the following parameters. Click √ when you finish setting the probe and then click Next to continue.
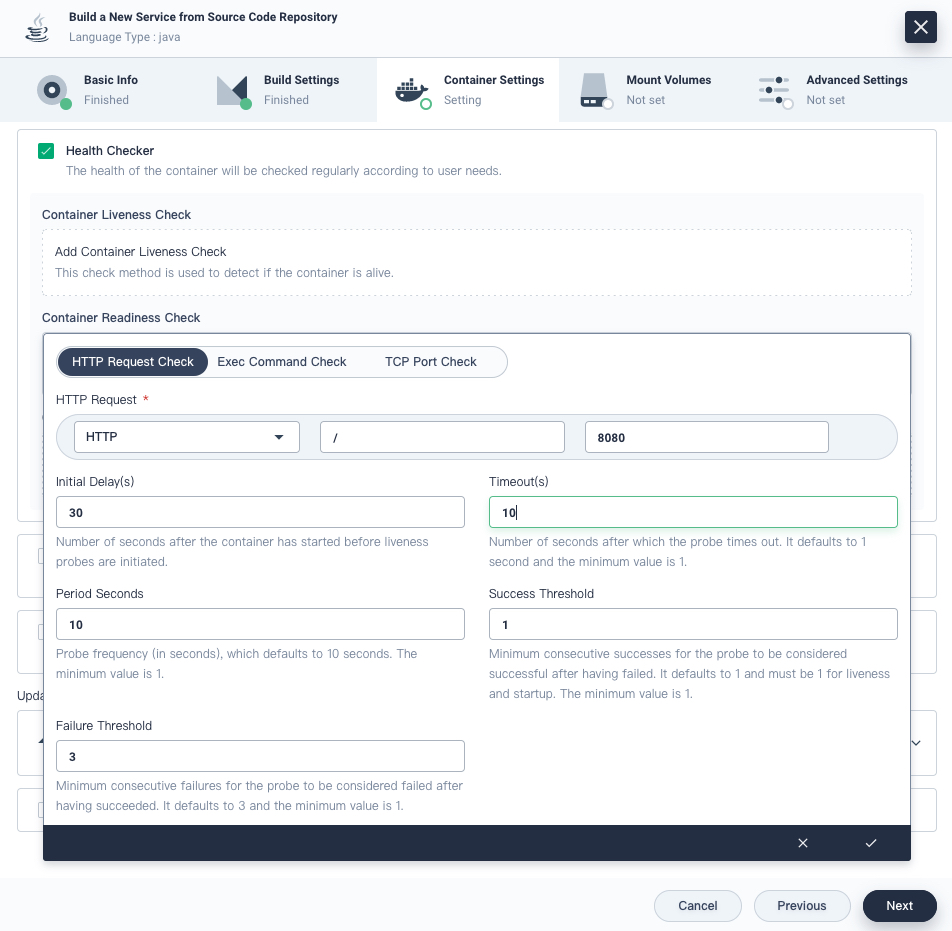
HTTP Request: Select HTTP as the protocol, enter
/as the path (root path in this tutorial), and input8080as the port exposed.Initial Delays: The number of seconds after the container has started before the liveness probe is initiated. Enter
30for this field.Timeouts: The number of seconds after which the probe times out. Enter
10for this field.For other fields, use the default value directly. For more information about how to configure probes and set other parameters on the Container Settings page, see Container Image Settings.
-
On the Mount Volumes page, you can add a volume for the container. For more information, see Volumes. Click Next to continue.
-
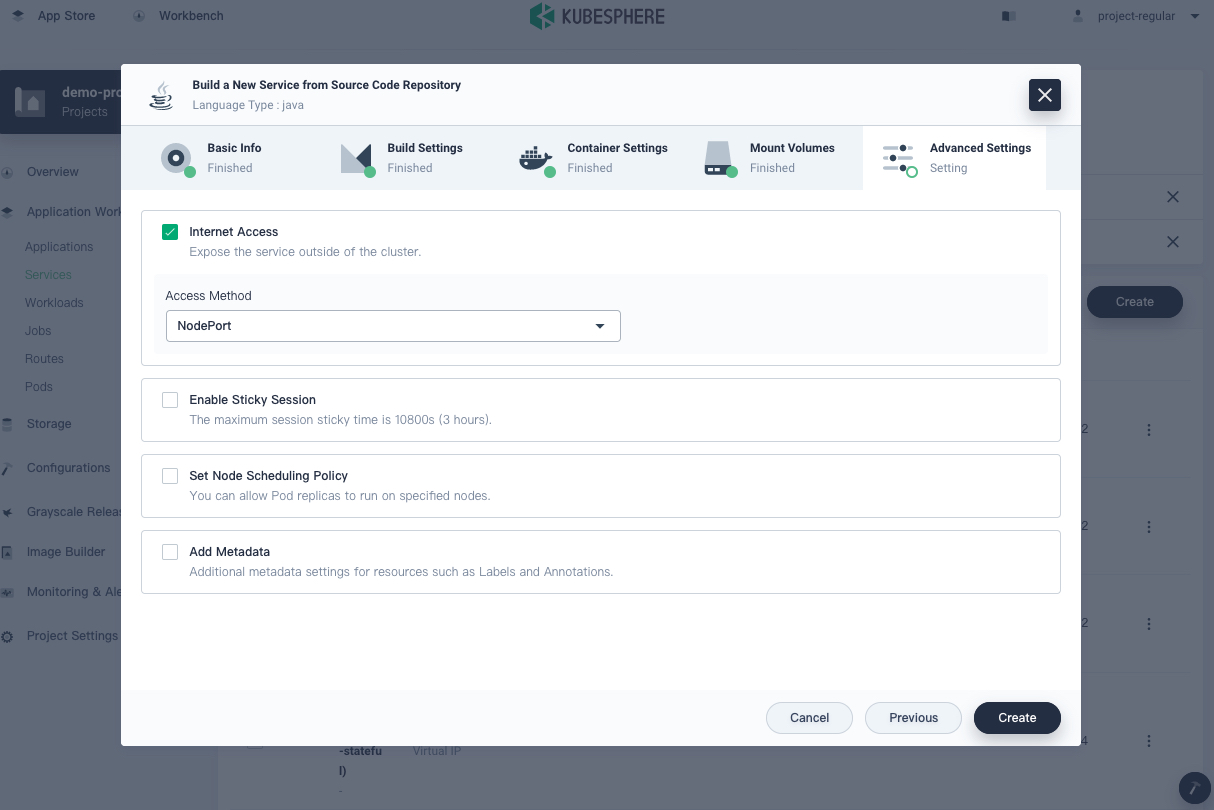
On the Advanced Settings page, check Internet Access and select NodePort as the access method. Click Create to finish the whole process.
-
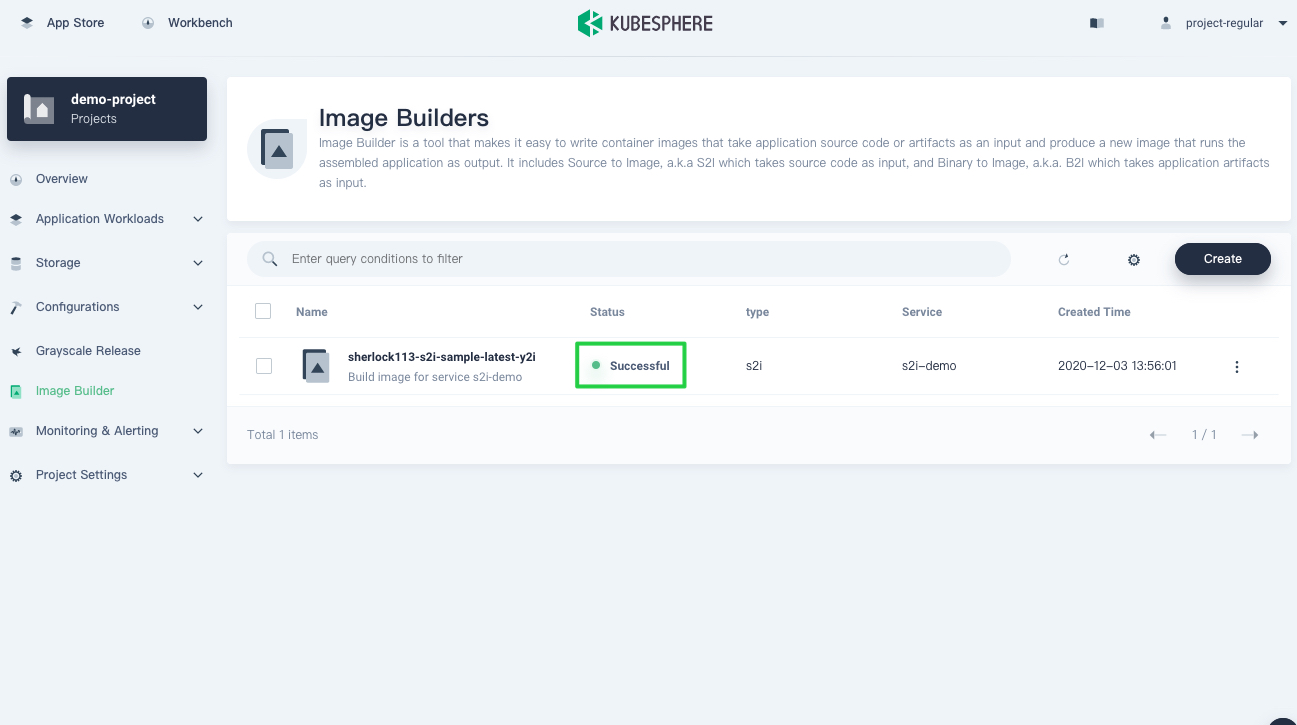
Click Image Builder from the navigation bar and you can see that the example image is being built.

Step 4: Check results
-
Wait for a while and you can see the status of the image has reached Successful.
-
Click this image to go to its detail page. Under Job Records, click the arrow icon on the right of a record to see building logs. You can see
Build completed successfullyat the end of the log if everything runs normally.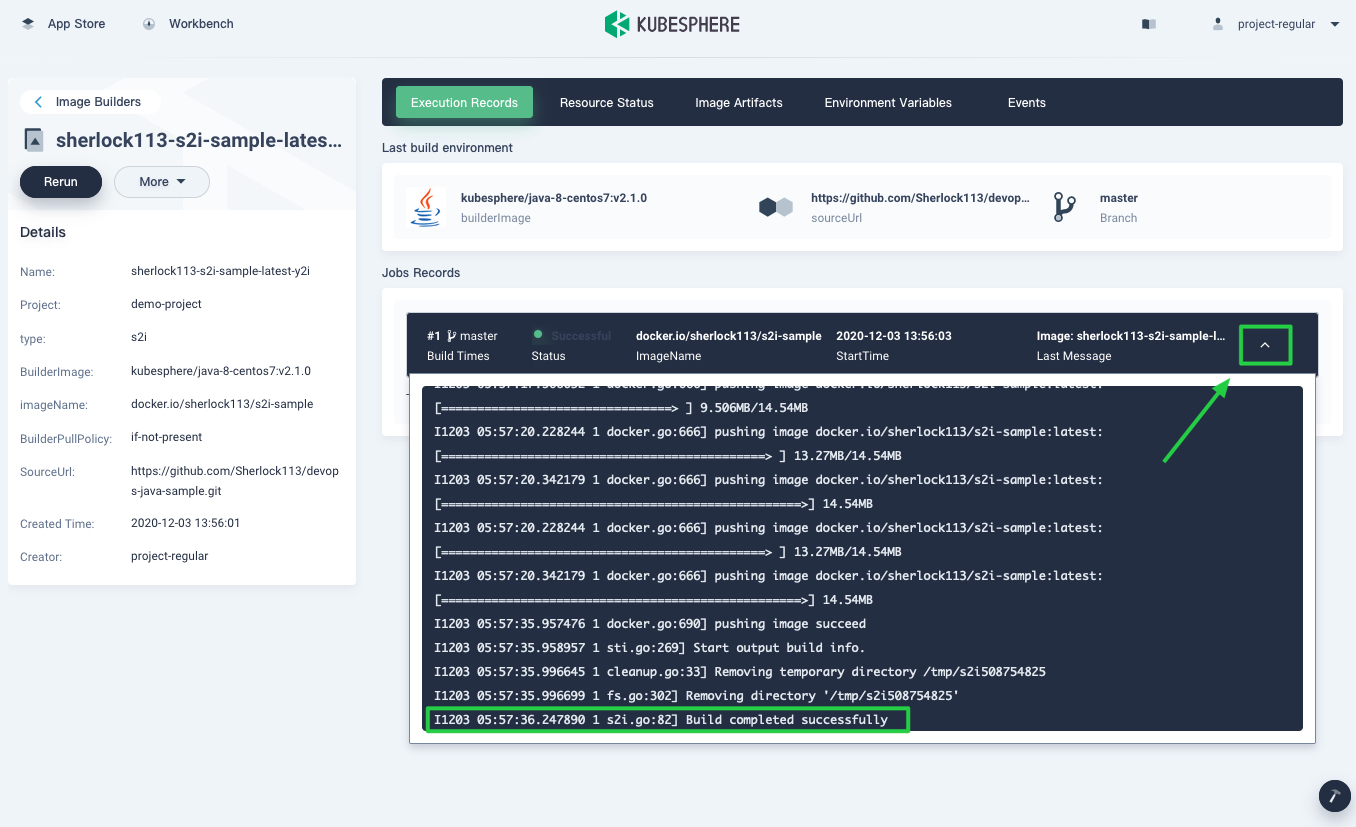
-
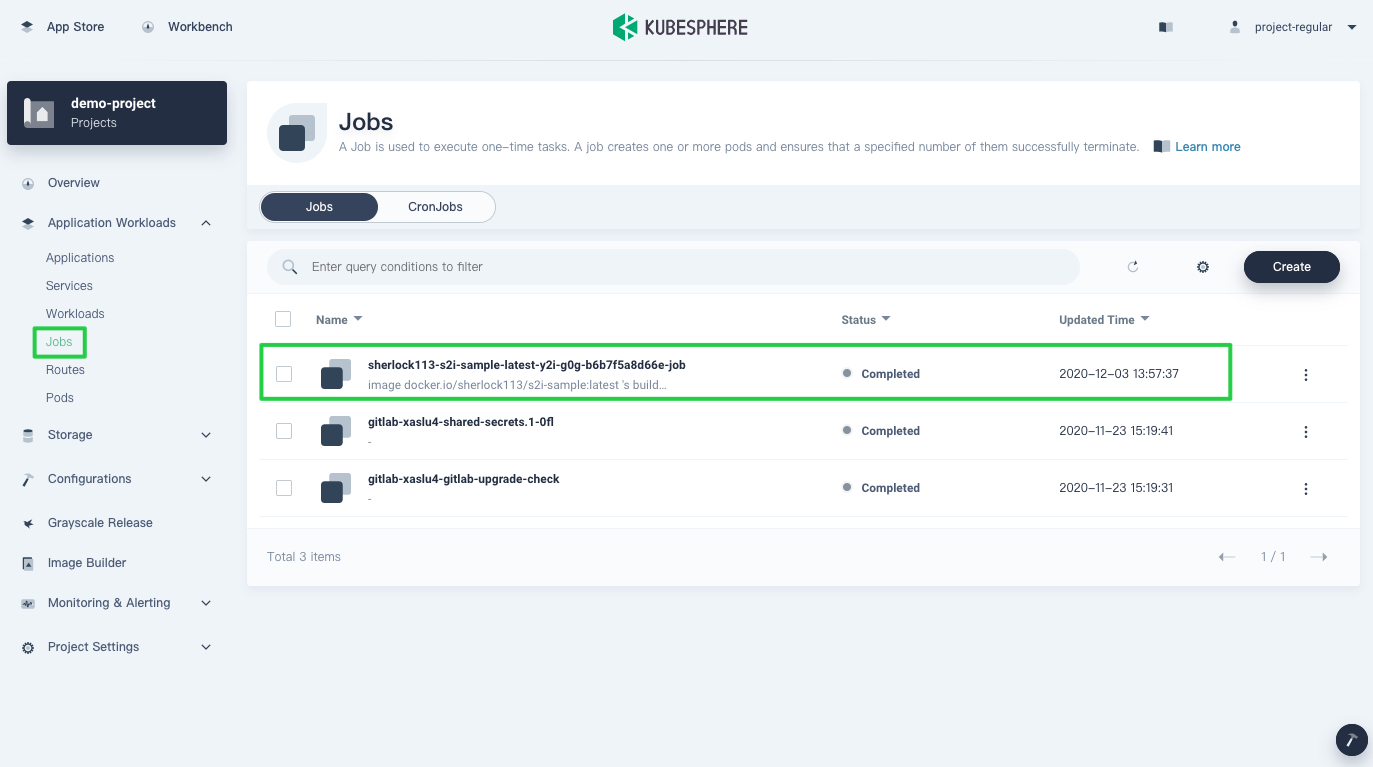
Go back to the previous page, and you can see the corresponding Job, Deployment and Service of the image have been all created successfully.
Service

Deployment
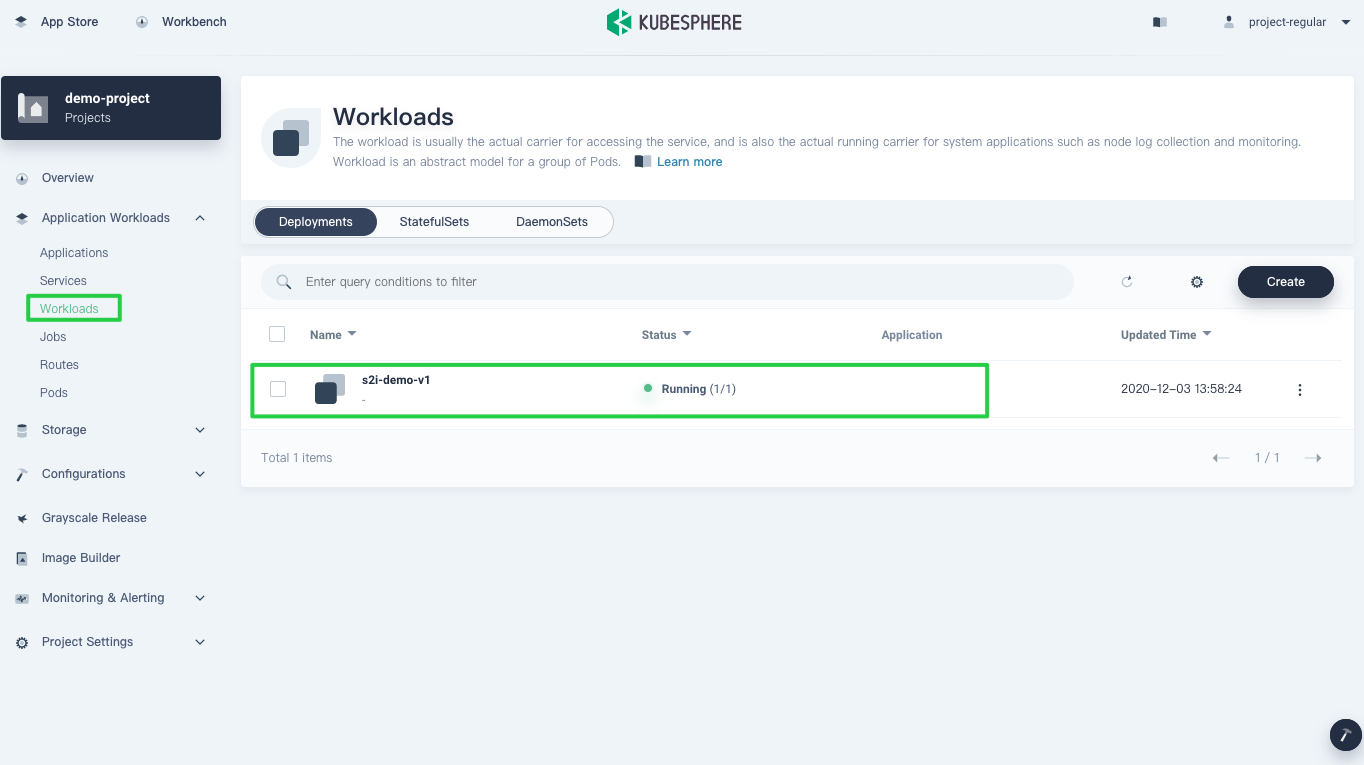
Job
-
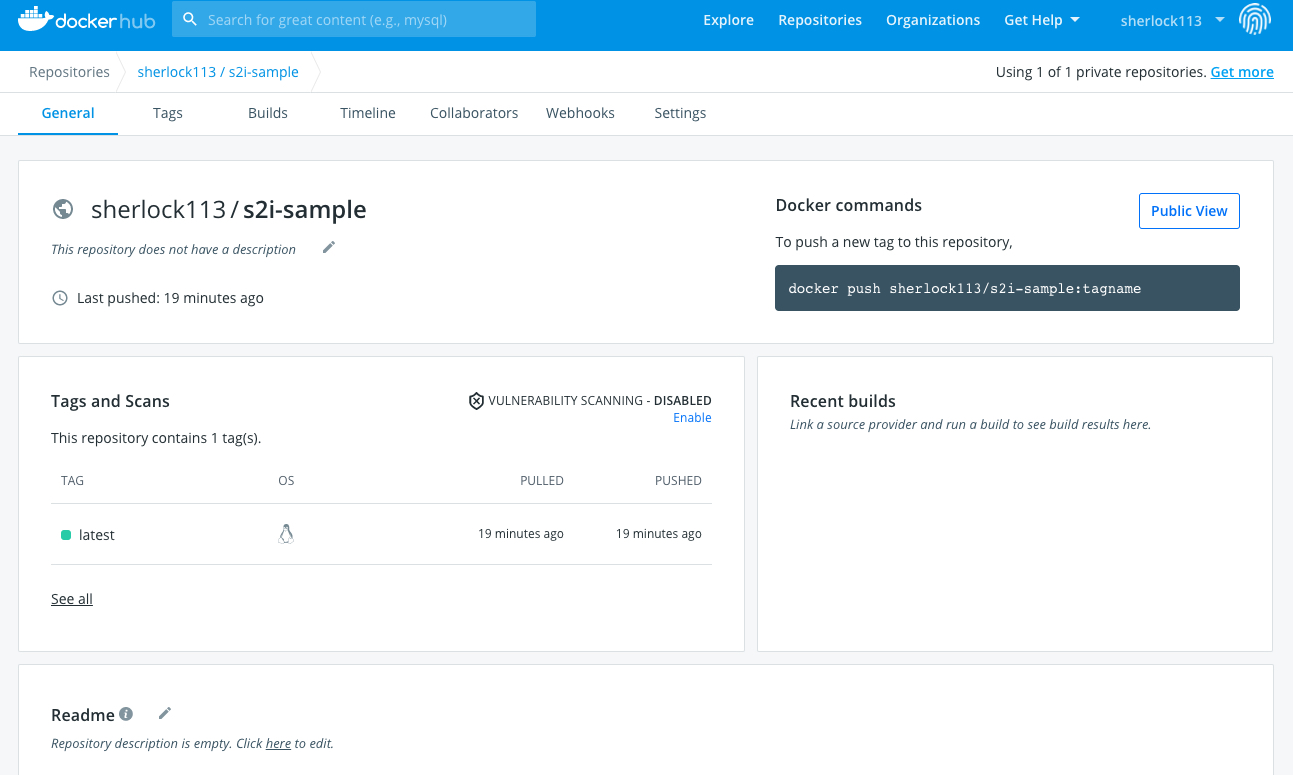
In your Docker Hub repository, you can see that KubeSphere has pushed the image to the repository with the expected tag.
Step 5: Access the S2I Service
-
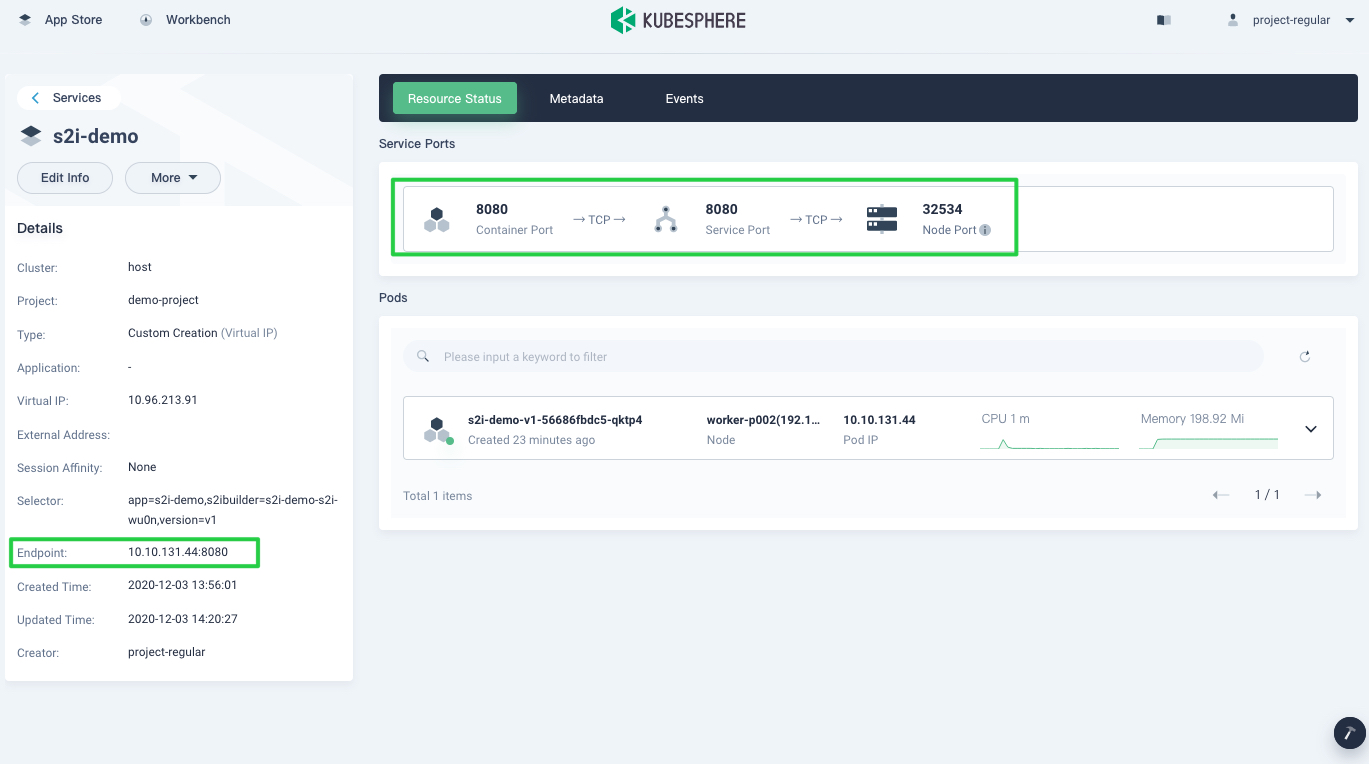
On the Services page, click the S2I Service to go to its detail page.
-
To access the Service, you can either use the endpoint with the
curlcommand or visitNode IP:Port Number. For example:$ curl 10.10.131.44:8080 Really appreciate your star, that is the power of our life.Note
If you want to access the Service outside the cluster, you may need to open the port in your security groups and configure port forwarding rules depending on your deployment environment.


 Previous
